Manage SIP Trunks (ExoTrunk)
Overview
SIP Trunk Management is the section of the Exotel dashboard where you create and manage the virtual SIP trunks that connect your SIP system — a Voice AI platform, CPaaS provider, PBX, SBC or contact-centre platform — to Exotel's cloud telephony platform.
To access Exotrunk Management, log in to your Exotel Dashboard based on your account cluster.
- Mumbai cluster: platform.in.exotel.com
- Singapore cluster: Currently Unavailable
Use your registered Exotel credentials to sign in.
A SIP trunk has four parts, and the dashboard walks you through them in the same order:
Part | What it controls | API fields |
|---|---|---|
Basic Info | The trunk name. A Trunk SID (trmum…) is generated when the trunk is created. | trunk_name |
Phone Numbers | The Exotel virtual numbers (DIDs) attached to the trunk, and whether each number routes as PSTN (direct SIP) or Flow (StreamKit / call flow first). | /phone-numbers resource |
SIP Outbound | How calls from your SIP system toward Exotel are authenticated: an ACL (whitelisted IPs), SIP digest credentials, or both. | termination, whitelisted_ips, credentials |
SIP Inbound | The destination URIs (IP or FQDN, port, transport) where Exotel delivers calls to your SIP system. | origination, destination_uris |
Everything you can do on this page can also be done with the SIP Trunking API; the dashboard and the API operate on the same trunk objects.
Note: SIP Trunk Management is a limited-access feature. If you don't see it in your dashboard, contact your Exotel account manager or write to [email protected].
Before you begin
Make sure you have the following:
- An active Exotel account with KYC completed.
- At least one Exotel phone number (virtual number / DID). You can buy or manage numbers from the dashboard — the SIP Trunking pages link to it directly (Open Numbers).
- Details of your SIP system:
- For SIP Outbound (your system → Exotel): the public static egress IP(s) of your SIP server, or a username and password you will configure on your SIP system for digest authentication (or both).
- For SIP Inbound (Exotel → your system): the public IP or FQDN of your SIP server, the port it listens on, and whether it accepts TCP or TLS.
- Firewall rules that allow Exotel signalling and media to reach your SIP server. See Network & Firewall Configuration.
If you're unsure whether to use an IP allowlist or credentials, use this rule of thumb (it is also shown on the Reference page inside the dashboard):
Your setup | Recommended SIP Outbound authentication |
|---|---|
Cloud-hosted SIP endpoint (Voice AI, CPaaS) with dynamic or unknown source IPs | Credentials (SIP digest) |
Customer-controlled PBX/SBC with stable, known egress IPs | ACL (whitelisted IPs) only |
Stable IPs and you want the strictest posture | ACL + credentials |
Open SIP Trunk Management
- Log in to the Exotel dashboard.
- Open SIP Trunking from the left navigation. The page URL ends in /exotrunk.
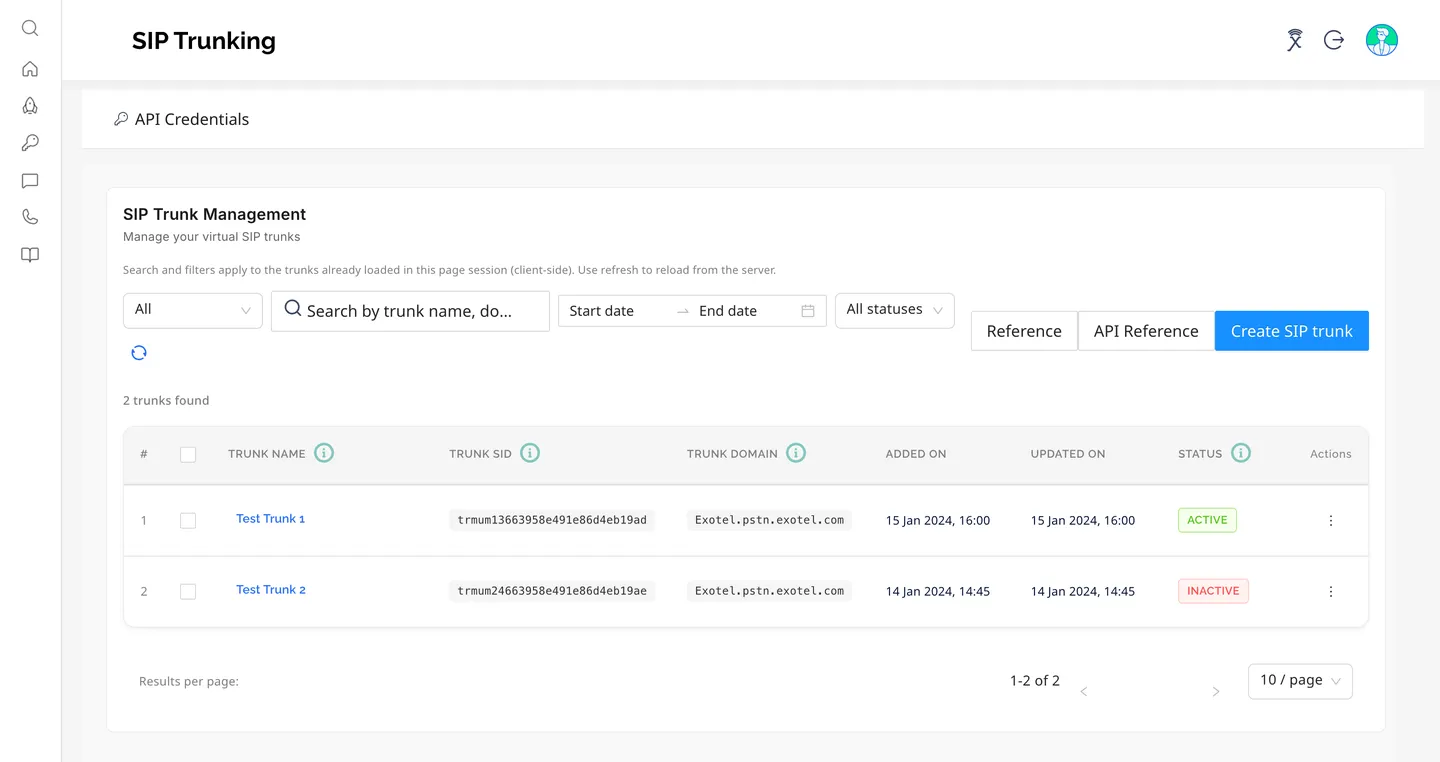
The SIP Trunk Management page lists every trunk in your account.
Column | Description |
|---|---|
Trunk Name | The name you gave the trunk. Click it to open the trunk's details. |
Trunk SID | The unique ID of the trunk (trmum…). You'll use it in API calls and in the Connect applet (sip:<TrunkSID>). |
Trunk Domain | The SIP domain for this trunk, in the form <account_sid>.pstn.exotel.com. Configure this as the SIP domain / outbound proxy on your SIP system. |
Added On / Updated On | When the trunk was created and last changed. |
Status | Active, Inactive or Pending. |
Actions (⋮) | View details or Delete. |
Above the table you can:
- Search by trunk name or domain (choose All, Trunk Name or Domain in the first drop-down), filter by Start date / End date, and filter by status (All statuses, Active, Inactive, Pending). Search and filters apply to the trunks already loaded in the page; click the refresh icon (⟳) to reload the list from the server.
- Open the Reference page (configuration guidance, firewall rules, Connect applet setup, troubleshooting) or the API Reference API Reference page (REST endpoints for every trunk operation). Both are described in In-app Reference and API Reference.
- Create SIP trunk — start the four-step wizard described next.
The API Credentials strip at the top of the page opens a panel with your Account SID, region, API subdomain and API keys. You need these only if you also plan to use the SIP Trunking API.
Create a SIP trunk
Click Create SIP trunk. The Create New SIP Trunk wizard has four steps, shown in the left-hand panel: Basic Info → Phone Numbers → SIP Outbound → SIP Inbound. Each step has Save and Next; you can go Back at any time, and Cancel discards the trunk.
Step 1 — Basic Info
- In Trunk Name, enter a unique name for the trunk. Use letters, numbers, hyphens and underscores only (maximum 100 characters). The name must be unique within your account — the API returns 409 Conflict if it already exists.
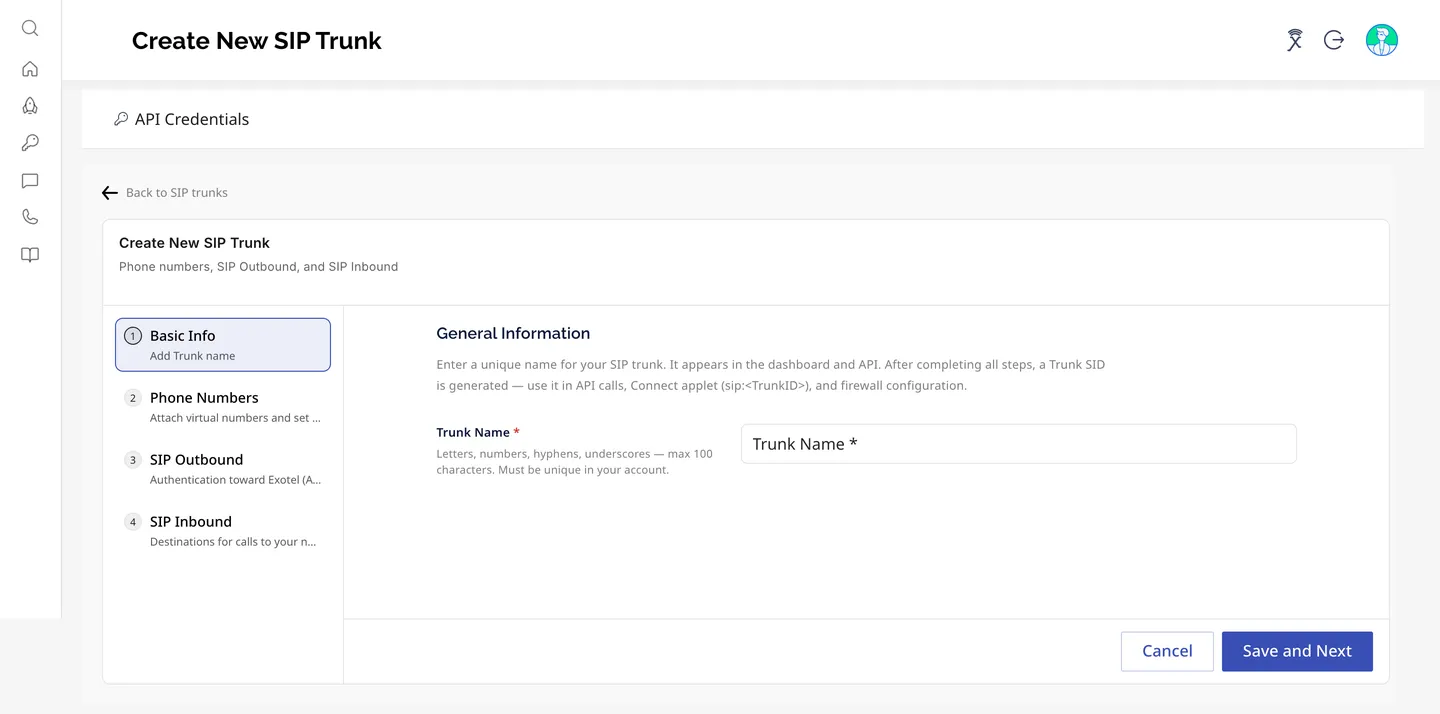
- Click Save and Next.
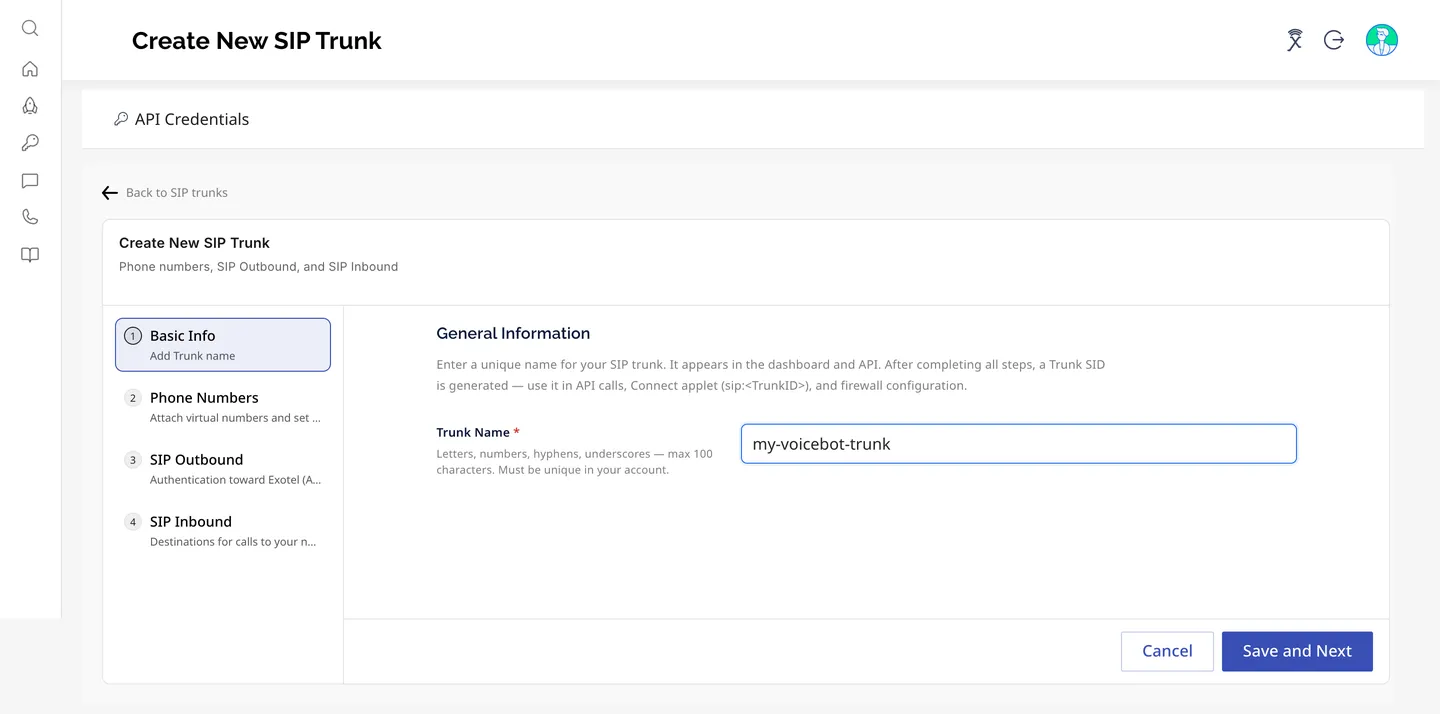
The Trunk SID is generated when you finish the wizard, not at this step.
Step 2 — Phone Numbers
Attach at least one phone number (virtual number) to the trunk. Inbound callers dial these numbers to reach your SIP system.
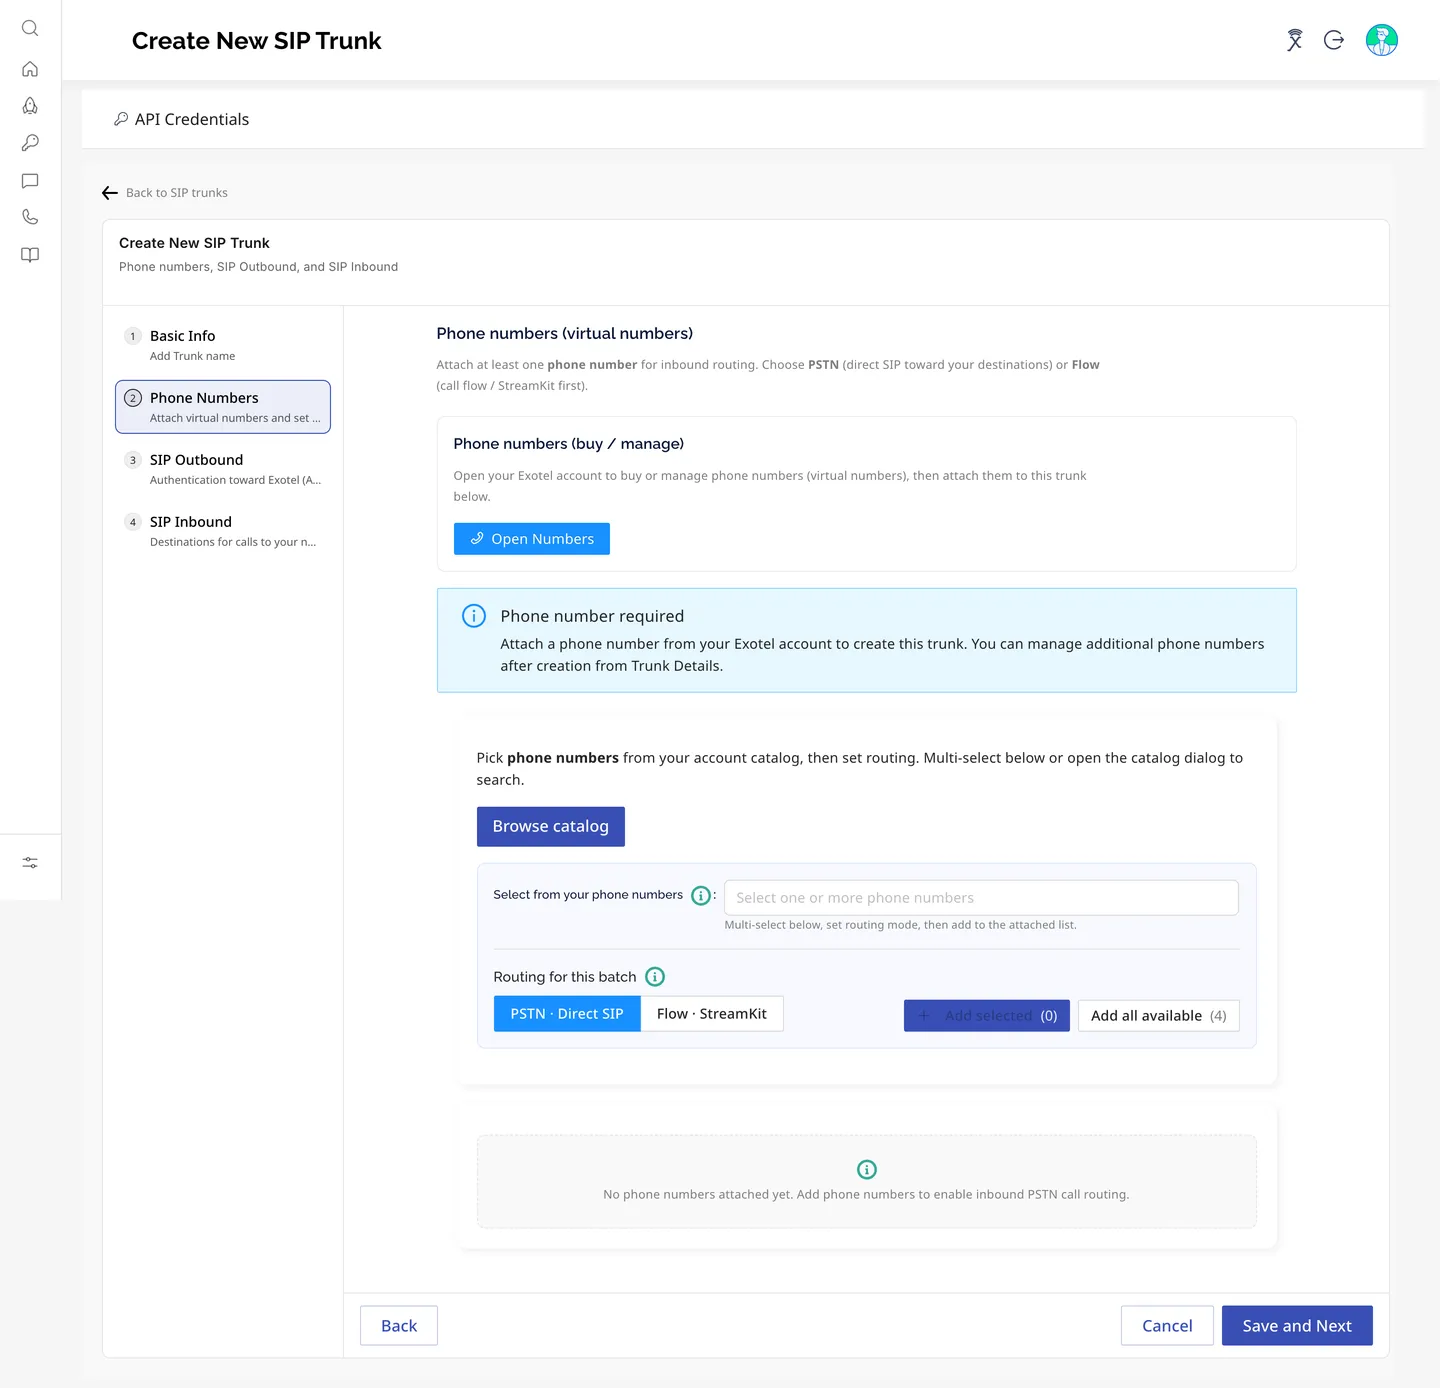
- If you don't have a number yet, click Open Numbers to buy or manage numbers in your Exotel account, then come back to this step.
- Pick numbers in one of two ways:
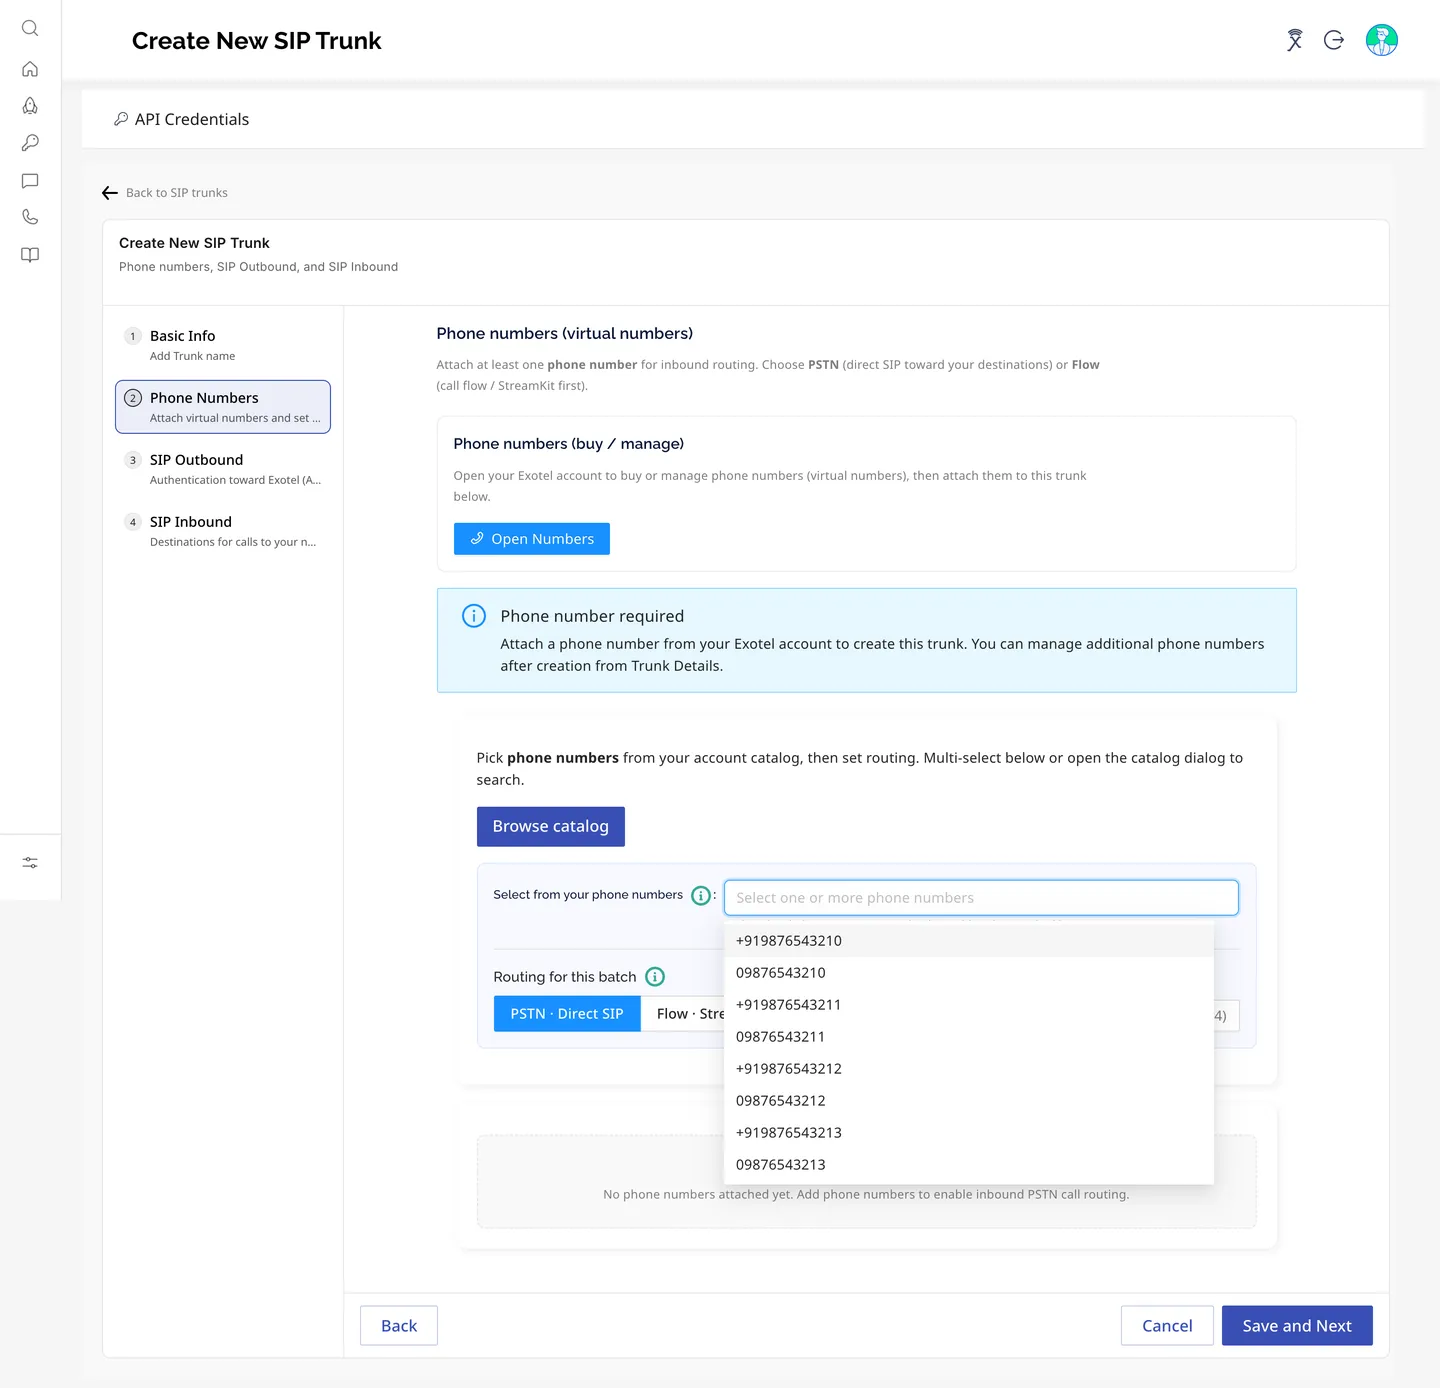
- Select from your phone numbers — open the multi-select drop-down and tick one or more numbers. The list shows the numbers available in your account.
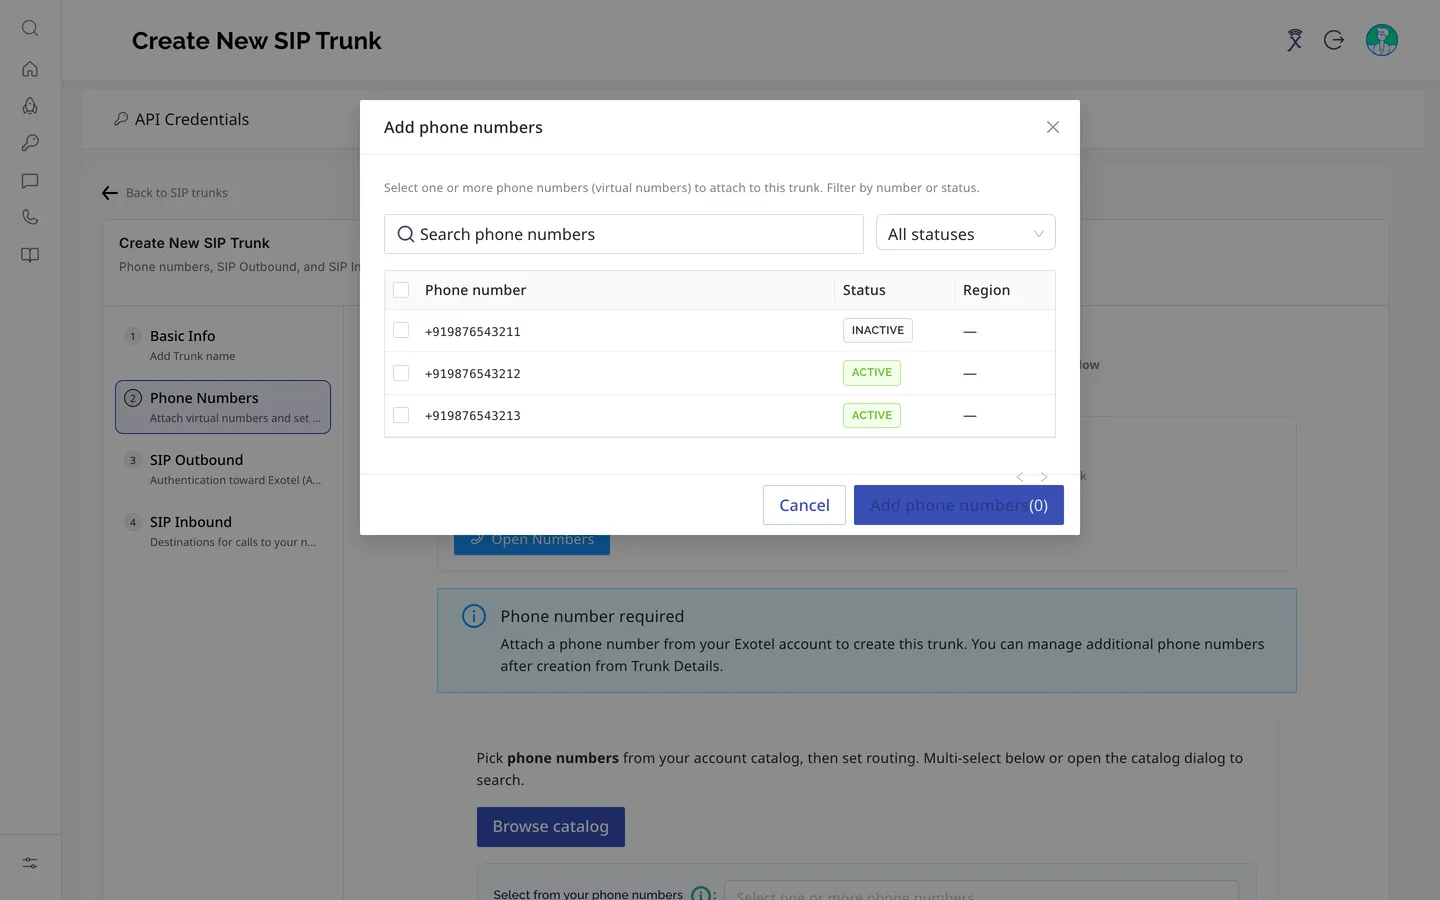
- Browse catalog — opens the Add phone numbers dialog, where you can search numbers, filter by status and select with checkboxes. Click Add phone numbers to add the selection.
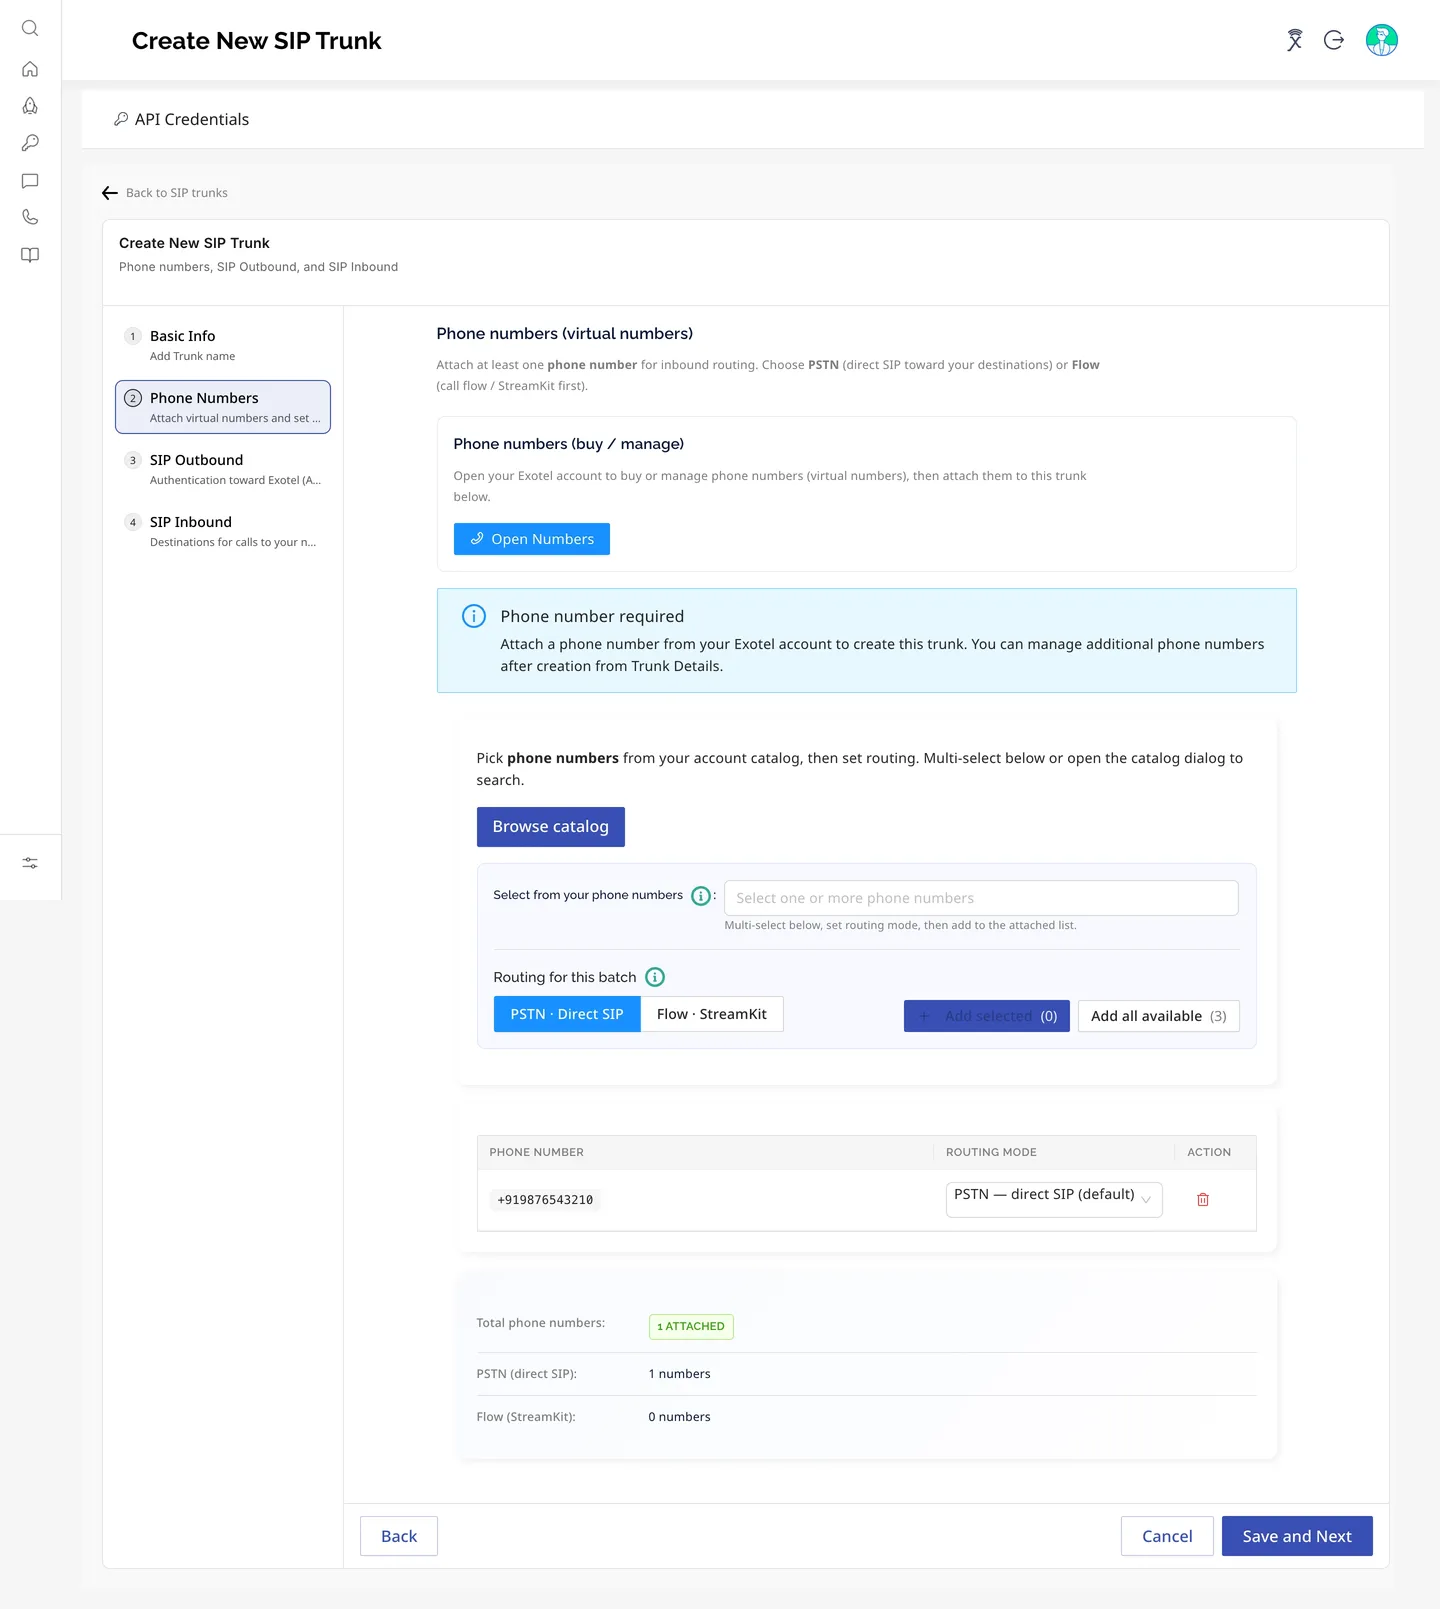
- Under Routing for this batch, choose how the selected numbers route inbound calls:
- PSTN · Direct SIP (default) — Exotel sends the call straight to the destination URIs you configure in Step 4.
- Flow · StreamKit — Exotel runs your call flow (App Bazaar Flow / StreamKit) first, and the flow decides where the call goes.
- Click Add selected (or Add all available to attach every number at once).
The attached numbers appear in a table with their Routing Mode, which you can change per number from the drop-down in the row, and a delete icon to detach a number. The summary below the table shows the total attached and the PSTN/Flow split.
- Click Save and Next.
Tip: You can attach more numbers, or change a number's routing mode, at any time after creation from Trunk Details → Phone Numbers.
Step 3 — SIP Outbound
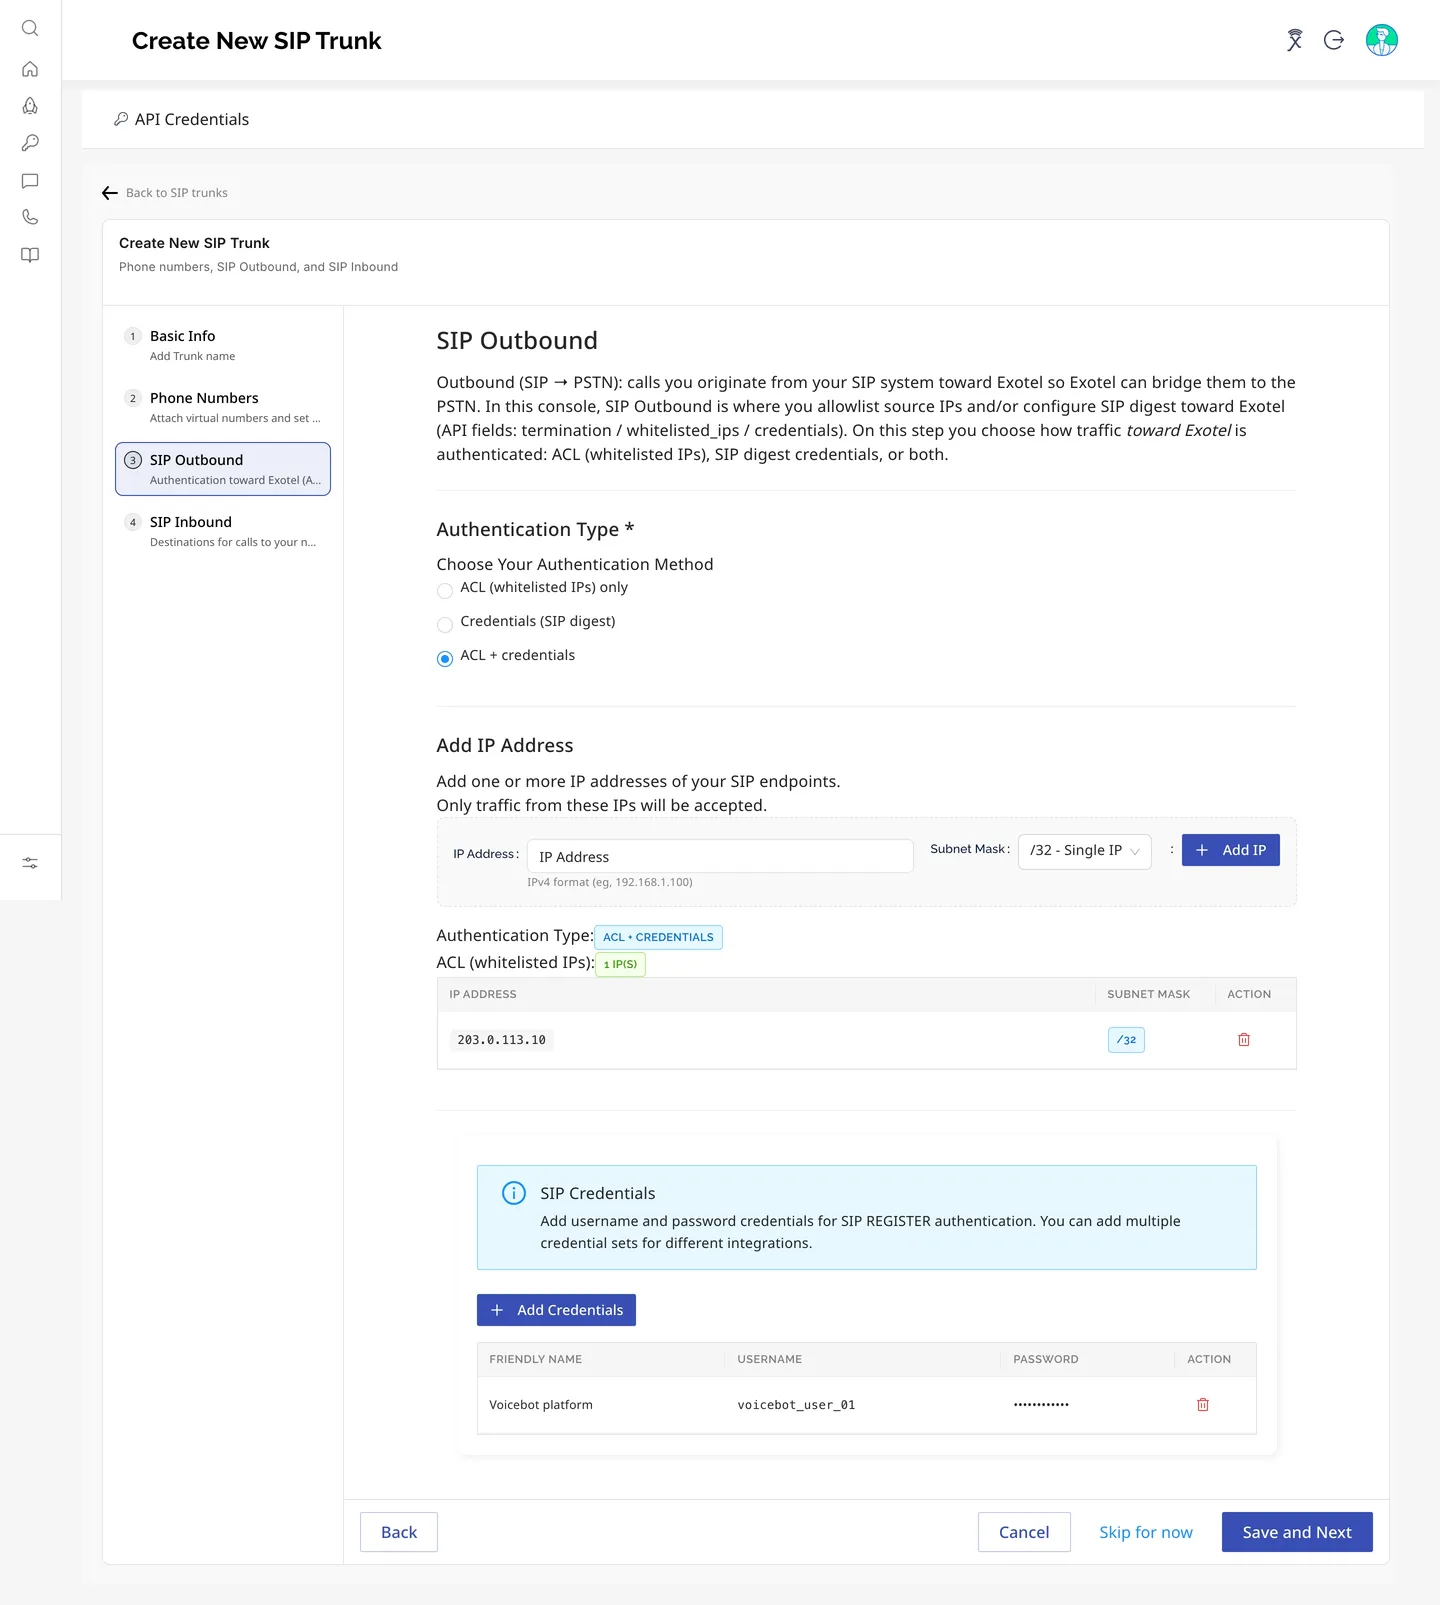
This step controls calls from your SIP system toward Exotel (your SIP system → Exotel → PSTN). Choose how Exotel authenticates that traffic.
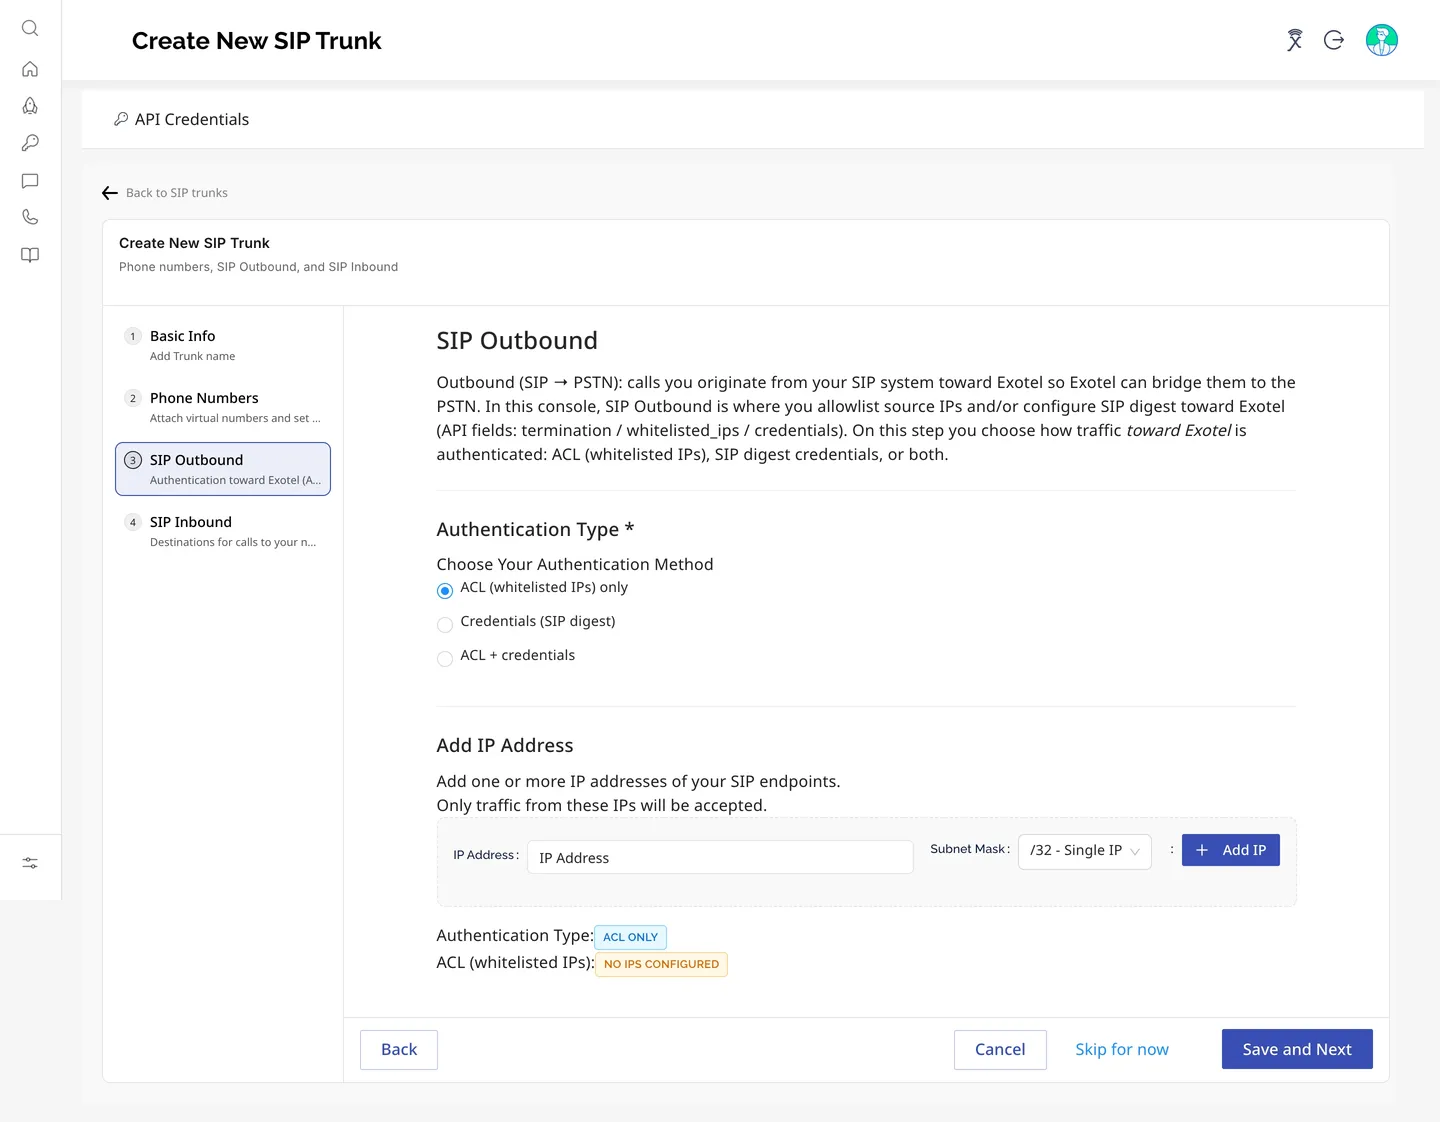
- Under Authentication Type, choose one of:
- ACL (whitelisted IPs) only — only SIP from the IPs you list is accepted.
- Credentials (SIP digest) — your SIP system authenticates with a username and password.
- ACL + credentials — both checks apply.
- If you chose an ACL option, add your IPs under Add IP Address:
- IP Address — an IPv4 address of your SIP endpoint.
- Subnet Mask — /32 - Single IP (default), /30 - 4 IPs, /28 - 16 IPs, /24 - 256 IPs or /16 - 65,536 IPs.
- Click Add IP. Repeat for every IP or range your SIP system egresses from. Each entry appears in the table below with a delete icon.
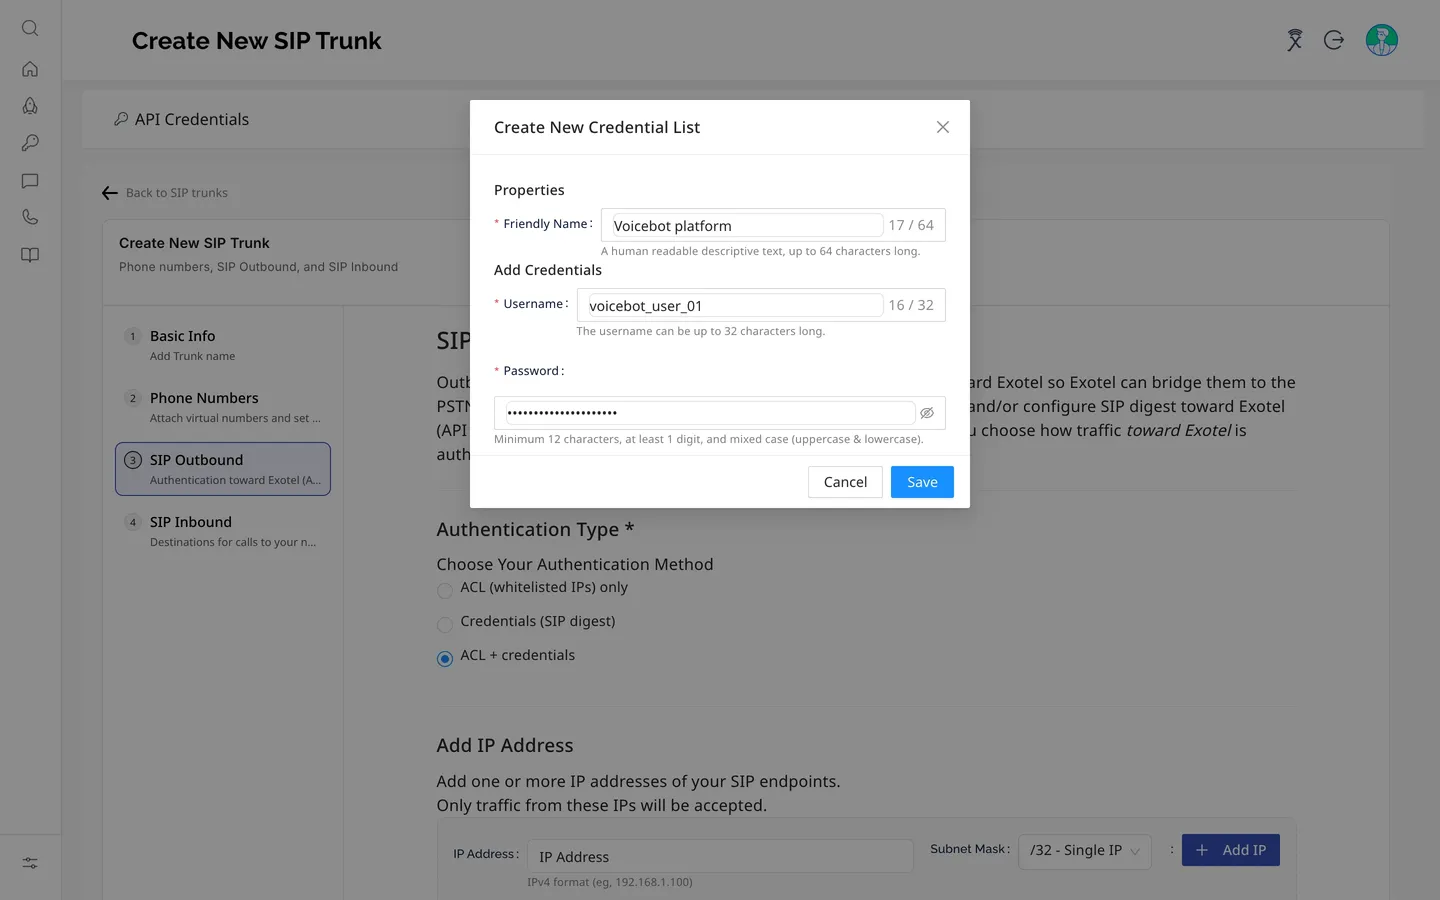
- If you chose a credentials option, click Add Credentials. In the Create New Credential List dialog, enter:
- Friendly Name — a label for this credential set, up to 64 characters (for example the name of the platform that will use it).
- Username — up to 32 characters.
- Password — minimum 12 characters, at least 1 digit, and mixed upper- and lower-case.
- Click Save. You can add several credential sets for different integrations.
- Configure the same username and password on your SIP system (Voice AI platform, PBX or SBC). Exotel never shows the password again — it is masked in the table.
- Click Save and Next. If you want to configure outbound authentication later, click Skip for now; the trunk will not accept outbound SIP until you do.
Step 4 — SIP Inbound
This step controls calls from the PSTN to your SIP system (PSTN → Exotel → DID → Flow or direct → your trunk → destination URI). Add one or more SIP endpoints where Exotel should deliver these calls.
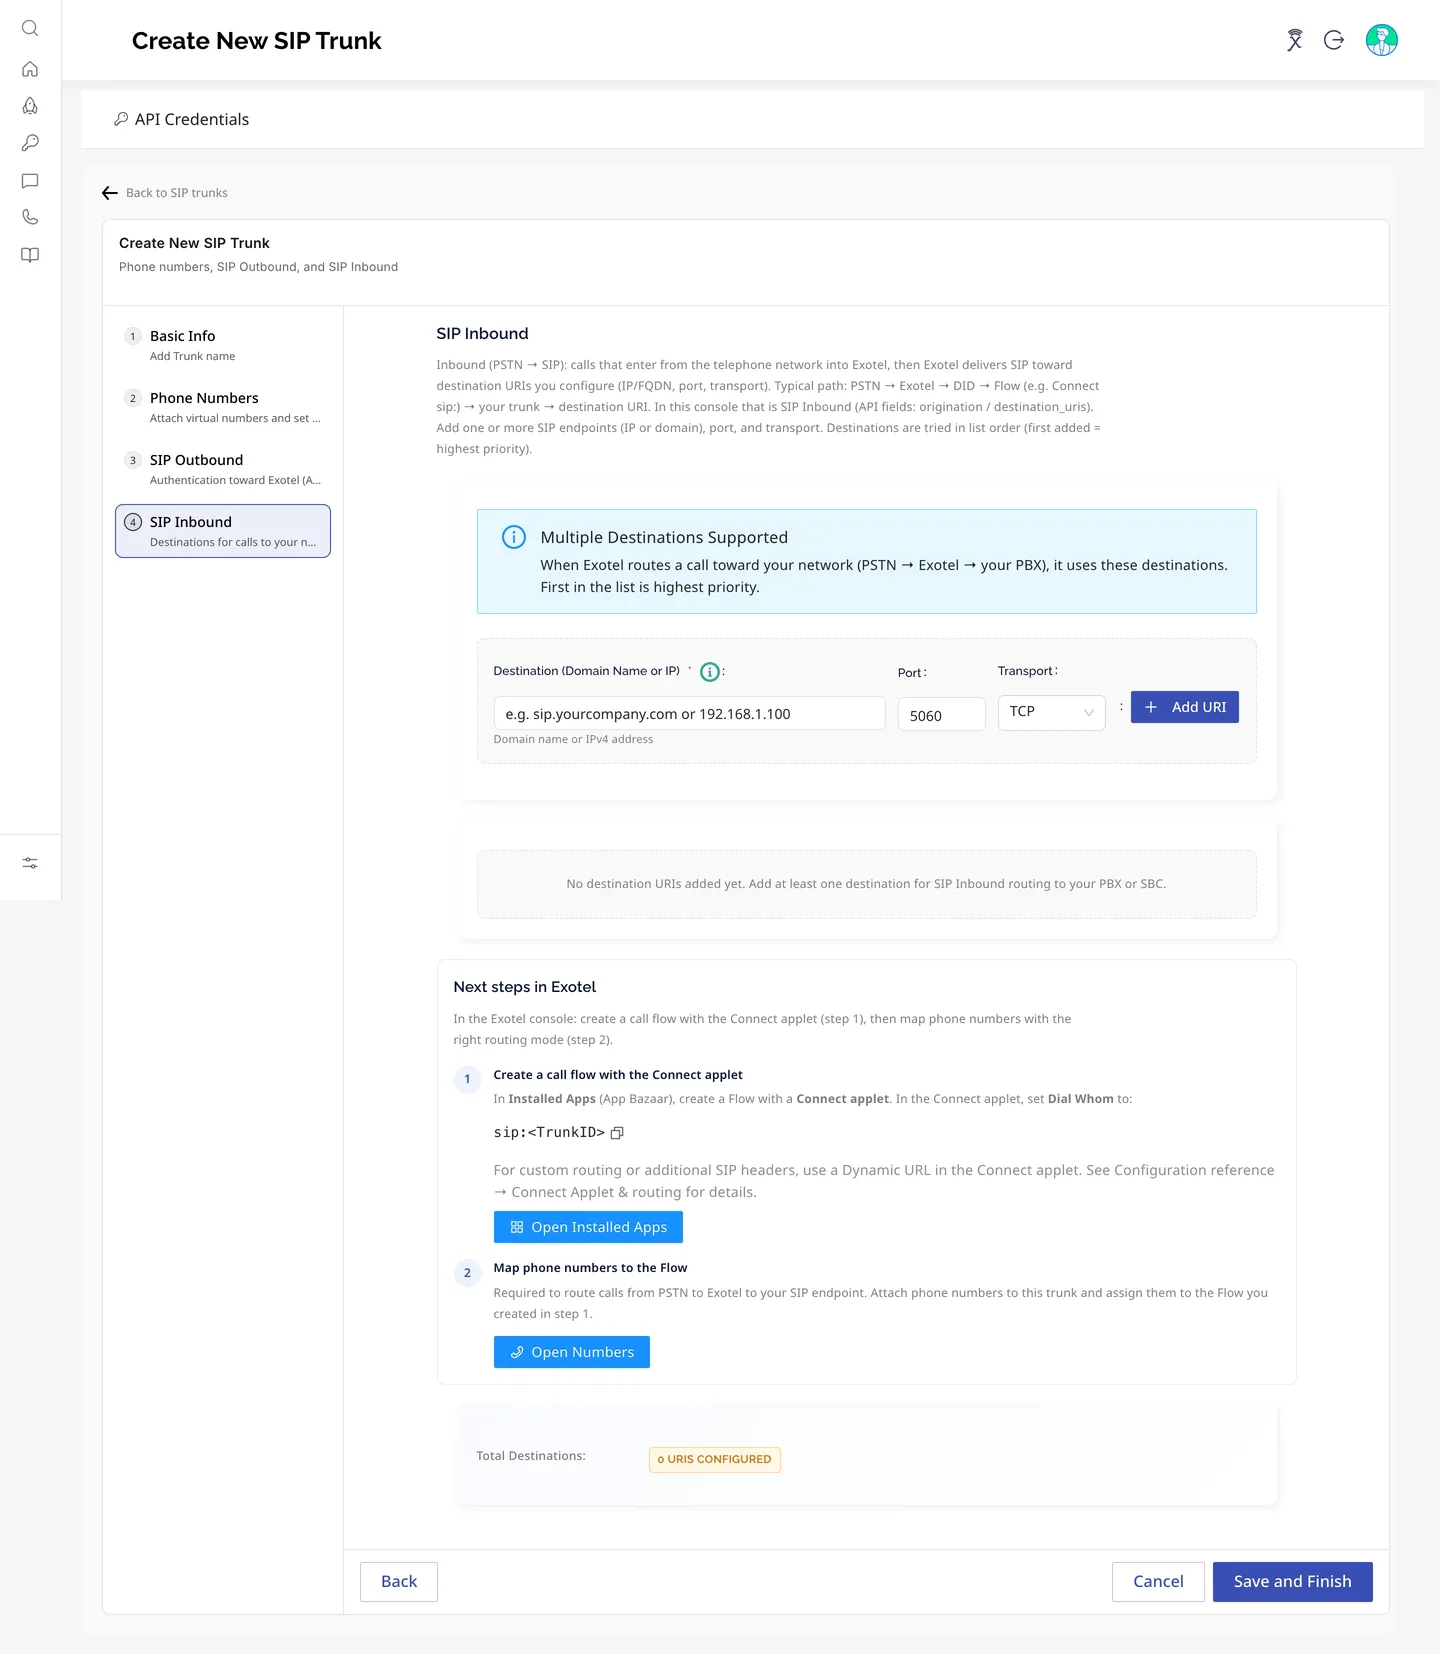
- Under Multiple Destinations Supported, fill in:
- Destination (Domain Name or IP) — the public IPv4 address or FQDN of your SIP server (for example sip.example.com). If you use an IP address, it must also be in the SIP Outbound allowlist (Step 3). FQDN destinations need no allowlist.
- Port — the port your SIP server listens on (defaults to 5060; TLS commonly uses 5061).
- Transport — TCP or TLS.
- Click Add URI. The table shows the destination, whether it is an FQDN or IP, the port, transport and the full SIP URI (for example sip:sip.example.com:5061;transport=tls).
- Add further destinations if you want fail-over. Destinations are tried in list order — the first row is the highest priority.
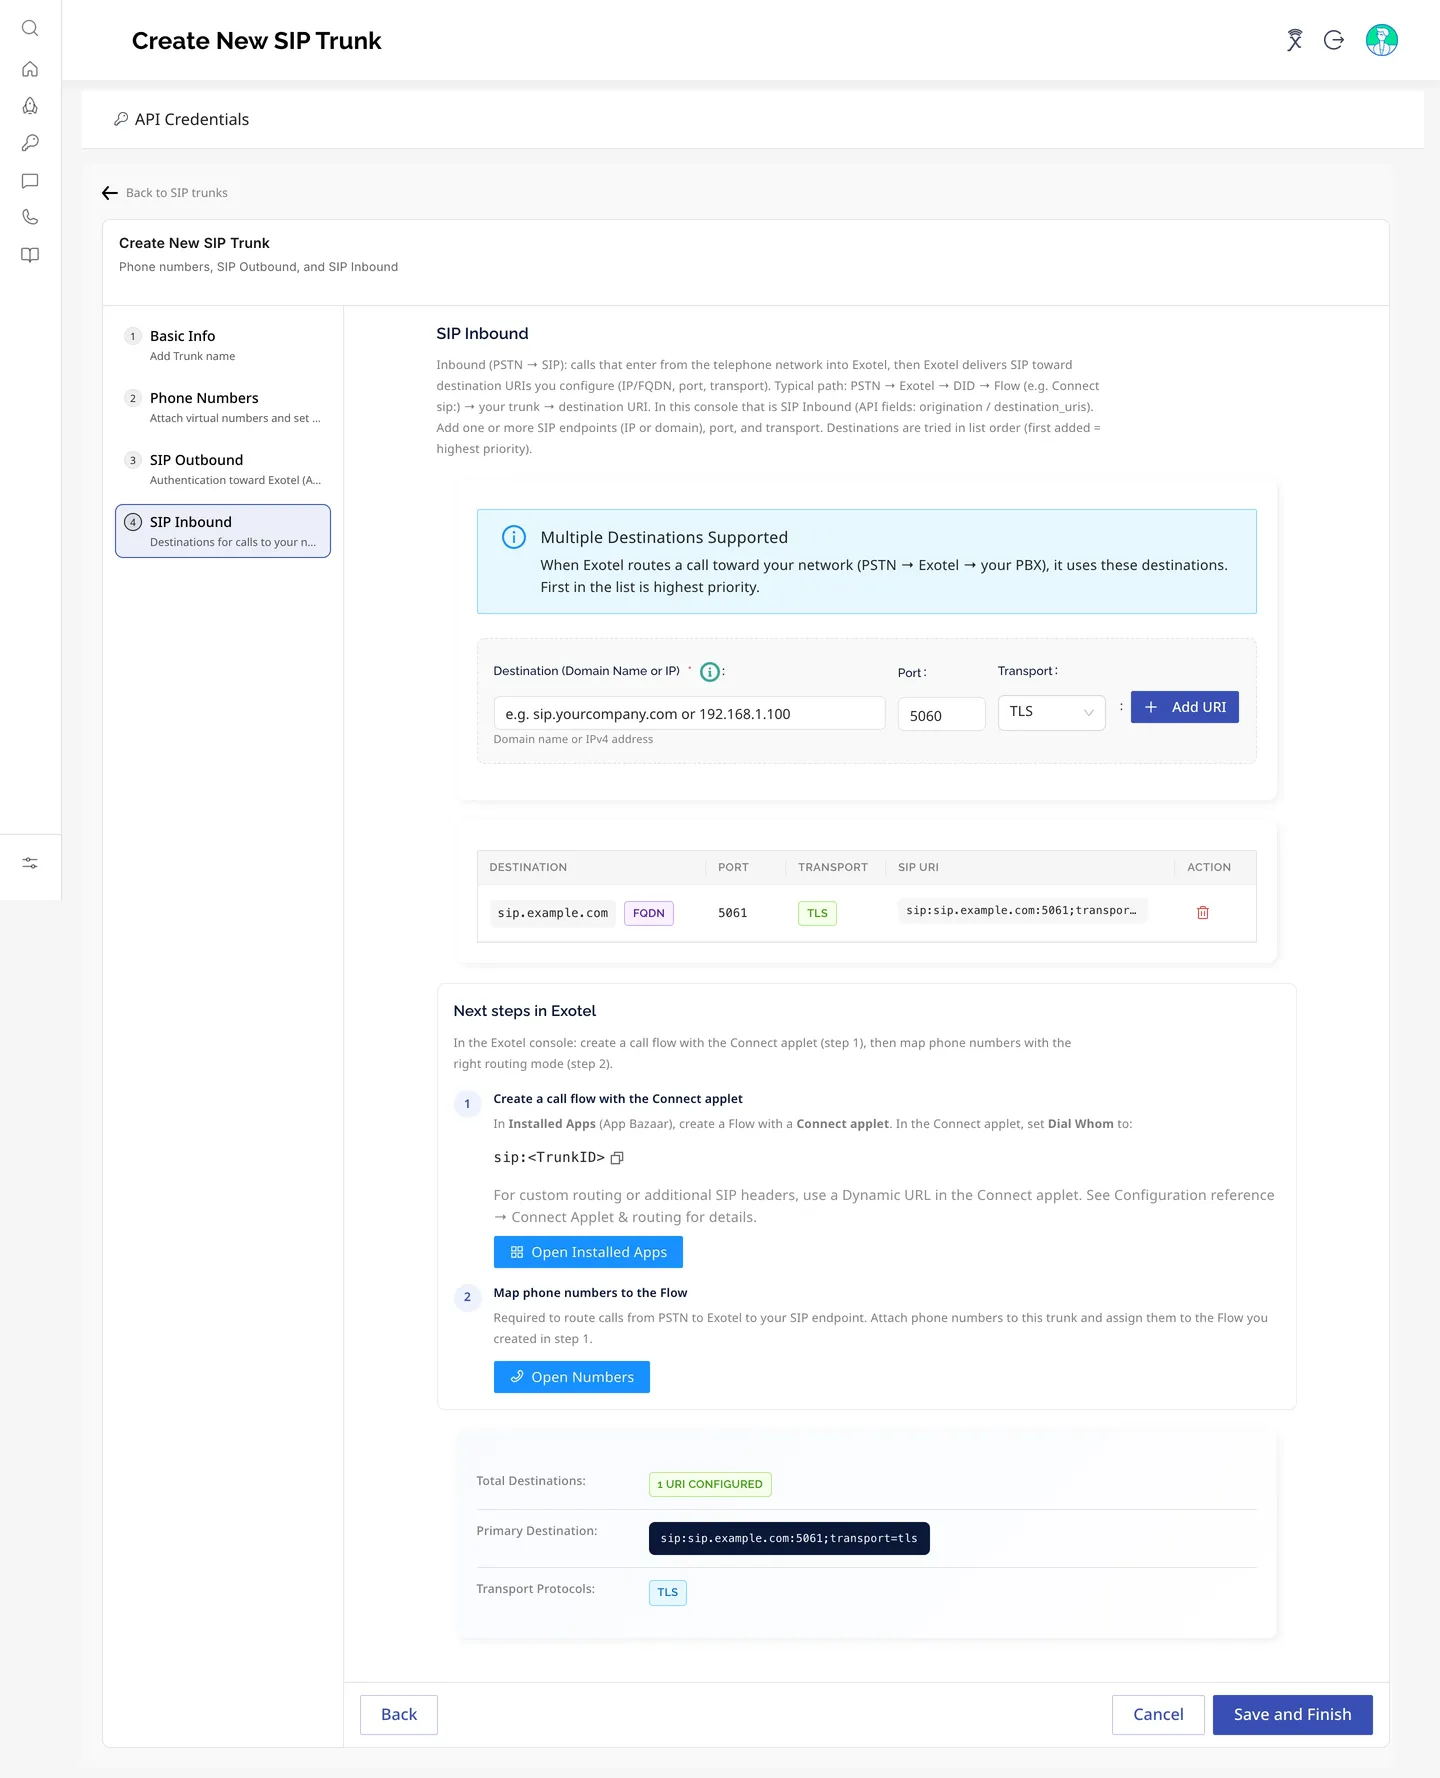
- Review the Next steps in Exotel card (creating a Flow with the Connect applet and mapping numbers to it — see Next steps).
- Click Save and Finish.
- Follow Connect Applet Guide to complete inbound call flowConnect Applet Guide to complete inbound call flow
Exotel creates the trunk (you'll see a Creating ""… message) and returns you to the SIP Trunk Management list, where the new trunk appears with its Trunk SID. Click the refresh icon if it isn't visible immediately.