View and manage a trunk
View and manage a trunk
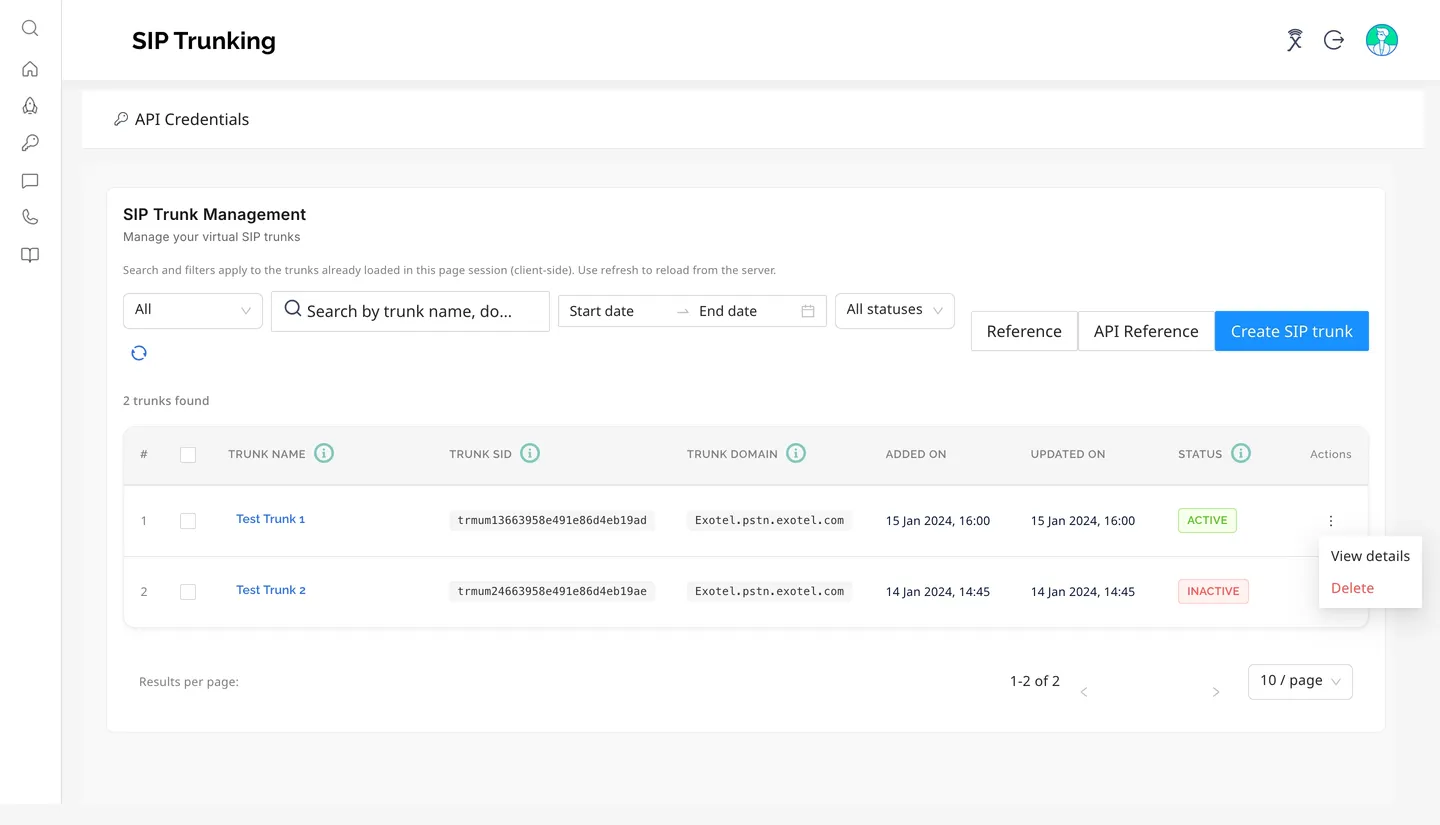
From the list, click a Trunk Name (or ⋮ → View details) to open Trunk Details. The header shows the Trunk SID (with a copy button) and the trunk Status. Show technical details expands the technical summary: authentication type, SIP domain, rate limit (20 calls per minute per trunk), supported codecs (PCMA, PCMU) and DTMF method (RFC 2833).
Five tabs let you manage every part of the trunk after creation.
Overview tab
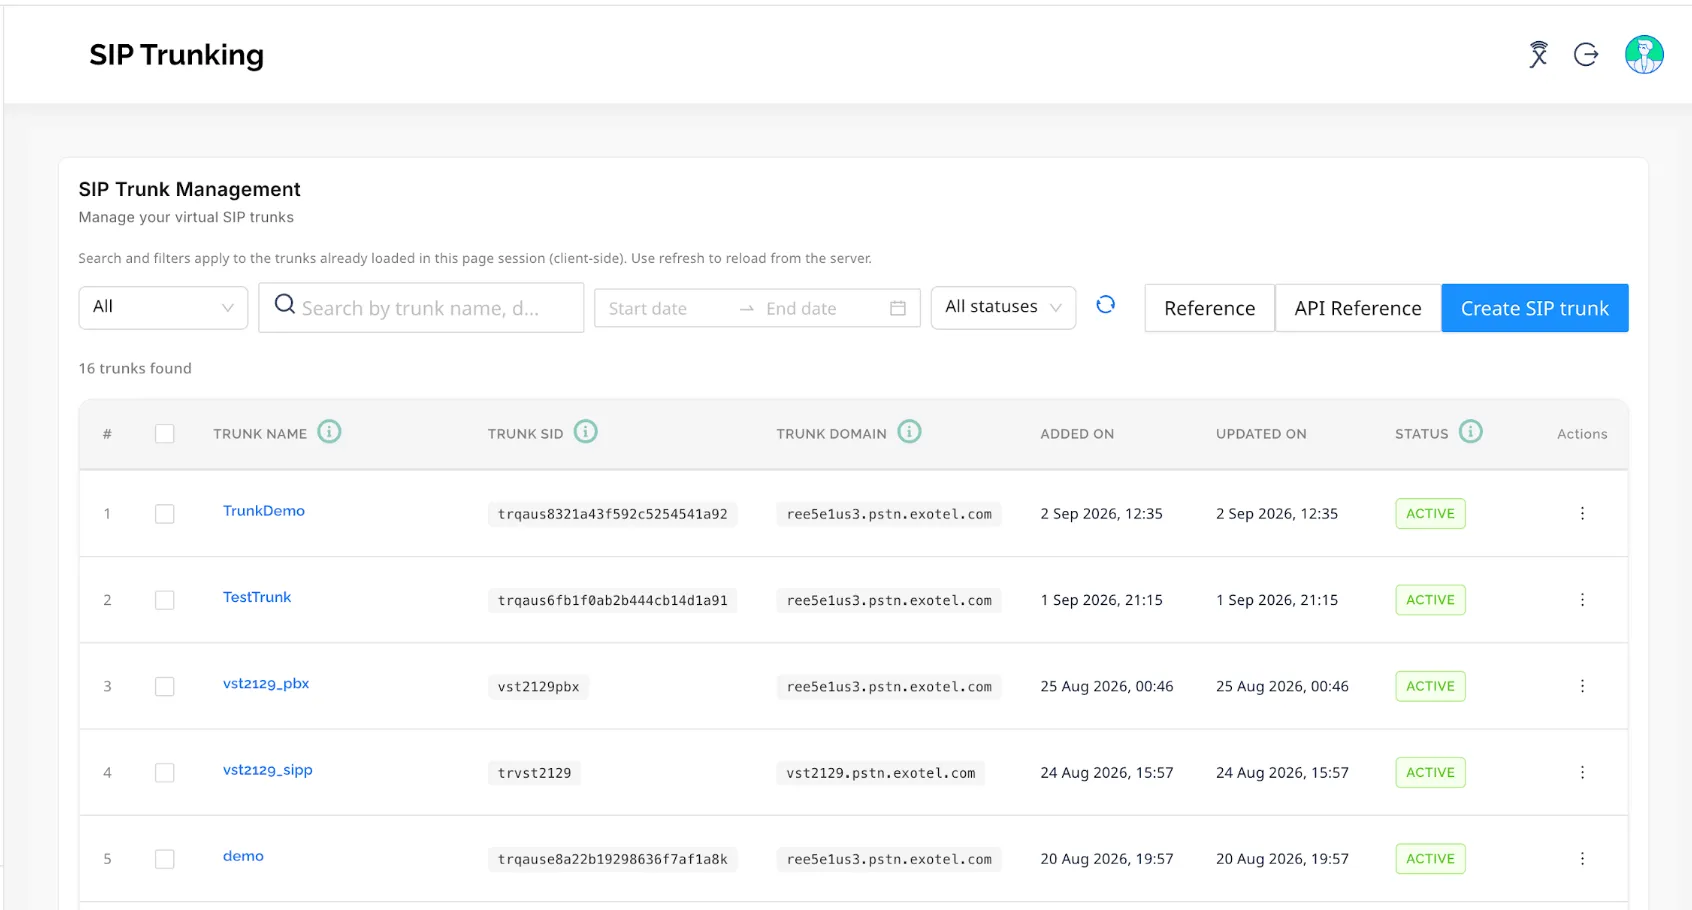
A read-only status check of the whole trunk: Trunk information (SID, name, domain, status, NSO code, created date), Setup progress (whether SIP Outbound, SIP Inbound and phone numbers are configured), and summaries of the attached numbers, allowlisted IPs and destinations.
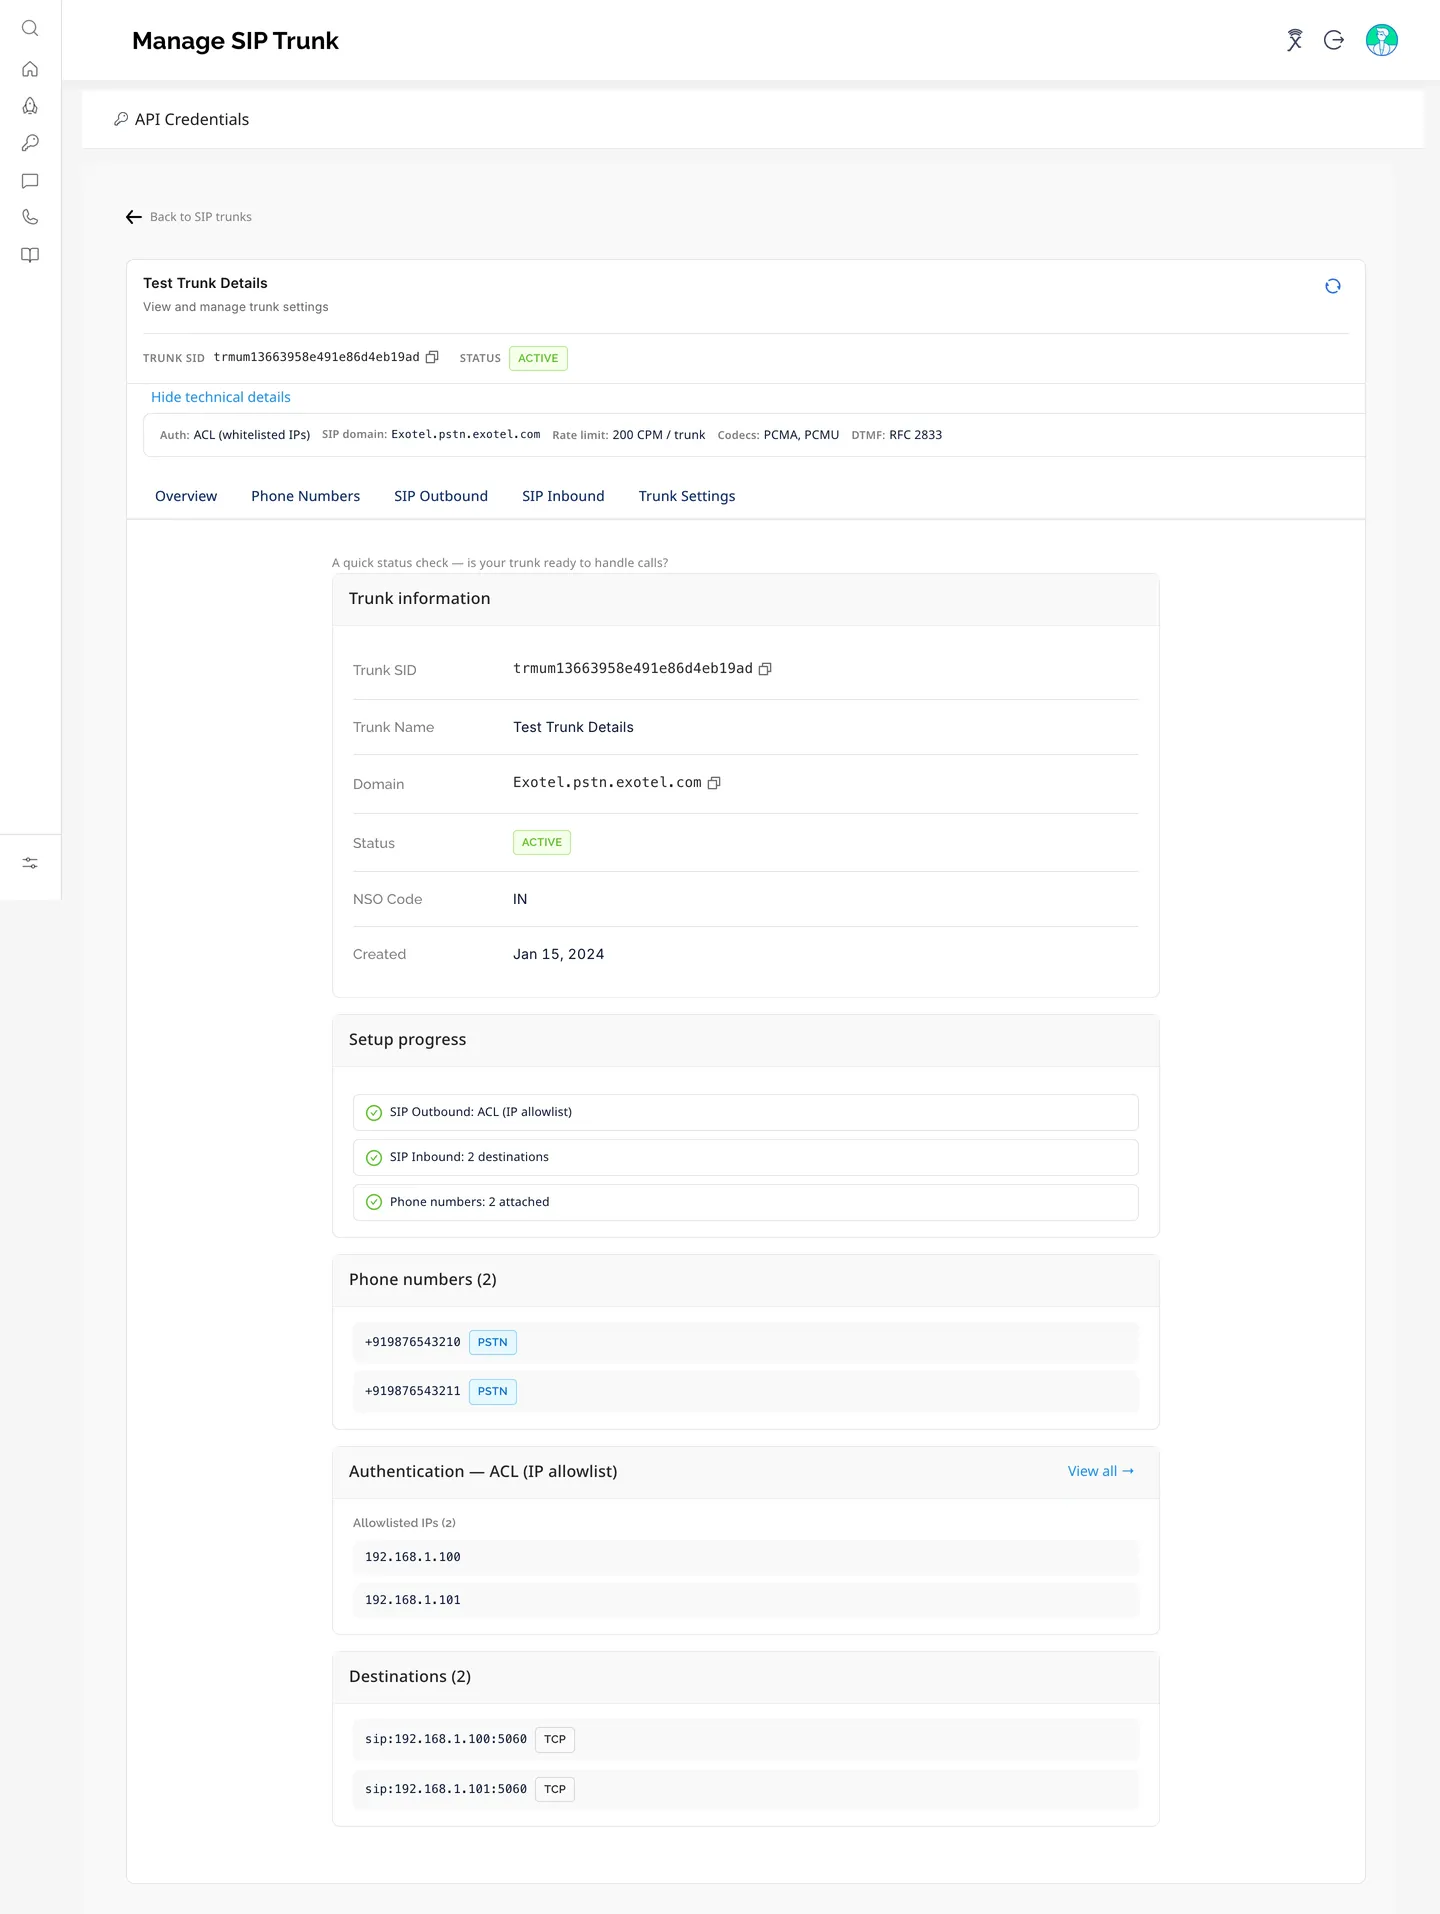
Phone Numbers tab
Lists the numbers attached to the trunk with their routing mode and attach date.
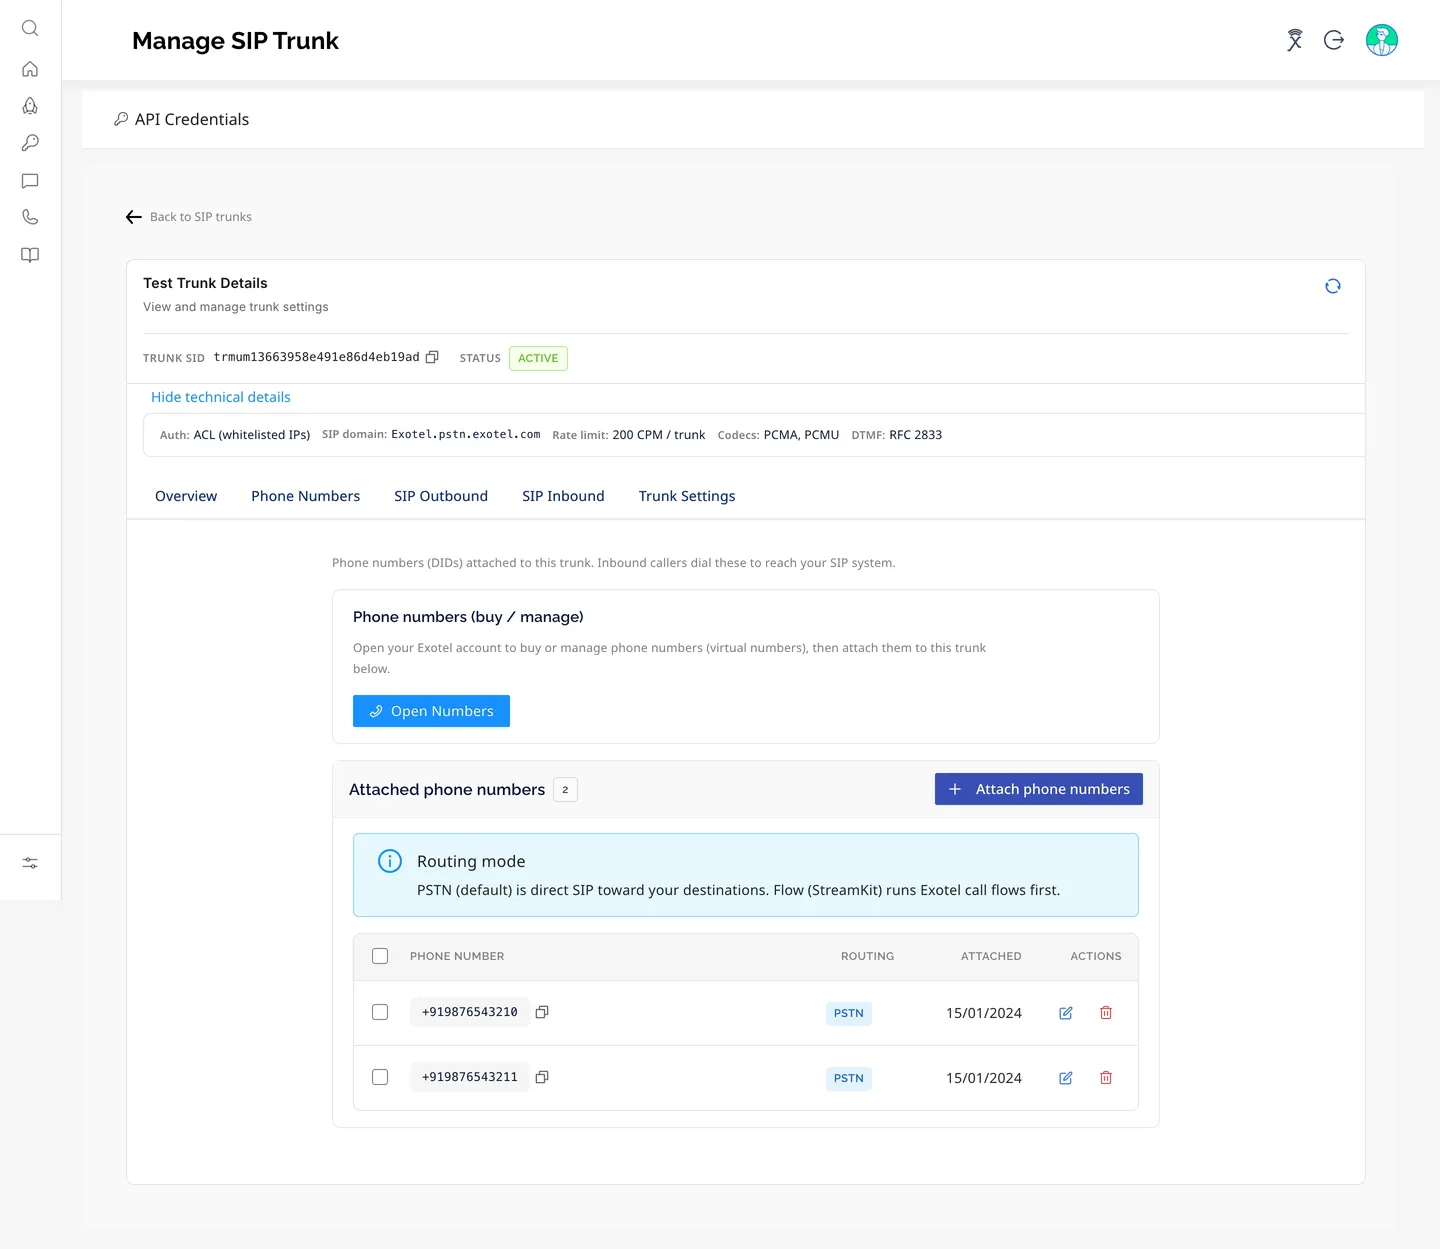
- Attach phone numbers opens a dialog where you select one or more numbers and the Routing (PSTN · Direct SIP or Flow · StreamKit) that applies to all of them. Click Attach selected.
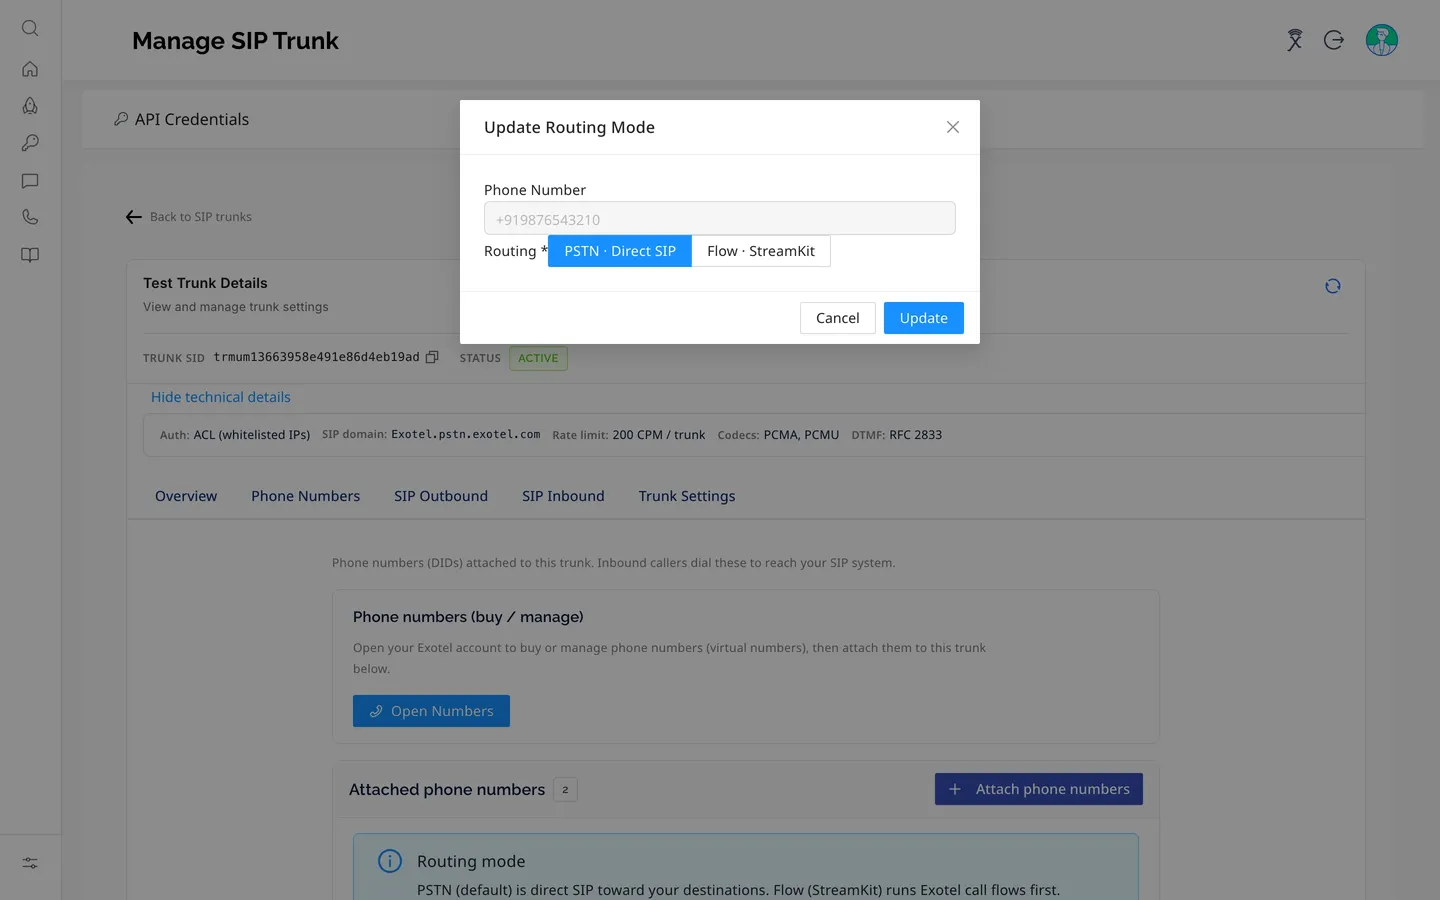
- The edit (pencil) icon on a row opens Update Routing Mode, where you switch that number between PSTN · Direct SIP and Flow · StreamKit and click Update.
- The delete (bin) icon detaches the number from the trunk.
Which routing mode do I need? Use PSTN when Exotel should send inbound calls directly to your destination URIs. Use Flow when the number is mapped to an App Bazaar Flow (for example a Connect applet or a voicebot applet) that decides the routing. See Call Directions.
SIP Outbound tab
Shows the current authentication method and lets you manage the IP allowlist (ACL) and SIP digest credentials.
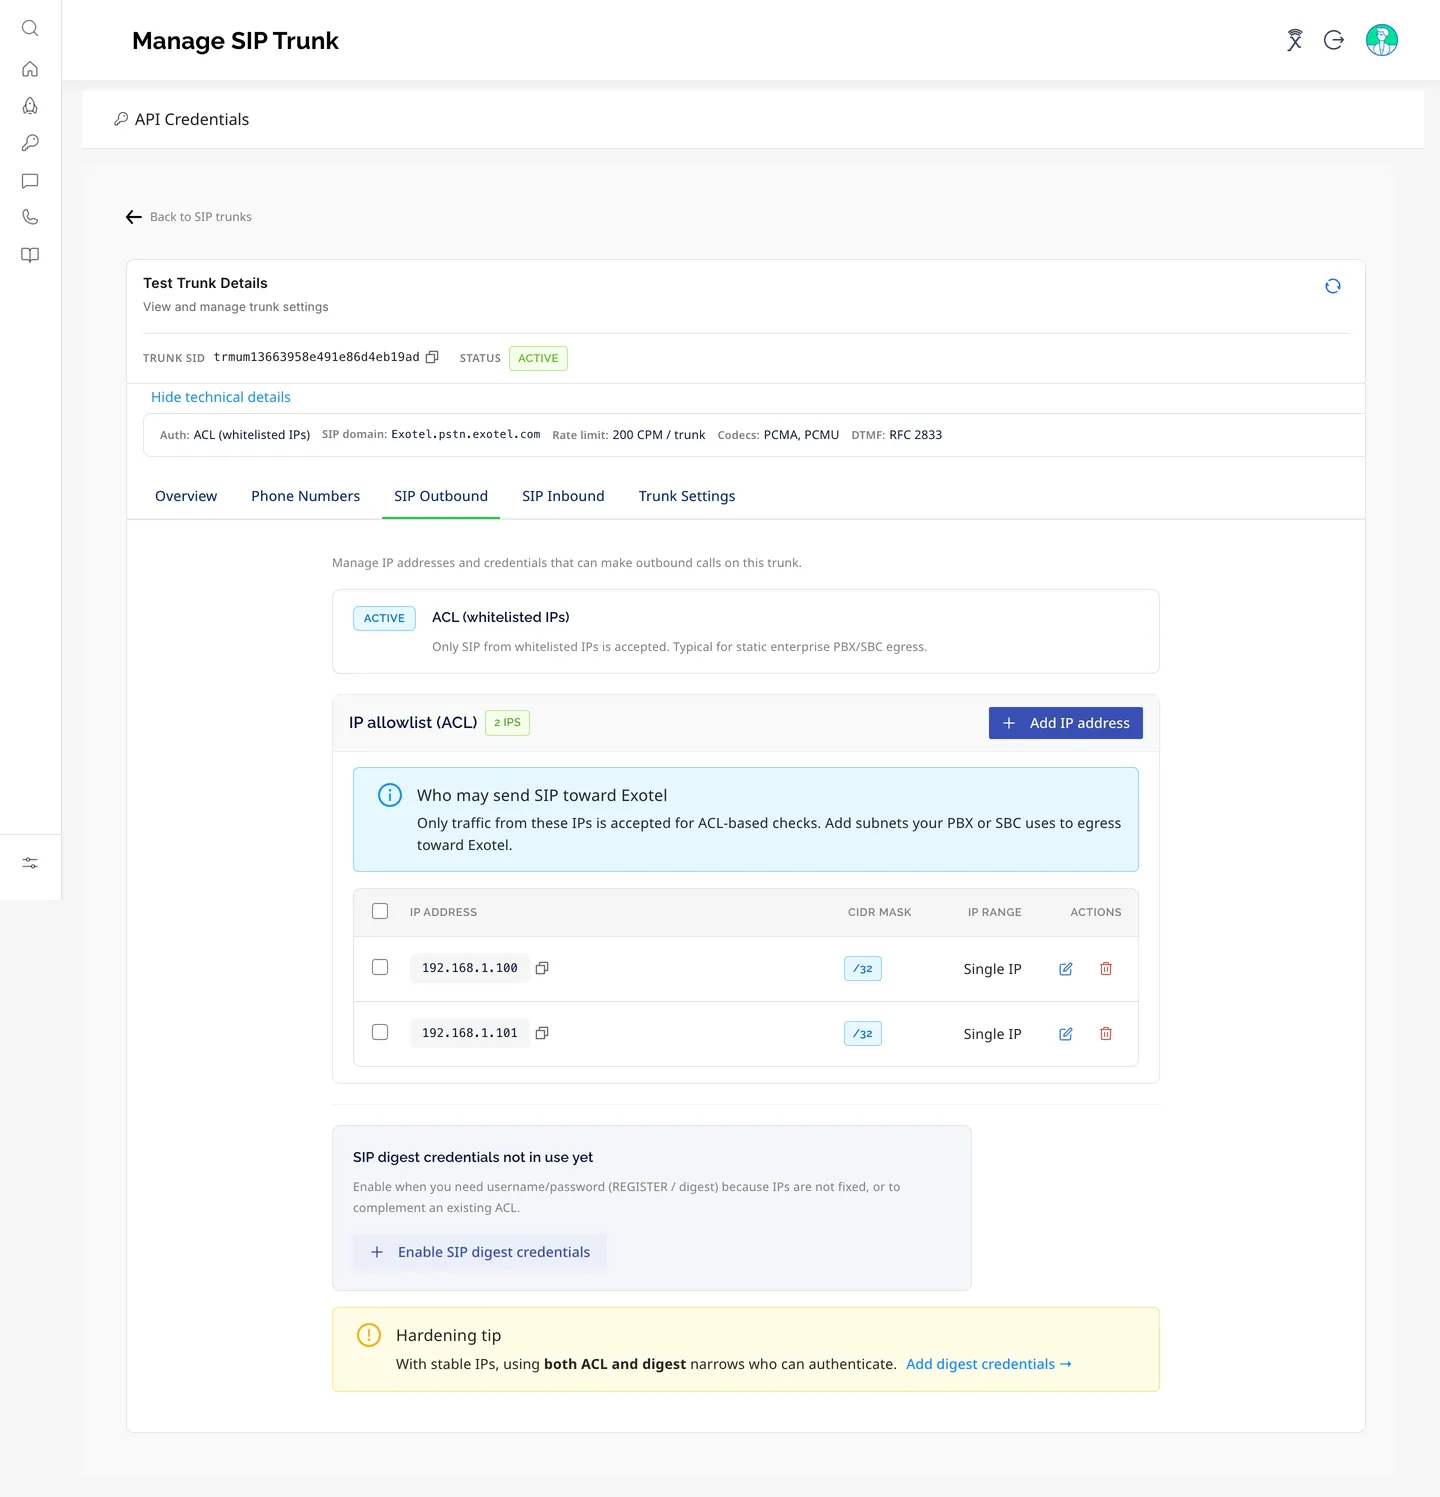
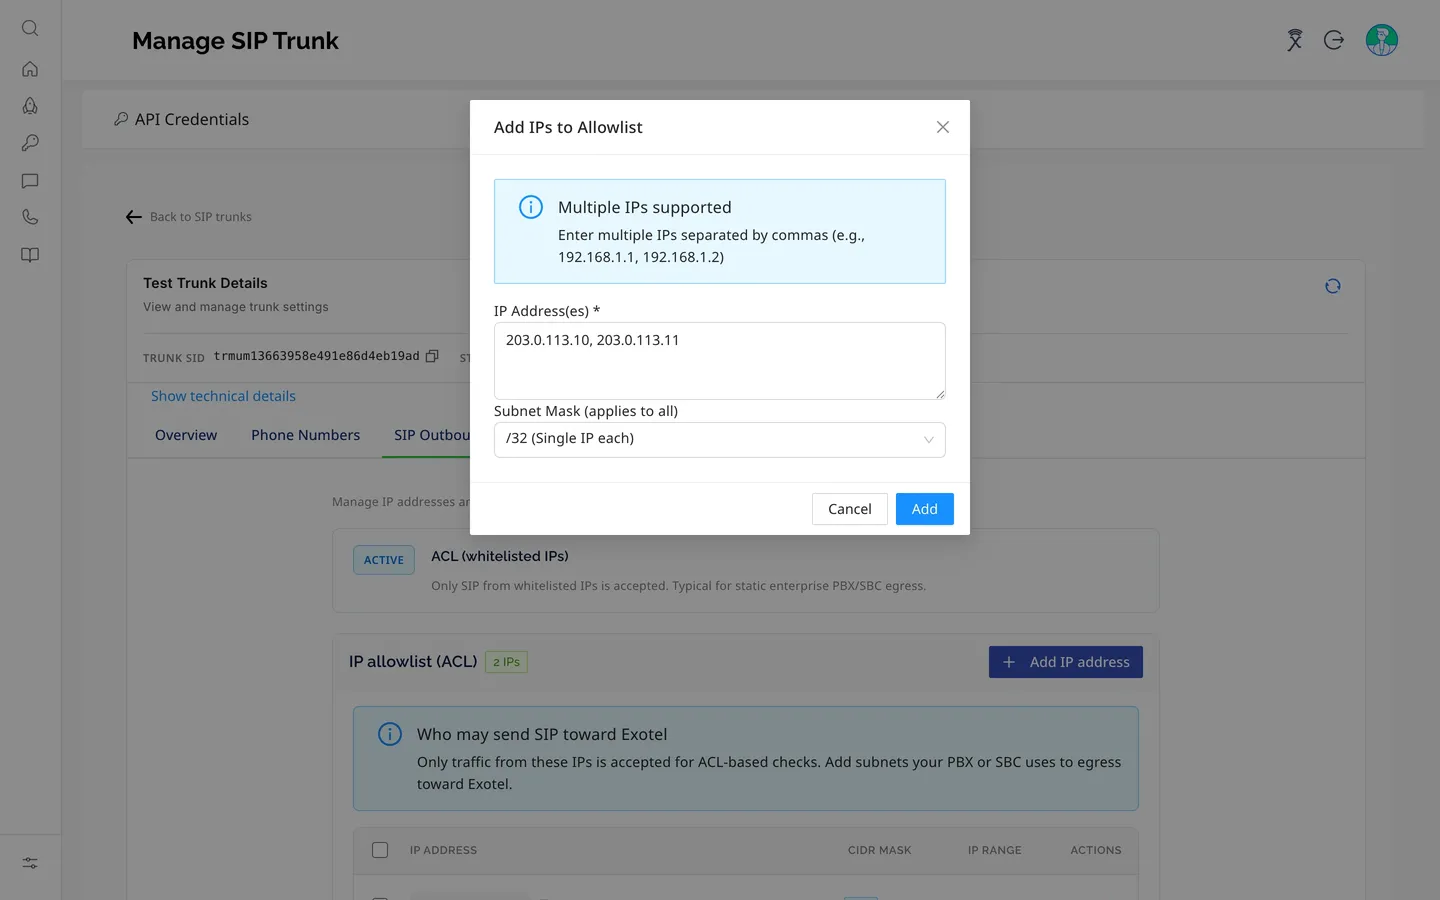
- Add IP address opens Add IPs to Allowlist. Enter one or more IPv4 addresses separated by commas, choose the Subnet Mask (applies to all) and click Add.
- Each IP row can be edited or deleted with the icons in the Actions column.
- Enable SIP digest credentials (or Add digest credentials →) opens the same Create New Credential List dialog used in the wizard. Once credentials exist, the tab lists them with their friendly name and username (the password stays masked).
SIP Inbound tab
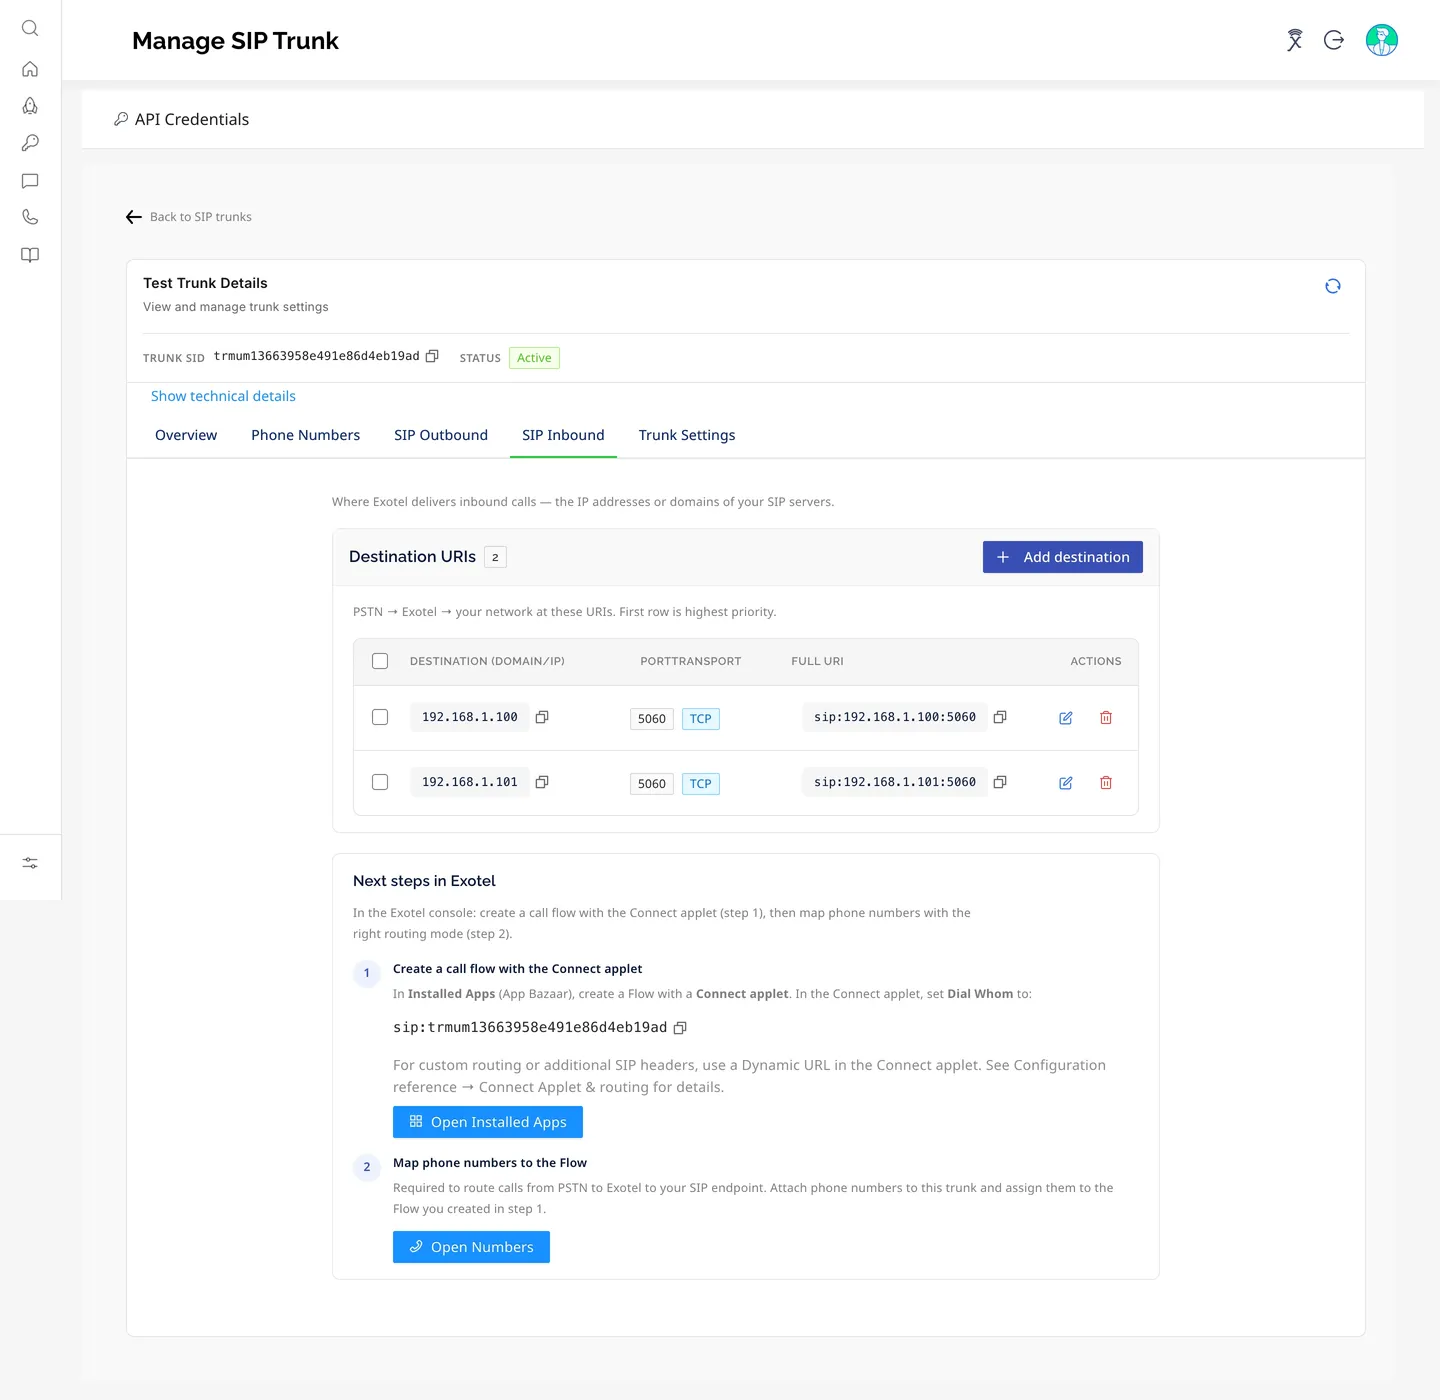
Lists the Destination URIs for the trunk. The first row is the highest priority.
- Add destination opens Add destination (SIP inbound): enter the Destination (Domain Name or IP), Port and Transport Protocol, then click Add.
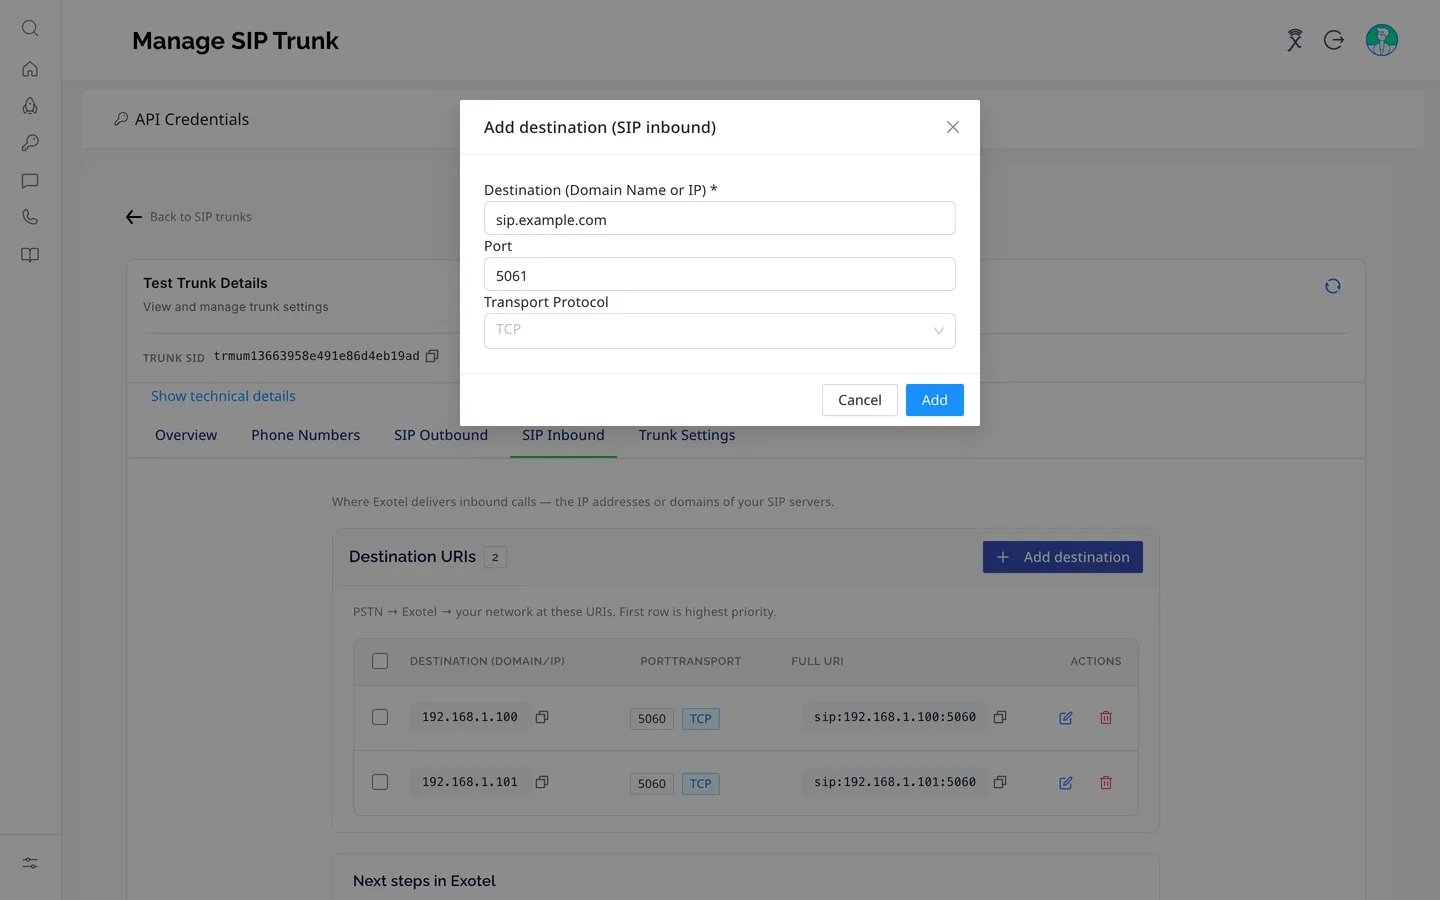
- Edit or delete a destination with the icons in the Actions column.
- The Next steps in Exotel card on this tab shows the exact sip:<TrunkSID> value to paste into your Connect applet, with a copy button, and shortcuts to Open Installed Apps and Open Numbers.
Trunk Settings tab
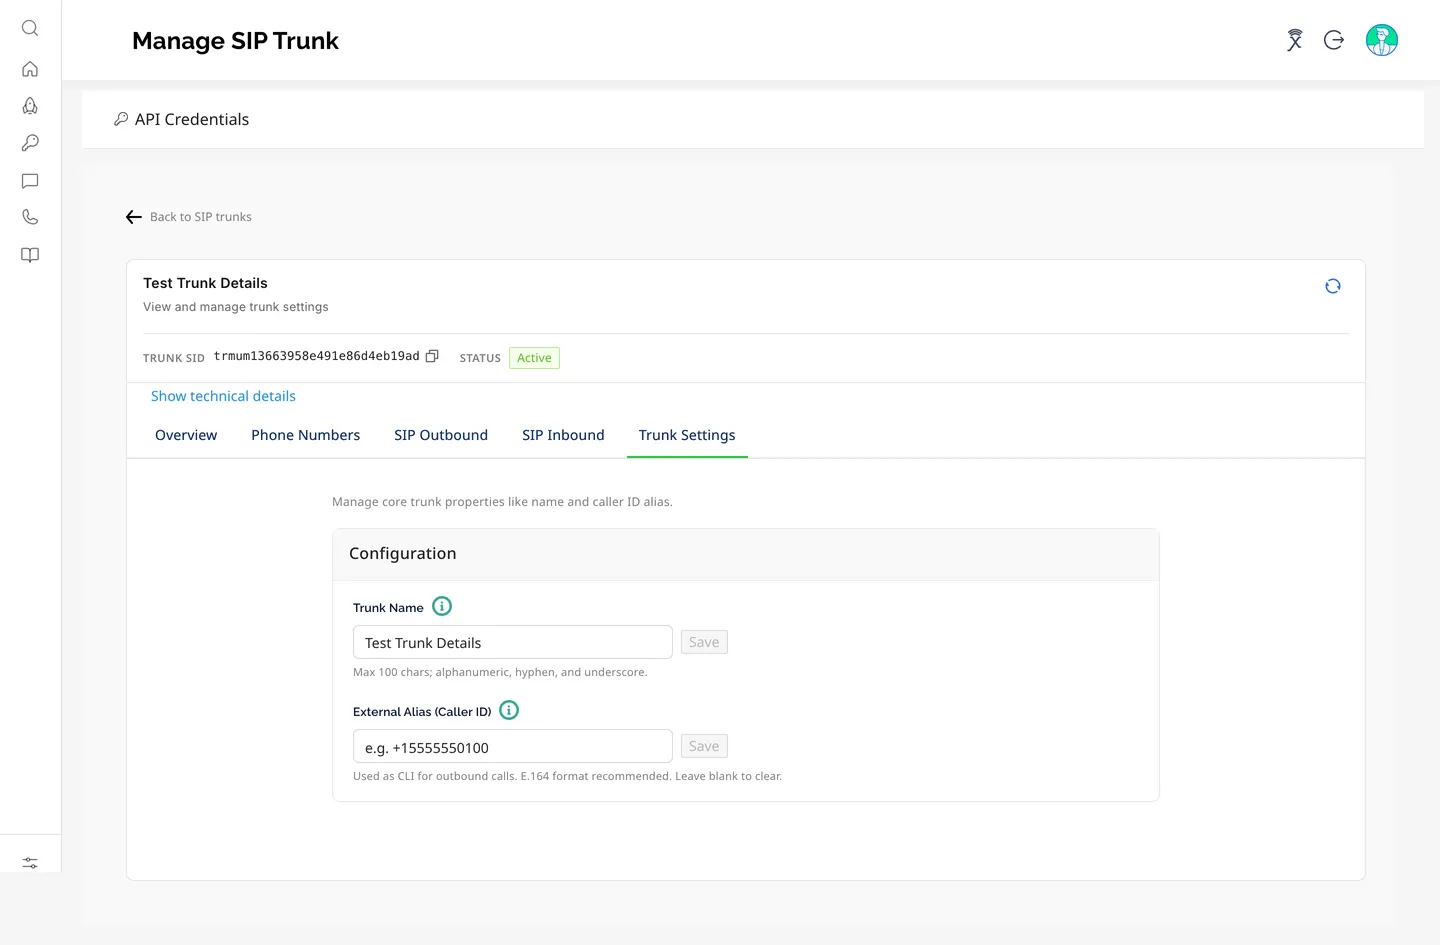
- Trunk Name — rename the trunk (same rules as at creation: max 100 characters; letters, numbers, hyphen, underscore). Click Save.
- External Alias (Caller ID) — the caller ID (CLI) presented on outbound calls made through this trunk. Use E.164 format (for example +919876543210). Leave it blank and Save to clear it.
Delete a trunk
- On the SIP Trunk Management list, click ⋮ in the trunk's row and choose Delete.
- In the Delete Trunk dialog, check the Trunk Name and Trunk SID, then click Delete Trunk.
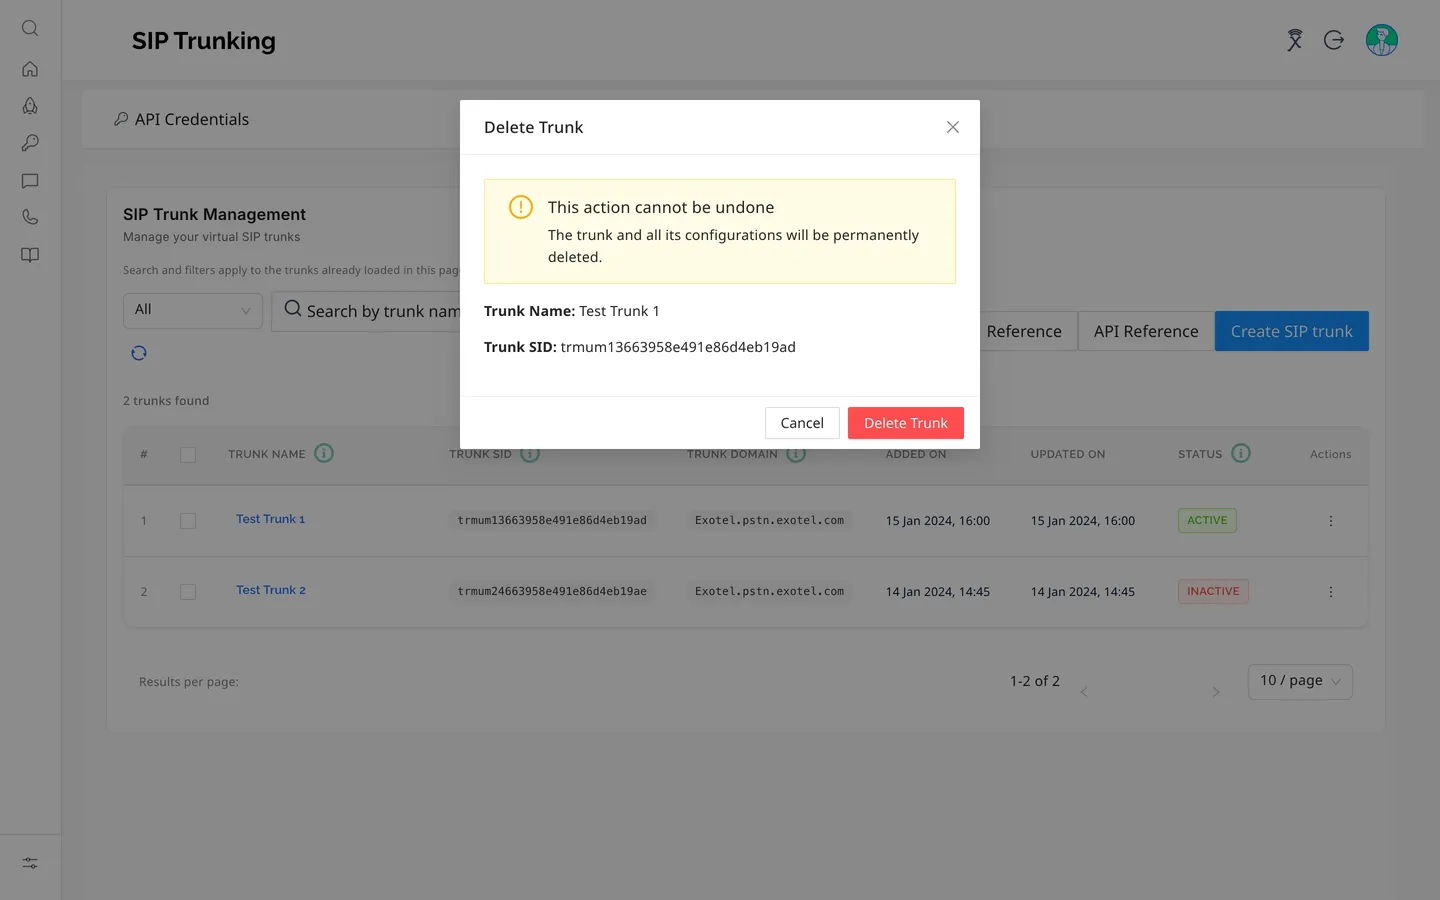
Warning: Deleting a trunk permanently removes the trunk and all of its configuration (phone-number mappings, allowlisted IPs, credentials and destination URIs). This cannot be undone. Detach any numbers you want to reuse first, and update any Flow that dials sip:<TrunkSID>.
Next steps: route inbound calls and connect your SIP system
Creating the trunk is the Exotel-side half of the setup. To actually pass calls you also need the following.
1. Create a Flow with the Connect applet (inbound calls)
- In the Exotel dashboard go to Installed Apps (App Bazaar) and create a new Flow.
- Add a Connect applet at the point where the call should reach your SIP endpoint.
- In the Connect applet, set Dial Whom to sip:<TrunkSID> — for example sip:trmum0abc123. Copy the exact value from Trunk Details → SIP Inbound → Next steps in Exotel.
- For advanced routing or custom SIP headers, configure a Dynamic URL in the Connect applet. The URL's response can select the destination trunk, pass up to 3 custom SIP headers (for example X-param1=value1, max 200 bytes in total; names starting with Exotel- or Veeno- are reserved) via custom_params, and control recording. See Connect Applet Setup for Inbound SIP Trunking.Connect Applet Setup for Inbound SIP Trunking.
2. Map the phone numbers to the Flow
In Numbers, point each phone number attached to the trunk at the Flow you just created, and make sure the number's routing mode on the trunk is set to Flow · StreamKit (Trunk Details → Phone Numbers).
The inbound path is then: PSTN → Exotel → DID → Flow (Connect applet) → SIP trunk → Destination URI → your SIP system.
You want inbound calls to… | Routing mode on the trunk | Flow needed? |
|---|---|---|
Go straight to your SIP system | PSTN · Direct SIP | No — Exotel dials your destination URIs directly |
Pass through a Flow first (Connect applet, voicebot or other App Bazaar applets) | Flow · StreamKit | Yes — map the number to the Flow; a Connect applet hands the call to the trunk with sip:<TrunkSID> |
Destination URIs (Step 4) are required in both cases.
3. Configure your SIP system (outbound calls)
Setting | Value |
|---|---|
SIP domain / outbound proxy | <account_sid>.pstn.exotel.com (the Trunk Domain shown in the list) |
Port | 443 for SIP over TLS (recommended) or 5070 for TCP |
Transport | TLS or TCP |
Authentication | IP allowlist and/or the digest username and password you created in SIP Outbound |
Media | RTP/SRTP on UDP 10000–40000; codecs PCMA/PCMU; DTMF RFC 2833 |
Exotel's source ports for signalling and media are ephemeral — never restrict them to a fixed range on your firewall. For the current list of Exotel edge FQDNs and media IP pools, see Network & Firewall Configuration.
4. Test
- Outbound: place a call from your SIP system to a PSTN number.
- Inbound: call one of the attached phone numbers from a mobile phone.
Both succeeding confirms the trunk is fully operational. If either fails, see Troubleshooting.
Troubleshooting
The Troubleshooting tab of the in-app Reference page lists the most common issues by category; the same guidance is summarised here.
Issue | Likely cause | Resolution |
|---|---|---|
No INVITE received at your SIP server | Source IP not in the trunk allowlist, or firewall blocking Exotel signalling IPs | Add your PBX/SBC IP in SIP Outbound → IP allowlist. Allow Exotel signalling IPs on port 443 (TLS) or 5070 (TCP). |
403 Forbidden on SIP INVITE | Wrong from-domain, IP not allowlisted, or digest credentials mismatch | Check the from-domain is <account_sid>.pstn.exotel.com. Verify the allowlist and/or credentials on both sides. |
408 Request Timeout | Firewall blocking the return path, or SIP server not responding | Ensure your SIP server is reachable on the configured destination port. Check NAT/firewall for return traffic from Exotel. |
One-way audio | RTP ports blocked, or symmetric NAT issue | Open UDP 10000–40000 for Exotel media IPs. Enable symmetric RTP on your SBC/PBX. |
No audio at all (call connects but silent) | RTP fully blocked, codec mismatch, or SRTP negotiation failure | Verify UDP 10000–40000 is open. Ensure PCMA/PCMU support. Check TLS vs non-TLS alignment. |
Call drops after ~30 seconds | NAT binding timeout, no keep-alive, or SIP session-timer expiry | Enable symmetric RTP. Configure SIP session timers or OPTIONS keep-alives on your PBX. |
Calls not reaching the correct Flow | Number routing mode set to PSTN instead of Flow, or wrong Flow selected | In Trunk Details → Phone Numbers, set the number to Flow · StreamKit and assign the correct Flow in Numbers. |
Connect applet not dialling your trunk | Dial Whom does not match sip:<TrunkSID> | Set Dial Whom to sip:<your_trunk_sid>. The Trunk SID is in the Trunk Details header. |
409 Conflict on trunk creation | Trunk name already exists in this account | Choose a unique trunk name. |
401 Unauthorized on API calls | Invalid API key/token, or wrong REST base URL for your region | Use HTTP Basic auth with the API Key as username and API Token as password. Use api.in.exotel.com (India) or api.exotel.com (Singapore). |
For SIP response codes, see the SIP Error Codes & Troubleshooting Guide.
FAQs
Can I attach more than one phone number to a trunk? Yes. Attach any number of numbers in Step 2 or later from Trunk Details → Phone Numbers, and set the routing mode per number.
Can I whitelist more than one IP? Yes. Add as many IPs or subnets as you need, either one at a time in the wizard or several at once (comma-separated) from Trunk Details → SIP Outbound → Add IP address.
Do I need an IP allowlist if my provider's IPs change? No. Choose Credentials (SIP digest) in SIP Outbound and configure the same username and password on your provider's platform. Use an FQDN as the SIP Inbound destination so no allowlist entry is needed for inbound either.
Can I use both TCP and TLS destinations on one trunk? Yes. Each destination URI has its own transport. Exotel tries destinations in list order.
Where do I find the Trunk SID? In the Trunk SID column of the trunk list, and in the header and Overview tab of Trunk Details (both have a copy button).
Can I change a trunk's name after creation? Yes — Trunk Details → Trunk Settings → Trunk Name → Save.
What is the per-trunk rate limit? 200 calls per minute per trunk (shown under Show technical details in Trunk Details). Contact Exotel if you need a higher limit.
Related articles
- FAQs