Blacklisting
Sometimes, customers misuse or abuse the users of the organization. Some of the customers also call repeatedly to the users, which hampers the working of the users. In such cases, the Administrator is able to blacklist the incoming calls of the customers. The contacts that have been added to the blacklist lead are not able to call the contact center. The organization can decide how to handle such customers differently.
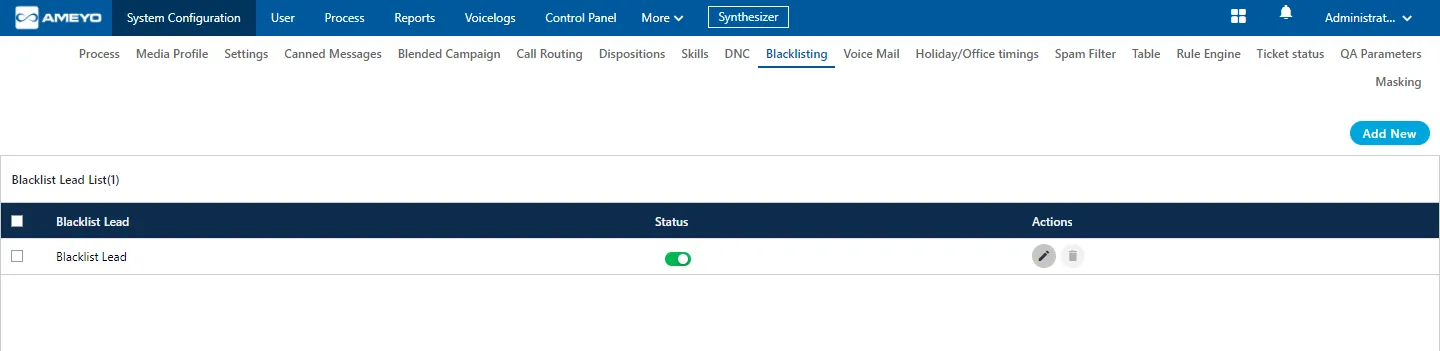
Add a new Blacklist Lead
Administrator can perform the following steps to add a new Blacklist lead.
- Click "Add New" button to create a new Blacklist lead. It shows the following modal.
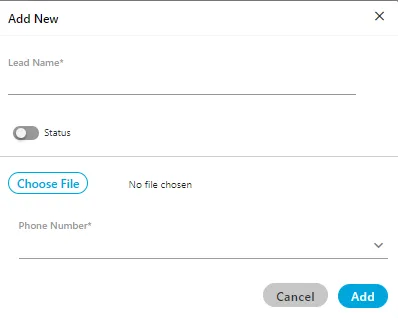
Here, you have to provide the following information.
- In Lead Name column, enter the name of the lead.
- Toggle Status button to enable or disable the new lead.
- Click "Choose File" to select the location and the CSV file. Click "Open" button to upload that file.
- In Header Mapping, the administrator can map the file headers of lead with phone, timezone, and name headers as per the created headers in the system.
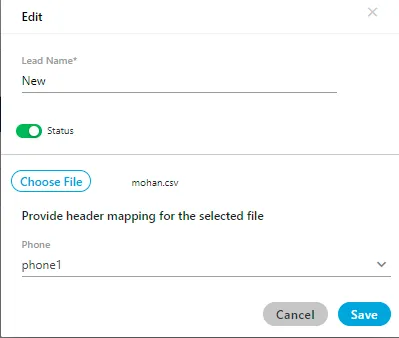
- Click "ADD" to add a new lead. Rather, you can click "Cancel" to discard the changes.
- After clicking "ADD", a result modal is shown that provides the overview of the uploaded contacts through the Blacklist lead.
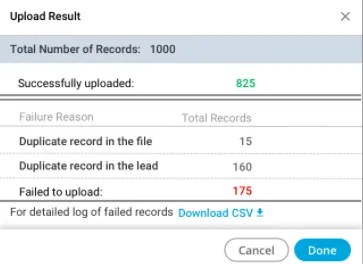
- The administrator can click "Download CSV" option to download the CSV file of the contacts that have been failed while uploading.
- The administrator can use the above steps to upload multiple Blacklist leads here.

Edit Blacklist Lead
Select the Blacklist Lead which you want to edit and click  icon. The same modal is arrived which is arrived at the time of adding the Blacklist. You can change the Blacklist lead name, file and header mapping on the opened modal. You can also enable or disable the lead from here as well.
Delete an Blacklist Lead List
The deleted Blacklist lead cannot be retrieved back.
Select the Blacklist Lead and click  icon to delete it. A warning message is displayed on screen. Click "Yes" to delete it else you can click "No" to not delete it.
