Agent Account Menu
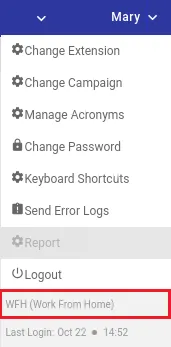
To access the Agent Menu, click on the Agent name icon at the top-right of the screen.
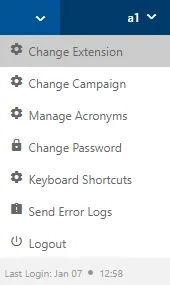
Last Login Date-Time: It shows the last login date and time of the agent. It helps the agent to recognize that when he loggedin to the Ameyo.
The Agent can perform the following operations from the Menu tab:
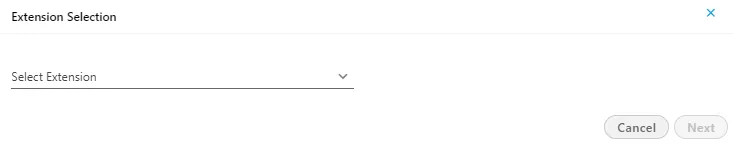
- Change Extension: This option allows the Agent to change his Extension on which he was working previously. To change the Extension, click on the "Change Extension” button and the pop-up to change the Extension will come then, select the Extension which you want to select.
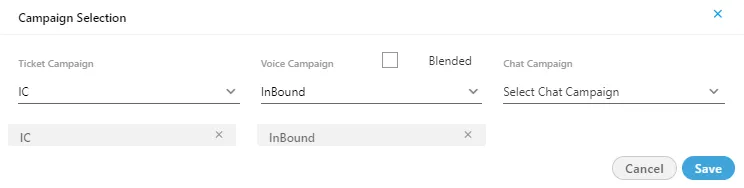
- Change Campaign: Through this option, the Agent is able to change the Campaign. To change the campaign, click Change Campaign button and then select the campaign which you want to select from the pop-up. It also allows you to select multiple campaigns at the same time.
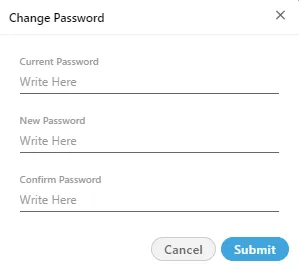
- Change Password: This option allows the Agent to change his account’s password. Click on the “Change Password” button and provide your current password, then type new password two times to validate it.
- Manage Acronyms: This option allows the agent to see the list of the campaign Acronyms which was created at the campaign level by a Supervisor.
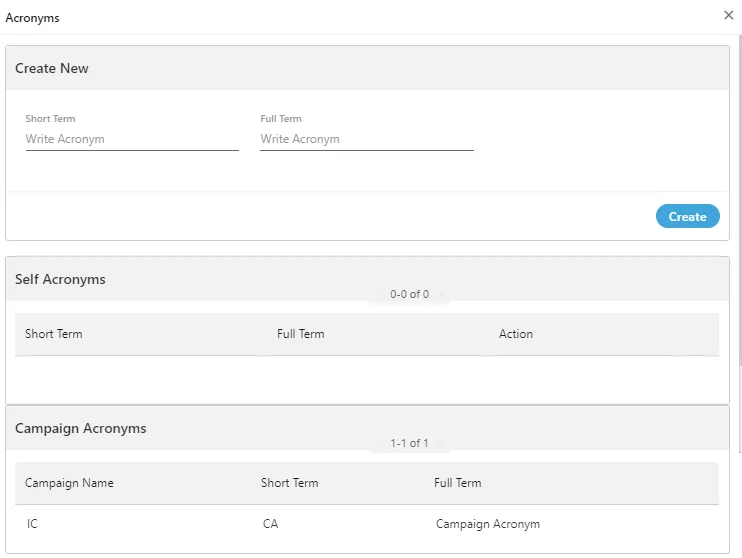
On this page, the agent can create his acronyms which are only visible to him, and he can use them only.
Perform the following steps to create the Self-Acronyms.
- Enter the short term in "Short Term" text area.
- Provide the full name corresponding to the short term in the "Full Term" text area.
- Click "Create" button.
Agent can delete his created acronyms but he does not have the option to edit them.
Select an acronym and click  icon to delete it. A confirmation pop-up comes up.

Click "Yes" to confirm the deletion process else click "No".
The campaign level acronyms cannot be deleted from here. They can only be managed by the supervisor.
- Keyboard Shortcuts: This feature allows the Ameyo agent to see the list of keyboard shortcuts, through which the work of the agent can be reduced. Click “Keyboard Shortcuts” option from the list. The following modal is displayed
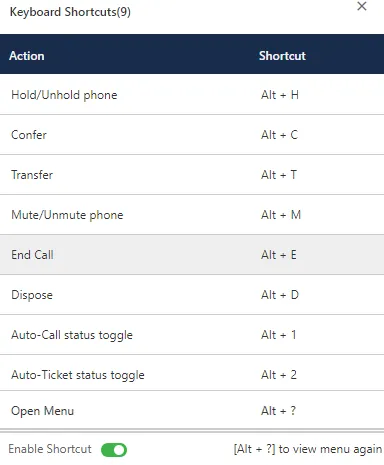
Following are the actions for which the shortcuts are listed in this modal:
- Hold/Unhold Phone: Press the “Alt” key and “H” key together to access this shortcut.
- Confer: Press the “Alt” key and “C” key together to confer any call.
- Transfer: Press “Alt” and “T” key together to transfer any call.
- Mute/Unmute Phone: Press “Alt” and “M” key together to mute or unmute any ongoing call.
- End Call: Press “Alt” and “E” key together to end the call.
- Dispose: Press “Alt” and “D” key together to dispose of any call.
- Auto-Call Status Toggle: Press “Alt” and “1” key together to change the status of the auto-call.
- Auto-Ticket Status Toggle: Press “Alt” and “2” key together to change the status of the auto-ticket assignment.
- Open Menu: Press “Alt” and “?” keys together to open the keyboard shortcut modal.
Click  switch to disable the Keyboard Shortcuts.
Click  switch to enable the Keyboard Shortcuts. By default, they are enabled for every user.
The above shortcuts can not be customized, they are fixed.
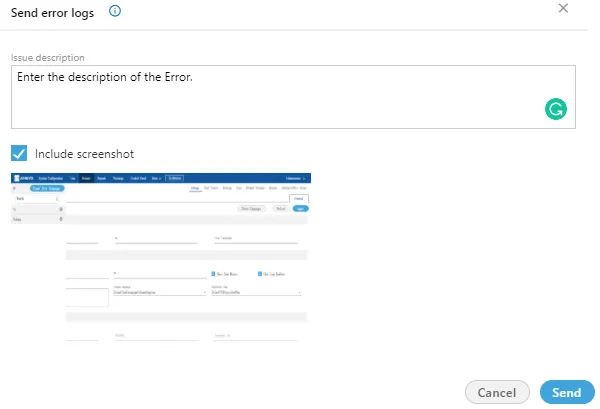
- Send Error Logs: It is a feature provided by the Ameyo to send the errors which occurred at the time of work. Click on the “Send Error Logs” button and the pop-up with the screenshot will arrive. Provide a description of that screenshot and enable “Include Screenshot” (optional) to attach the Screenshot with the error. After then click on the Send button to send that screenshot to the server. This will help the Administrator to resolve the error.
- Logout: Click "Logout" to logout from the Ameyo. Once you click logout, all the services will stop, and agent redirects again to the login page.
Logout option will be disabled when the user is either on the call or having the conversation with customer over the chat. Logout option will only be available after the conversation will be terminated and call or chat will be disposed successfully.
- Last Login: It shows the last date and time of the agent when the account has been logged in by agent.
- Working Mode Selection: If the administrator has configured the working mode selection, then the agent can view the selected working mode (shown in red-box of the following screenshot).
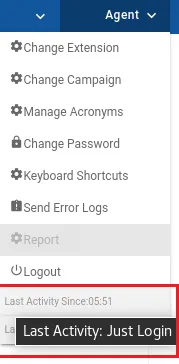
- Last Performed Activity: The agents can view their last activity time through the account menu with the "Last activity since" data point. It shows the total time from which the agent has not performed any activity. The activity performed by the agent is according to the session. It means that the activities performed by the agent will be saved for only the current session, irrespective of the campaign. There is a possibility that an agent is assigned in multiple campaigns, in such a case, the activity performed by the agent in any campaign will be treated as an activity.
The following work will be considered as an activity of the agent.
- Changing status, that is, all kind of Break is considered as an activity.
- Picking up the chat/ticket/call is considered as an activity
- Disposition on the chat/ticket/call is considered as an activity
- Call Hold is considered as an activity
The agent can hover its mouse on "Last activity since" to view the performed activity on the agent's console.
- On page reload, the activity time count will reset to 0.
- This functionality is only for the WebApp application. It is not present for the toolbars as of now.