Lead List Upload & Allocation
Overview
This feature allows supervisors and administrators to upload lists of customer contacts (leads) into an outbound campaign and manage how those leads are allocated. This is the foundational step for any proactive outbound dialing activity.
How It Works
A user with appropriate permissions navigates to the Lead Management section of a outbound campaign. They can upload a lead list, typically from a CSV file, mapping the columns in the file to the corresponding fields in the system's CRM (e.g., Name, Phone Number, Account ID). The system ingests these leads and adds them to the campaign's dialing queue. The supervisor can then see the total number of leads, reset lists, or monitor their status.
Prerequisites
- An Outbound Voice Campaign must be created.
- A lead list must be prepared in a supported file format (e.g., CSV).
Use Cases
- New Sales Campaign: A marketing manager uploads a list of 5,000 new prospects to be called by the sales team.
- Customer Survey: A customer service manager uploads a list of recent customers to be called for a satisfaction survey.
- List Re-run: A supervisor resets and re-uploads a list of leads that were not successfully contacted during the previous day's campaign.
Usage Instructions/Configuration Steps
Lead Management in Process level (Supervisor Interface)
The Lead Management section allows Supervisors to create, edit, delete, upload, and assign leads to campaigns within a specific process.
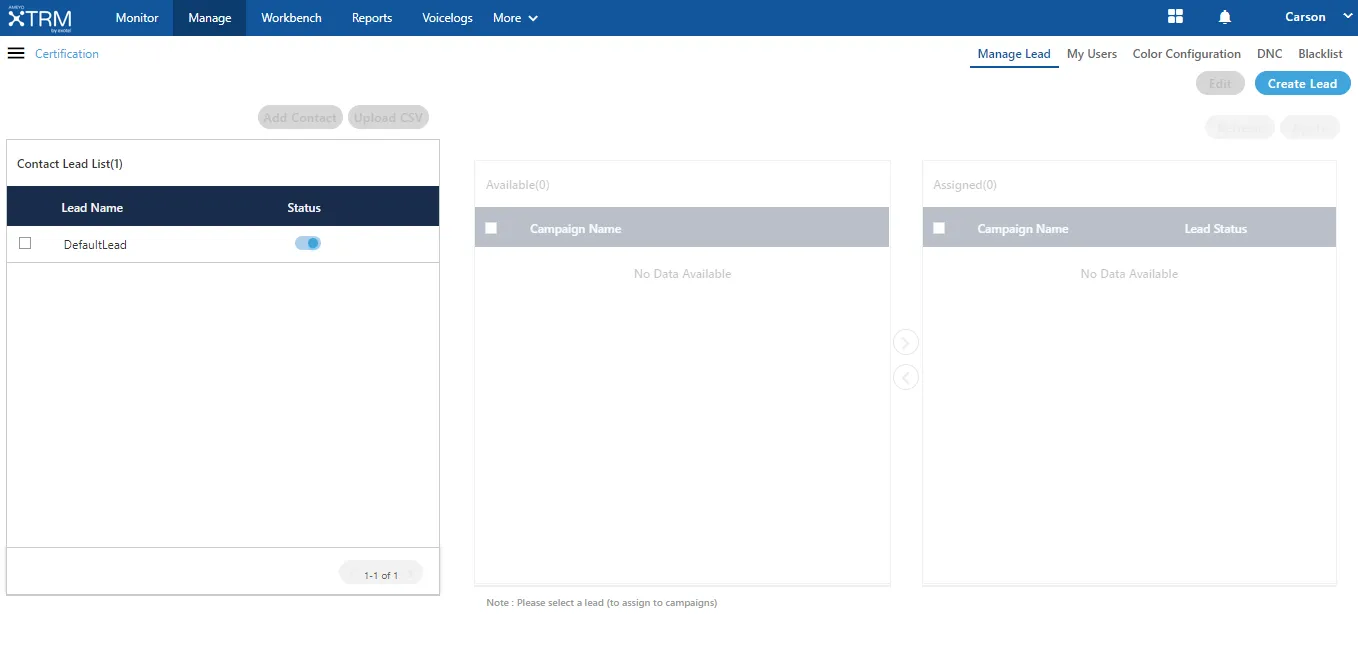
Creating a Lead
Supervisors can create new leads at the process level (not at the campaign level).
- Click Create Lead. A pop-up window appears prompting you to enter lead details.
- Provide the following information:
- Lead Name
- Time Zone
- Lead Owner
- Description
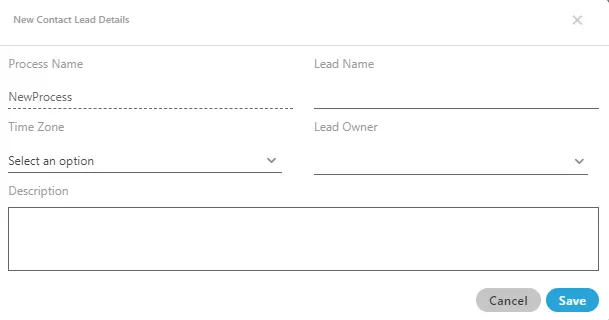
- Click Save to create the lead, or Cancel to discard changes.
Editing a Lead
- Select the desired lead and click Edit.The Edit Lead modal appears.
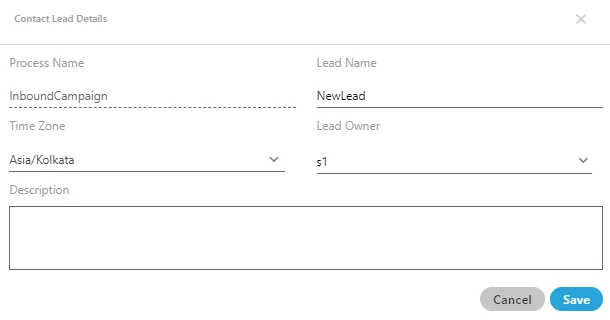
- Update any of the following fields:(The Process Name cannot be changed.)
- Lead Name
- Time Zone
- Lead Owner
- Description
- Click Save to confirm or Cancel to discard changes.
Deleting a Lead
- Select the lead to delete and click the Delete (🗑) icon.A confirmation dialog appears.

- Click Yes to confirm, or No to cancel.
Enabling or Disabling a Lead
- To disable an active lead, click the green toggle switch.
- To enable a disabled lead, click the gray toggle switch.
This allows Supervisors to temporarily deactivate leads without deleting them.
Uploading Leads via CSV
Supervisors can bulk upload contacts into leads using a CSV file.
This ensures data integrity and smooth import.
CSV File Rules
- Follow the defined Character Type, Nullable, Unique Key, and Primary Key configurations.
- Ensure data formatting matches the field types set by the administrator.
Steps to Upload a CSV File
- Select the lead in which the data should be uploaded.
- Click Upload CSV. The Upload CSV pop-up appears.
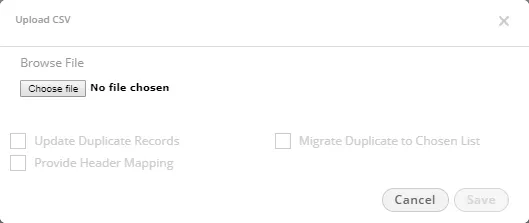
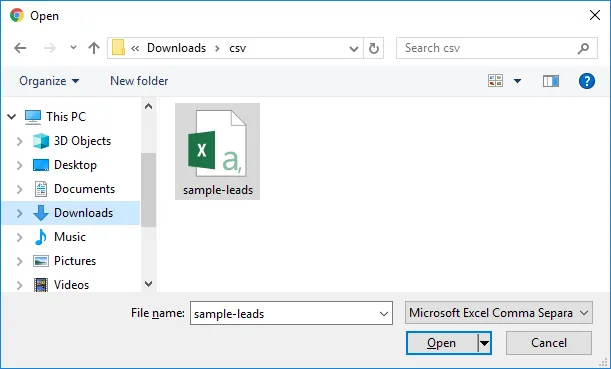
- Click Choose File, select the desired CSV from your disk, and click Open.
- Configure the following options before uploading:Upload Parameters
- Update Duplicate RecordsUpdates existing entries (if the same contact already exists) with new details.
- If duplicate exists in a different lead → updates that lead only.
- If duplicate exists in the same lead → record is updated, not duplicated.
- Migrate Duplicate to Chosen ListMoves duplicates from other leads of the same campaign into the new lead, carrying updated information.
- Provide Header Mapping Map CSV headers to lead attributes like:Phone1, Phone2, Phone3, Phone4, Phone5, Timezone, Name
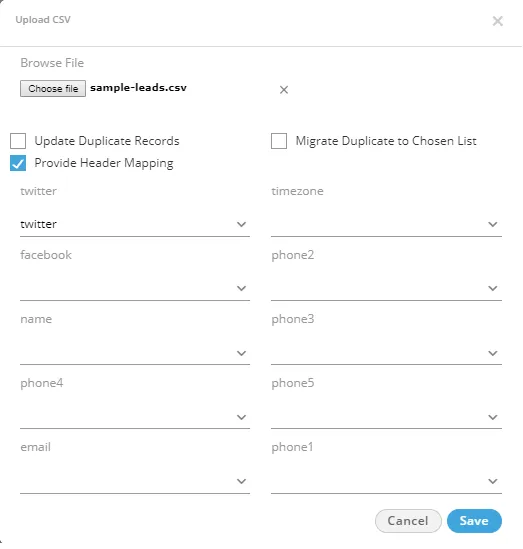
- Click Save to upload or Cancel to abort.
Adding a Contact Manually
Supervisors can manually add individual contacts to a lead.
- Select the desired lead and click
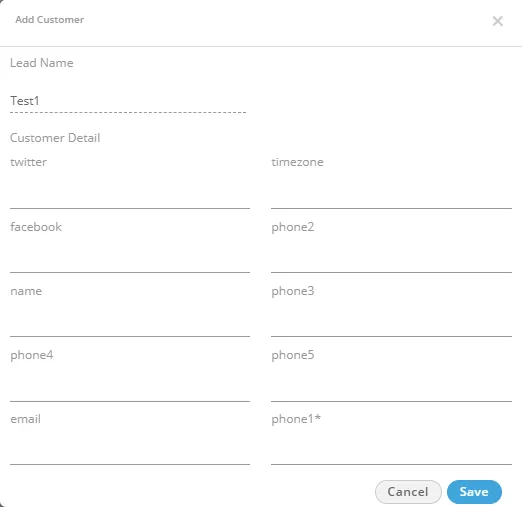
- Enter the following details as required:
- Name
- Phone Numbers (up to 5)
- Twitter or other contact fields
- Click Save to confirm, or Cancel to discard.
Assigning or Unassigning Leads to Campaigns
Leads must be assigned to campaigns before they can be used for calling or interactions.
- Select a lead. The associated campaigns list appears on the right side.
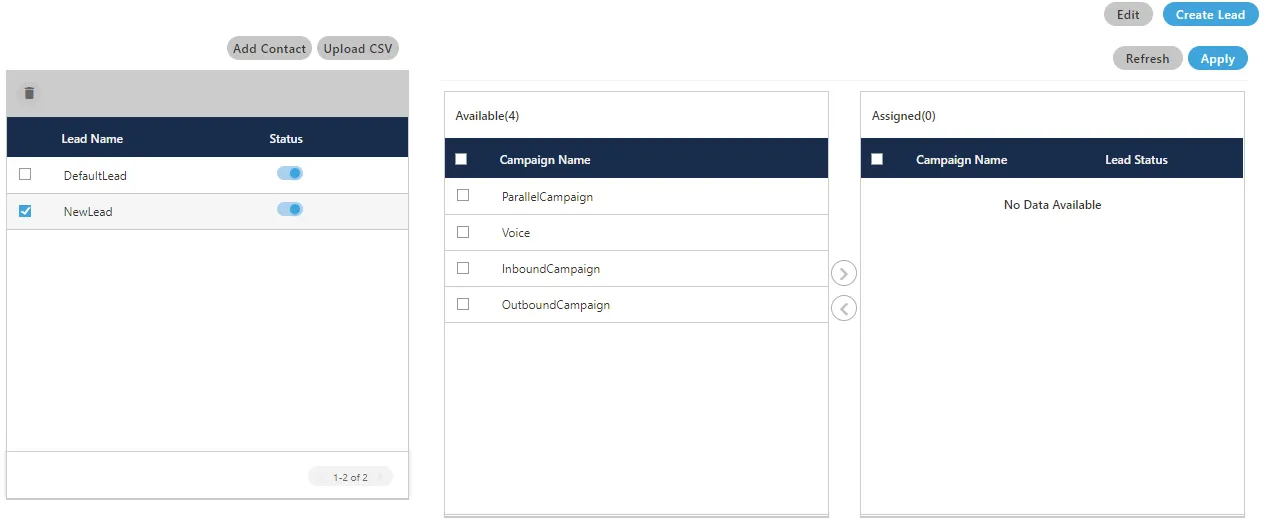
- In the Available section:
- Select one or multiple campaigns using checkboxes.
- Click the right-arrow (→) icon to assign.
- Click Apply to save changes.
To unassign, select campaigns in the Assigned section and click the left-arrow (←) icon.
Click Apply again to confirm.
Special Case:
Handling Blank “Name” Fields
If the Name field in the Data Table Definition is:
- Optional, and
- Configured as Unique,
previously, leads with blank customer names might fail to upload for duplicate validation.
This issue has been resolved - now, leads with blank names upload successfully even if the field is marked unique.
Unassigned Lead Behavior
If a lead is unassigned from a campaign:
- The STATE of its customers is lost.
- The data becomes unavailable in the campaign view.
- The lead’s records will no longer appear in campaign-level reports.
Making New Leads Visible in Manage Contacts & Dashboard
To ensure new leads and uploaded contacts appear in both Manage Contacts and Dashboard, follow these steps:
- Create a new lead and upload contacts to it.
- Assign the lead to at least one campaign.
- Enable the lead.
- Go to Manage Lead → Enable Lead at the campaign level.
- Navigate to Manage Contacts under Lead Management and perform a Churn without applying any filter.
The uploaded contacts will now be visible on both:
- Manage Contacts Screen, and
- Dashboard Screen.
Benefits
- Enables Proactive Outreach: Provides the core functionality for populating outbound campaigns with contacts to be dialed.
- Centralized List Management: Offers a single place to manage all aspects of a campaign's lead list, from uploading to monitoring and resetting.
- Data Integration: The field mapping process ensures that data from external files is correctly imported into the system's CRM fields.
Limitations
- The quality of the uploaded lead list (e.g., correct phone numbers, accurate data) directly impacts the success of the outbound campaign. The system can only dial the numbers it is given.