PACE Rule in process settings
Overview: Rule Tab for PACE in System Settings (Licensable)
Rule Tab in System Settings allows the Administrator to create the rule for the PACE.
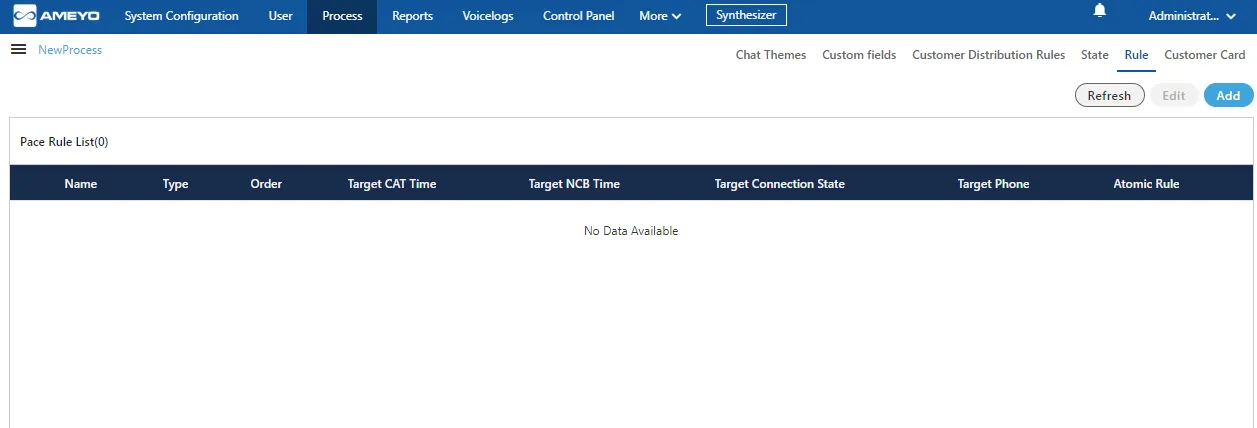
Add a PACE Rule
Perform the following steps to add a PACE Rule.
- Click "Add" to add a PACE Rule using the following pop-up
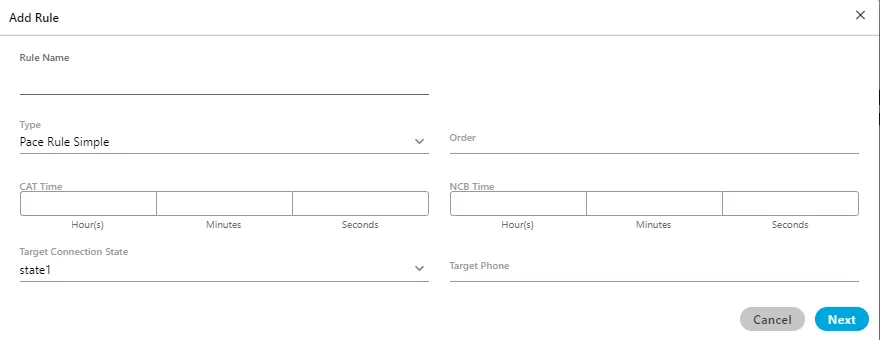
- Provide a name for the rule.
- Provide the order of execution in numbers.
- (Optional)CAT Time: Provide the target CAT (Call Around Time) in HH:MM:SS format. The call will be made to the customers only during this time.
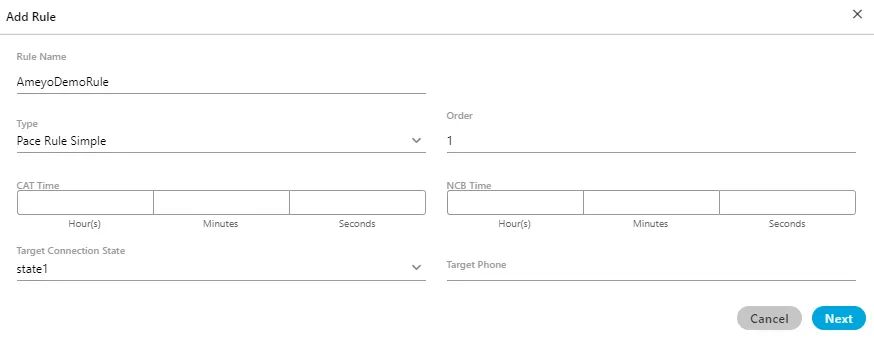
Suppose a case where three different PACE states such as "state1", "state2", and "state3" have been created. After calling, the customer (say C1) is moved to from "state1" to "state2". If the PACE rule is applied again on the same customer (C1), then the customer will move from "state2" to "state3". But, if the Administrator wants to change the state of the customer (C1) back to "state1" from "state2" or "state3", then the Administrator has to create the rule and provide "0" (zero) values in both CAT and NCB fields.
Instead of adding zero as value, these fields should remain blank to decrease the unnecessary manual inputs.
To meet this requirement, the CAT and NCB fields in the PACE rules have made optional fields instead of being mandatory. (*) symbol with these fields have also been removed.
- If you want to set the Time before which no call should be made to the customers, then enter this NCB (Not to Call Before) Time in HH:MM:SS format.
- Except "freshNumber", "catNumber", and "ns", you can select a customized state upon which the rule will be applied.
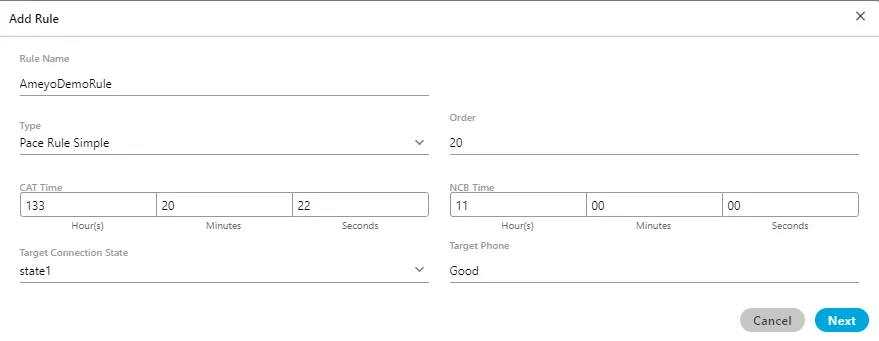
- Provide the Target Number.
- Click "Next" to proceed to the next page, which lets you add the rule conditions.
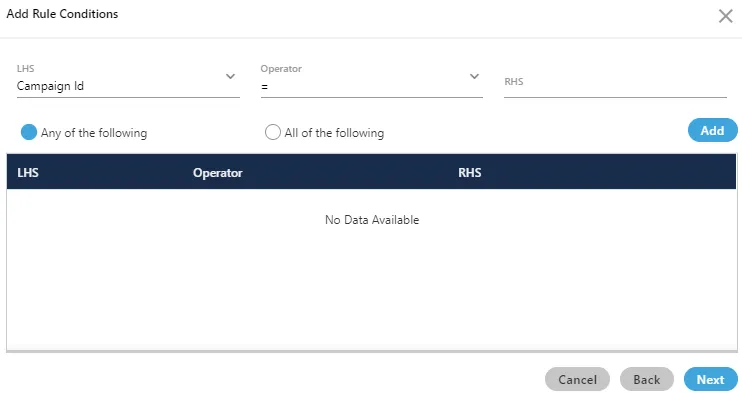
Here, you have to add a condition for the rule.
- In "LHS" drop-down menu, select any of the following values.
- System Disposition
- Disposition Code
- Disposition Class
- Last Status
- Last Disposition
- Last Dialed Time
- CAT Time
- NCB Time
- Connection State
- Campaign ID
- Select any of the following operators.
- =
- <>
- <=
- >=
- Provide the corresponding value for any selected "LHS" condition in "RHS" text field.
- Click "Add" to add the rule.
- You can add multiple rules here. To manage them, you can select any of the following options.
- Any of the following: Select this option to run the rule when any of the selected conditions are matched.
- All of the following: Select this option to run the rule only when all of the selected conditions are matched.
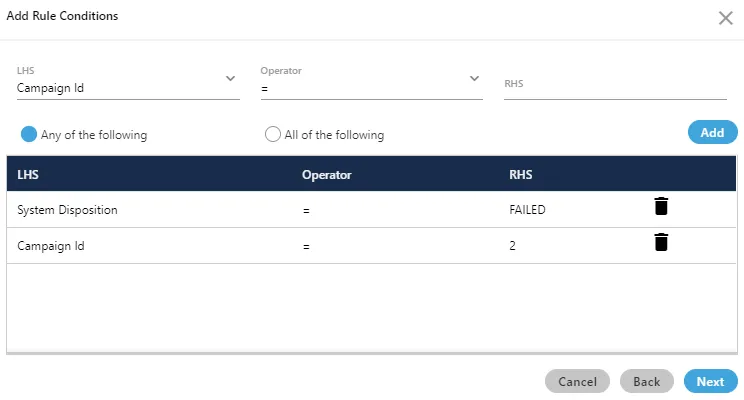
You can click on delete icon to delete any rule.
- Click "Next" to go to the next page, where the action can be selected.
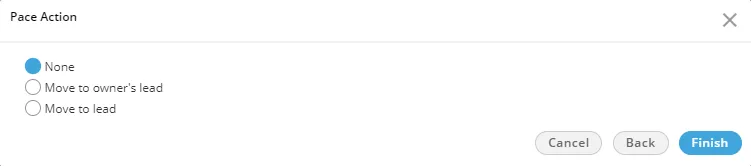
15.You can select any of the following actions here.
- None: Select it not to perform any action on the state (group of numbers), which meets the pre-selected conditions.
- Move to owner's lead: Select it to move the state (group of numbers) to the owner's lead, which meets the pre-selected conditions.
- Move to lead: Select it to move the state (group of numbers) to the lead, which meets the pre-selected conditions. If selected, it shows a drop-down menu that lets you select the lead to which the numbers can be moved.
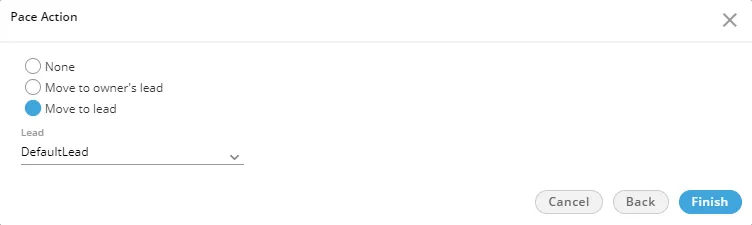
- Click "Finish" to create the rule.You can create multiple rules by performing these steps.

Modify a PACE Rule
Perform the following steps to modify a PACE Rule.
- Select a PACE Rule which you want to modify, and click "Edit" button.
- The information of the selected rule is visible on the same modal which was used to create the rule.
- Here, you can change the State Name and the State Percentage as well.
Delete a PACE Rule
Perform the following steps to delete a PACE Rule
- Select the PACE Rule.
- Click "Delete" button present on the top right corner to delete the PACE Rule. It shows the following pop-up.

- Click "OK" to delete the Rule, else Click "Cancel" to cancel the seletion process.