Queue Management
This guide helps you to determine the answers for following:
How to Create a New Queue?
What are the Queue Configuration Parameters
Creating a New Queue
To configure a new queue for a campaign, follow these steps:
- Navigate to the Campaign Management section and click on "Queues" tab.
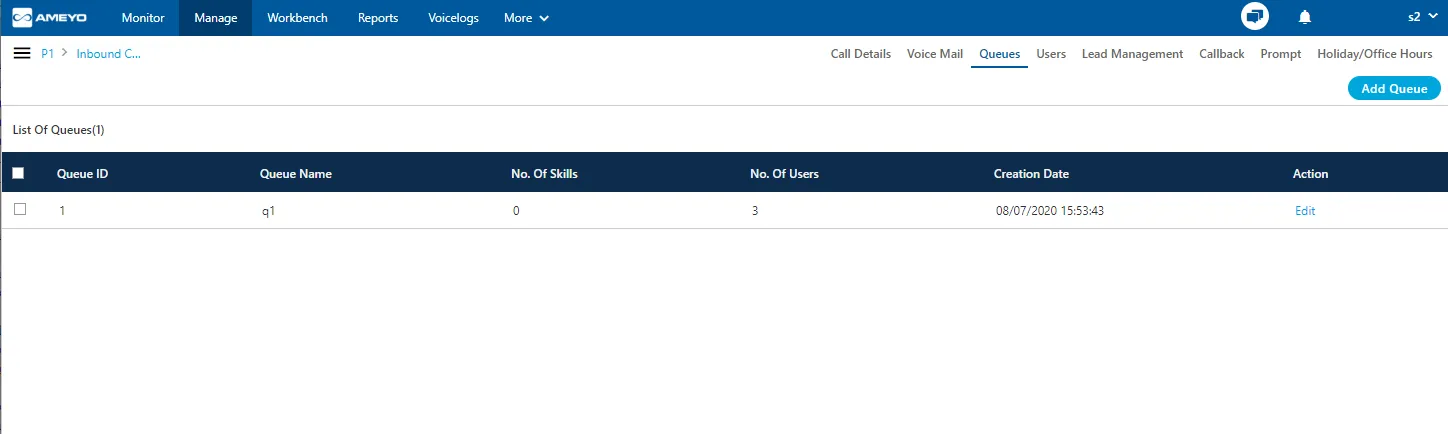
- Click the Create Queue button.
- Enter a descriptive Name for the queue.
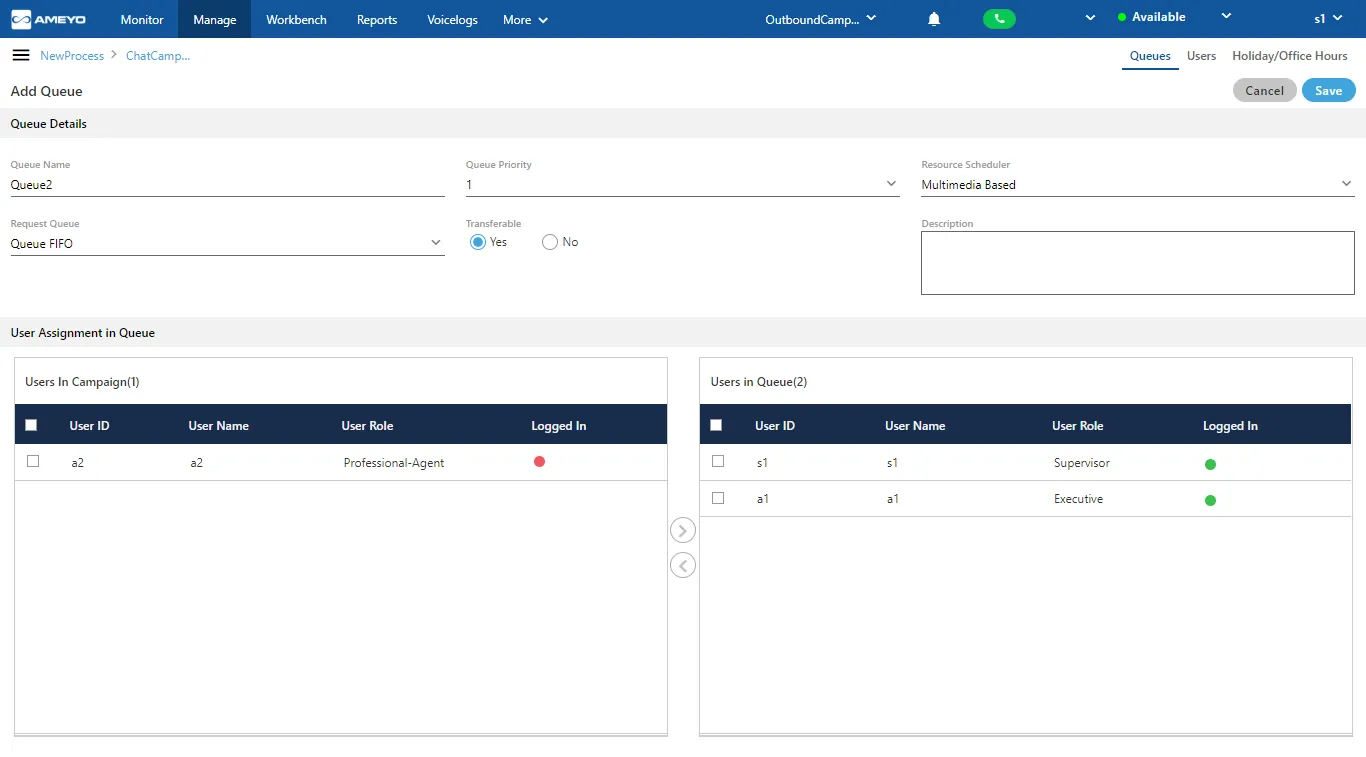
- Configure the Queue Parameters (detailed below).
- Click Apply to save the new queue.
Queue Configuration Parameters
When creating or editing a queue, you must configure the routing logic and prioritization settings:
1. Queue Priority
This setting determines the priority of the queue itself relative to other queues an agent is assigned to.
- How it works: If an agent is assigned to multiple queues (e.g., Queue A and Queue B) and becomes available while calls are waiting in both, the call from the Higher Priority queue will be routed to the agent first.
2. Request Queue Type (Customer Priority)
This defines the logic for sorting customers waiting within the same queue.
- Queue FIFO (First In, First Out): The default standard. The customer who has been waiting in the queue the longest is connected to the next available agent.
- Queue Priority (Nodeflow): Uses Nodeflow logic to assign priority levels to individual callers.
- Example: If Customer 1 (Priority 1) arrives first, and Customer 2 (Priority 2/Higher) arrives later, Customer 2 will be connected first due to higher priority status.
3. Resource Scheduler
This determines which specific agent within the queue receives the call.
- LRU (Least Recently Used): Routes the call to the agent who has been idle (available) for the longest duration.
- Multiple Extension: Select this if agents in this queue handle both voice calls and chat interactions simultaneously (Agents must be logged into a chat campaign; requires appropriate licenses).
- Multimedia: Select this if agents in this queue handle only chat interactions (Agents must be logged into a chat campaign; requires appropriate licenses).
- Skill Based: Routes calls based on defined agent skills and proficiency levels. Note: This option is only visible if the "Skill Based Routing" license is enabled.
4.Transferable Status
- Enabled: Agents will see this queue name in their transfer dropdown menu, allowing them to transfer active calls to this queue.
- Disabled: This queue will not appear as a transfer destination for agents.
Users assignment
Once the queue is created, you must staff it with users.
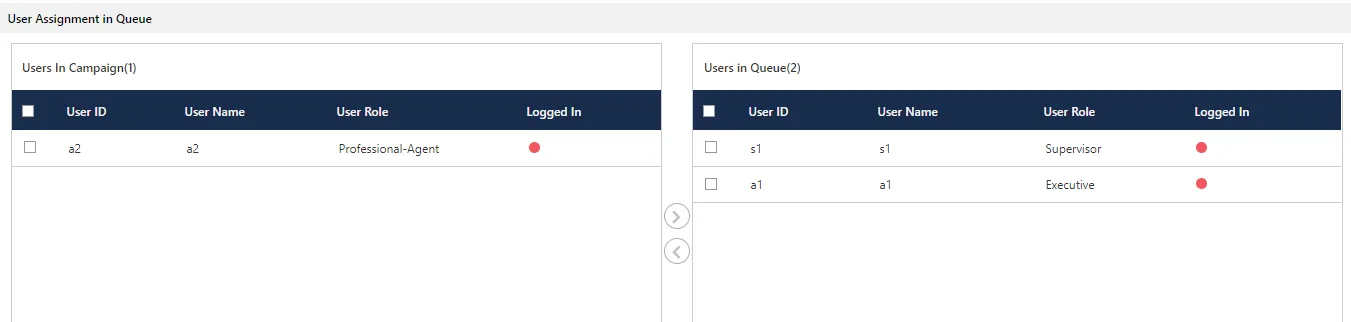
- In the Assign Users section, locate the Available Users list.
- Select the desired agents and click the Arrow Icon to move them to the Assigned Users list.
- To remove an agent, select them in the "Assigned Users" list and click the reverse arrow icon.
Editing a Queue
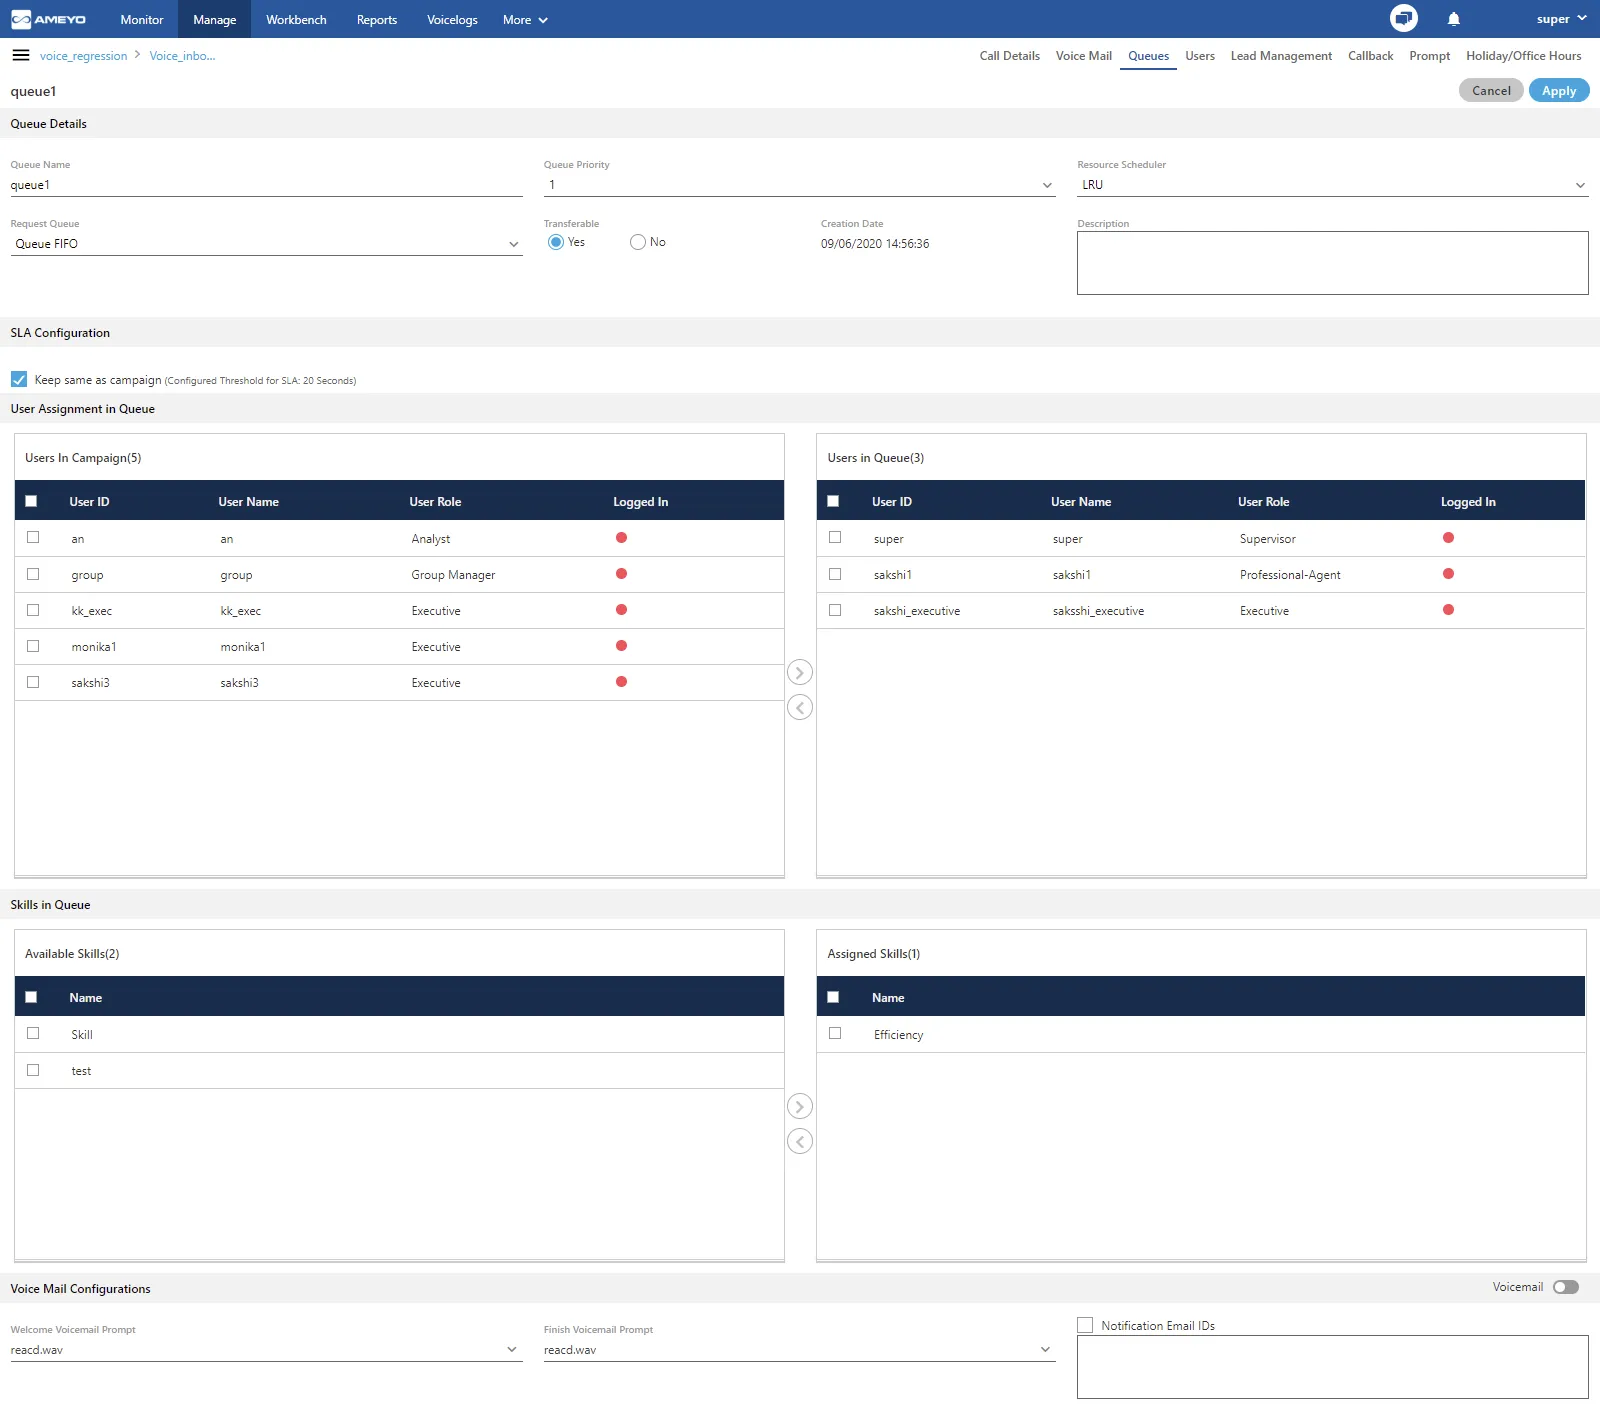
To modify an existing queue:
- Select the queue from the list (available in the "Queues" tab)
- Click the Edit button.
- Modify the necessary parameters (Name, Priority, Scheduler, User Assignment, etc.).
- Click Apply to save changes or Cancel to discard them.
Note: Changing queue settings updates the system level configuration immediately. This impacts all users currently assigned to that queue. It is advised to perform edits only when mandatory to avoid disrupting active operations.
Skill Assignment
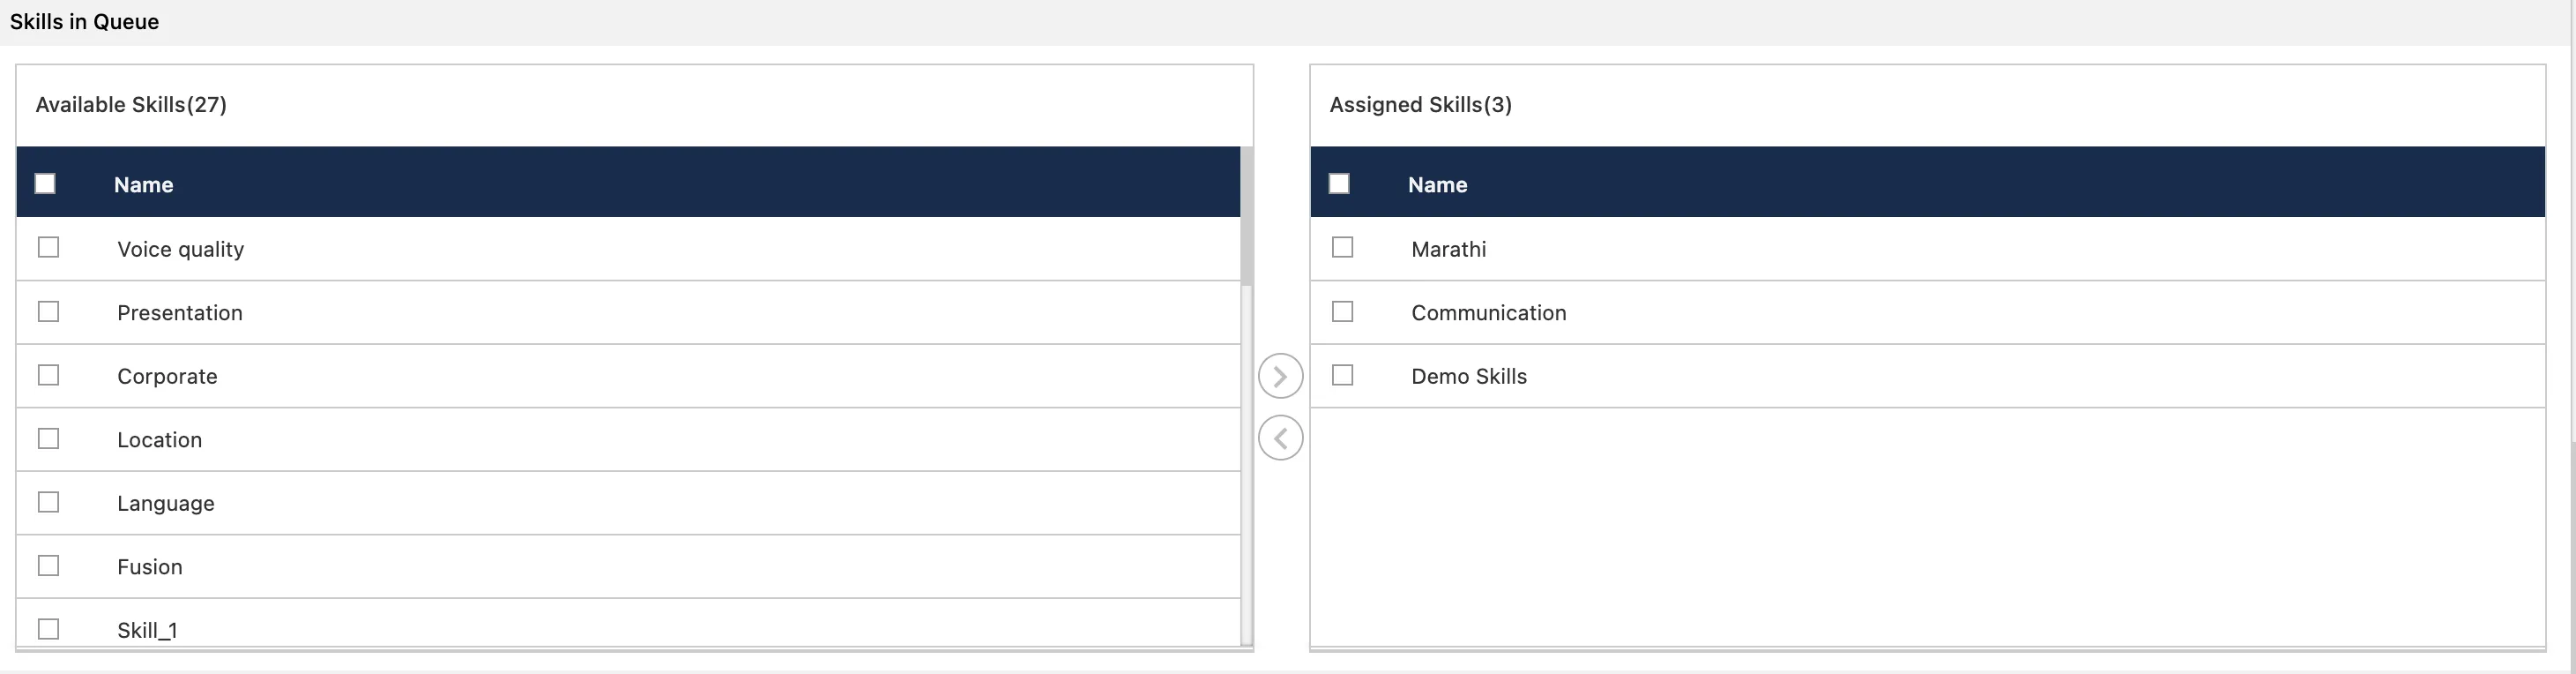
If utilizing Skill Based Routing, supervisors can assign specific skills to the queue (provided skills have been created by the administrator). Agents assigned to the queue will receive calls based on the alignment of the call's required skills and the agent's assigned skills.
Voicemail Configuration
Note: Voicemail is a licensable feature.
If enabled, callers can leave a message when no agents are available.
- Voicemail Toggle: Switch the slide button to ON to enable features.
- Notification Email IDs: Check this box to trigger email alerts when a voicemail is received.
- Configuration: Enter the recipient email addresses in the text box. Multiple emails can be added by separating them with a comma (,) or colon (:).
- Welcome Voicemail Prompt: Select the audio file played to the customer inviting them to leave a message.
- Finish Voicemail Prompt: Select the audio file played to the customer after the recording confirms the message was saved.

Deleting a Queue
To remove a queue permanently:
- Select the queue from the list (available in the "Queues" tab).
- Click the Delete button.
- A confirmation pop-up will appear. Click Yes to confirm or No to revert.

Warning: Once a queue is deleted, it cannot be retrieved. Ensure the queue is no longer needed before confirming deletion.
Configuration Summary
Feature | Description |
|---|---|
Request Queue Type | Logic for sorting waiting customers (FIFO or Priority based). |
Resource Scheduler | Logic for selecting the agent (Idle time, Skills, or Media type). |
Queue Priority | Priority level of this queue relative to other queues the agent serves. |
Transferable | Visibility of this queue in the agent's "Transfer Call" dropdown. |
Voicemail | Toggle to enable message recording with email alerts. |
Important Notes
- Deletion is Permanent: Once a queue is deleted, it cannot be retrieved.
- Live Impact: Editing a queue while active immediately impacts routing for all assigned agents. It is recommended to make changes during low-traffic periods.