User Guide: Zoho CRM
8 min
Objective: To successfully authorize the Ameyo application, configure your extension, and access the dialer interface within the Zoho CRM Toolbar.
Instructions
Step 1: Launch the Login Process
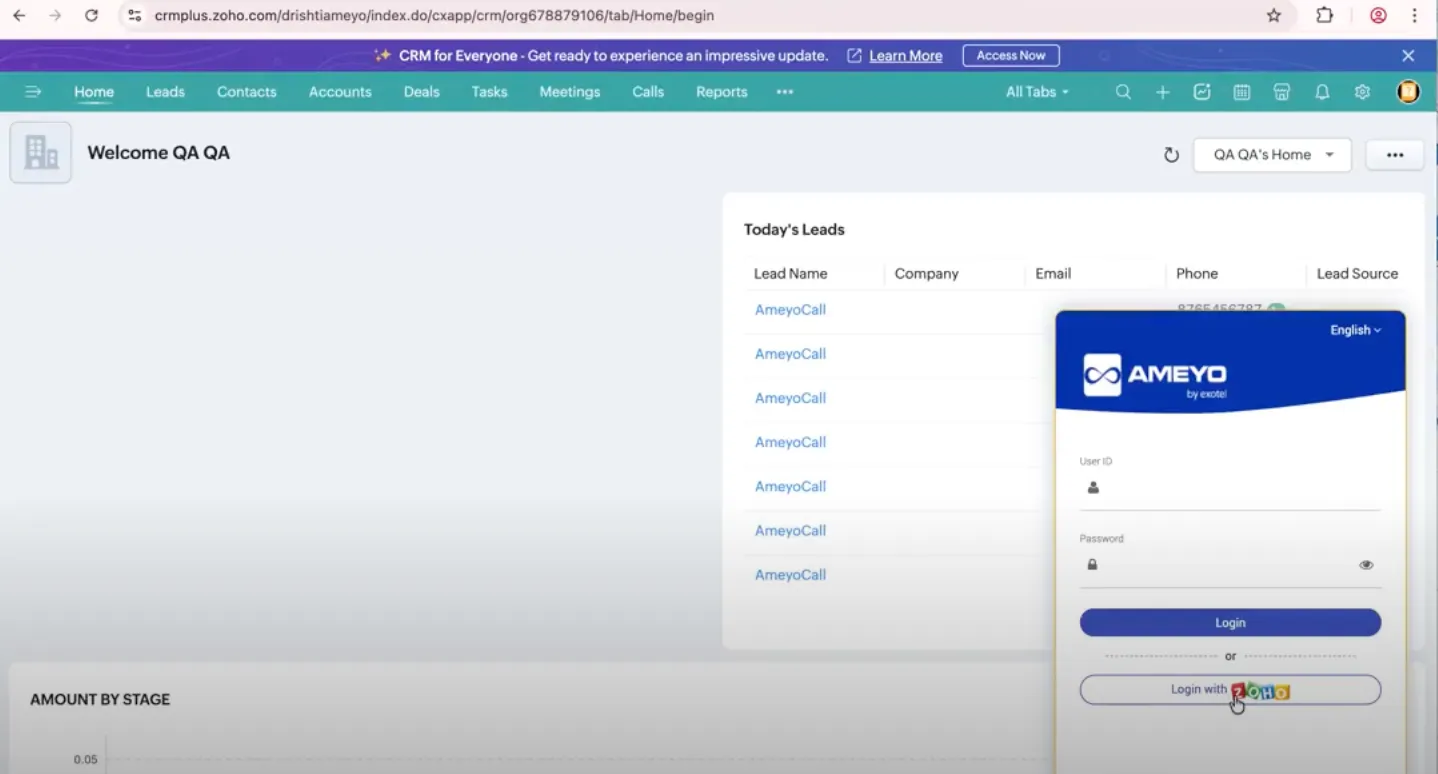
- Navigate to your Zoho CRM Home screen.
- Locate the Ameyo Toolbar on the right-hand side of the screen.
- Click the blue Login button.
Step 2: Authorize Services
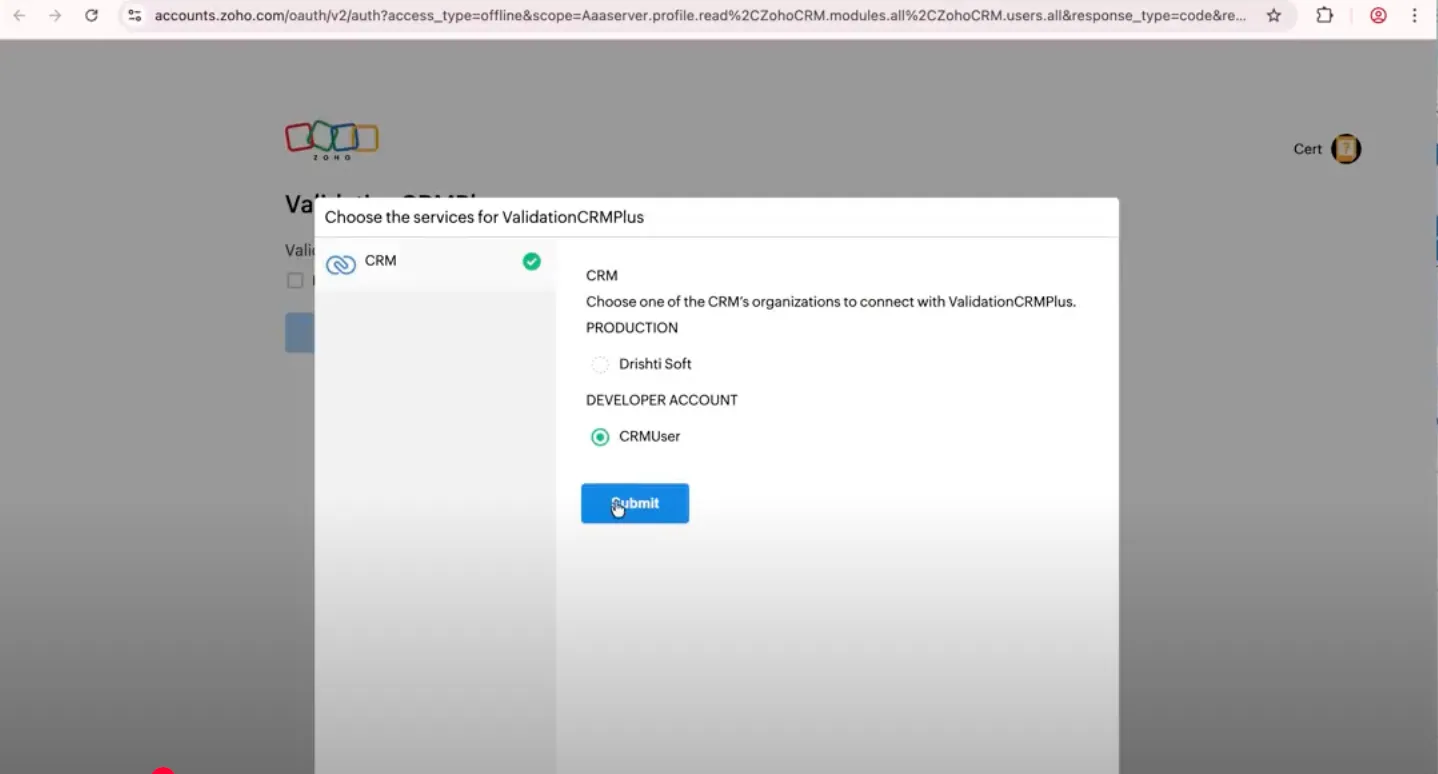
- A pop-up window will appear for authorization.
- Select your organization/profile (e.g., CRMUser).
- Click Submit.
Selecr the organisation profile if there are multiple
Step 3: Grant Permissions
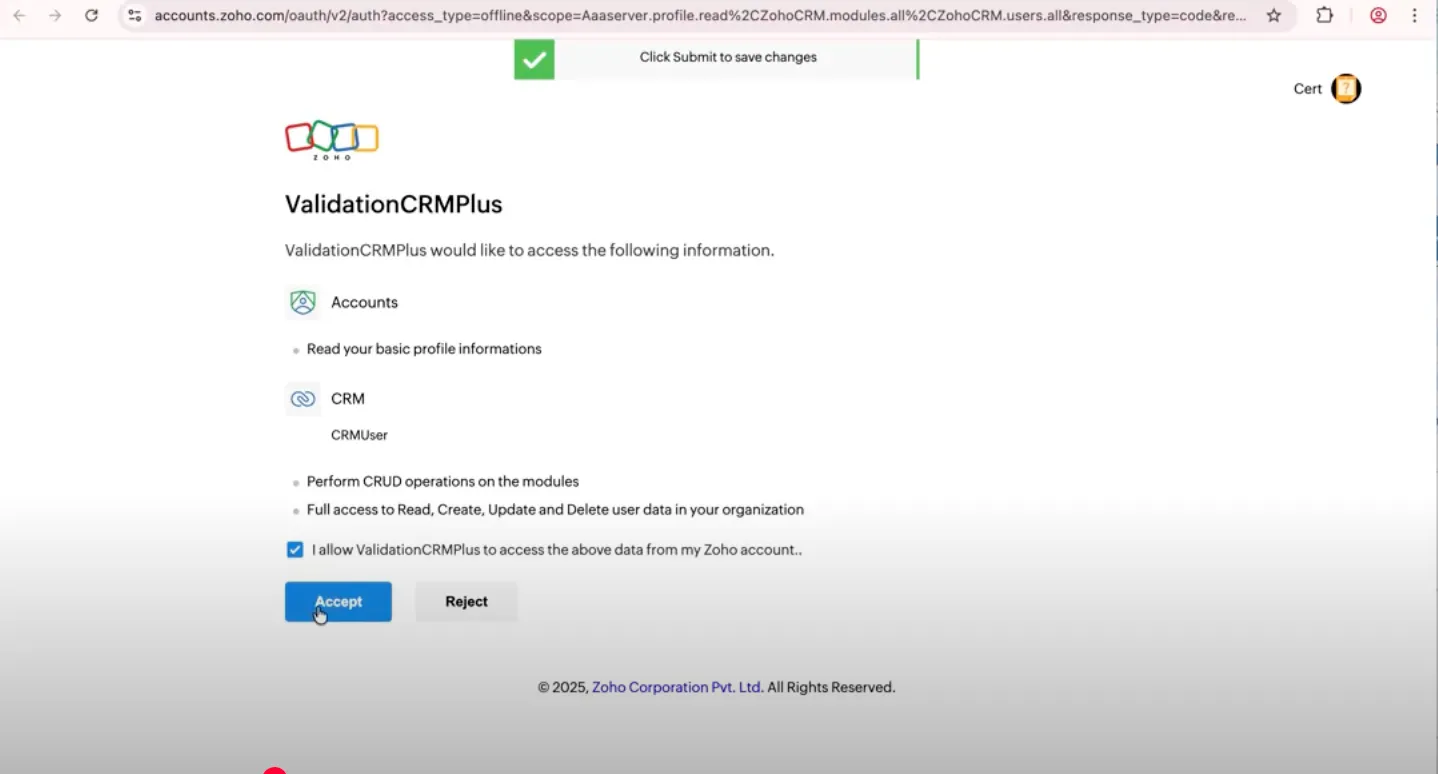
- The system will request access to your Zoho Account data.
- Click the blue Accept button. The pop-up will close automatically.
Step 4: Select Campaign
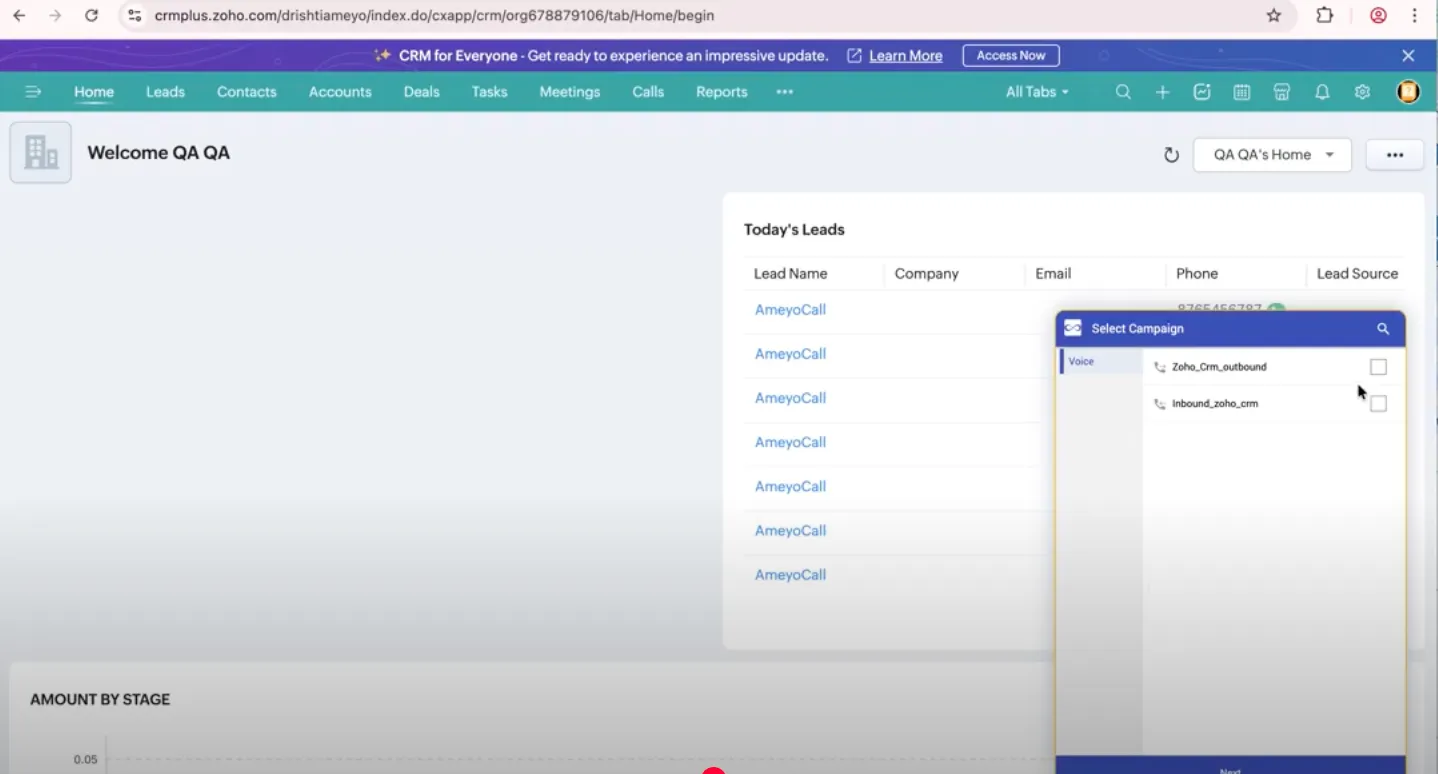
- Back in the Toolbar, a campaign list will load.
- Check the box next to your assigned campaign (e.g., Daha_crm_outbound).
- Click the arrow icon to proceed.
Step 5: Configure Extension
- Select an option: Choose your extension profile if webRtc is not enabled
- Phone Number: Enter the phone number for this session only if webRtc is not enabled.
- Click the arrow/submit button.
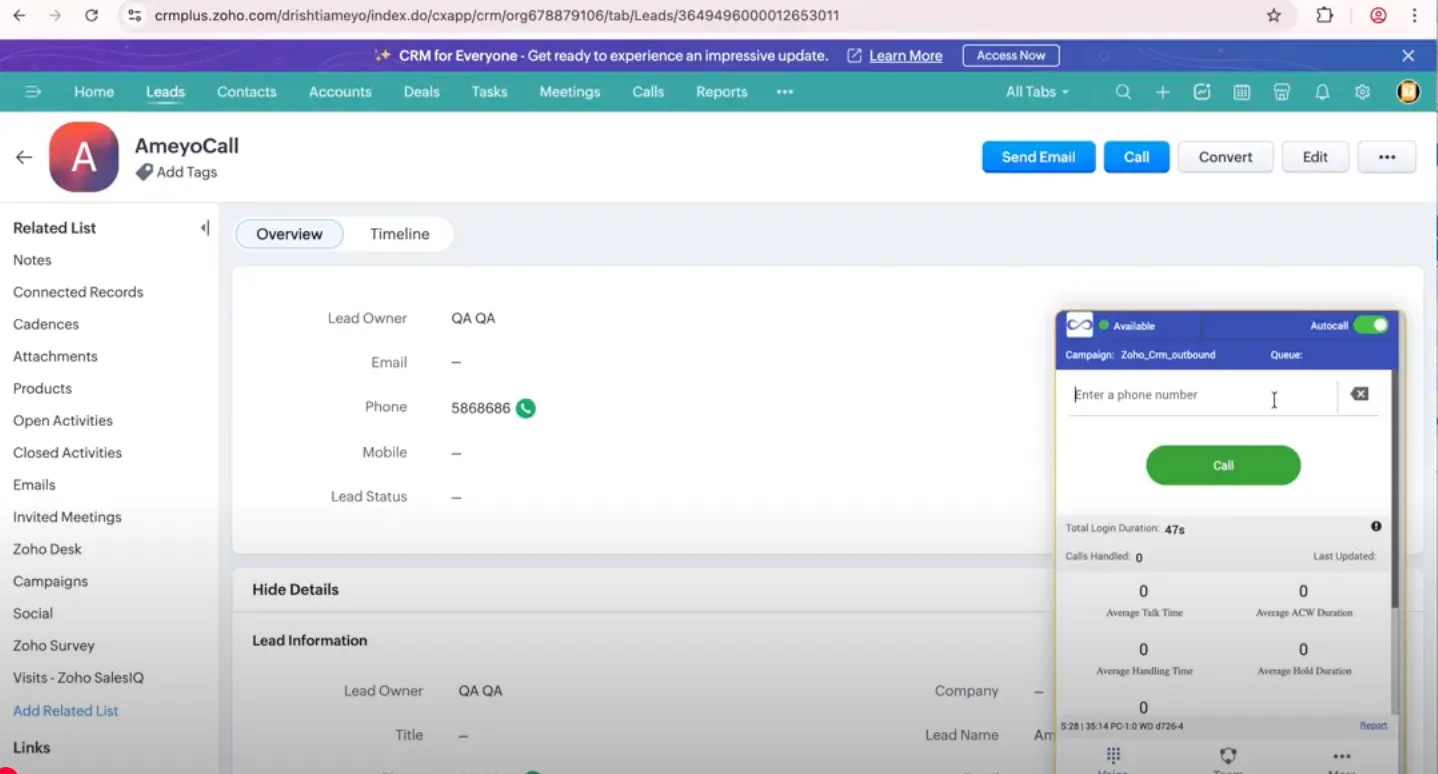
Step 6: Toolbar Active State
- You are now successfully logged in.
- The Toolbar displays your current status (e.g., Available) and call statistics.
- You can now use the dialer input box to initiate calls.
Managing Calls via Ameyo Toolbar
Objective: Learn how to dial numbers, manage active calls, and correctly dispose of call records after hanging up using the Ameyo Toolbar in Zoho CRM.
Step 1: Call Handling
Ensure your status in the Toolbar is set to Available for auto Calls.
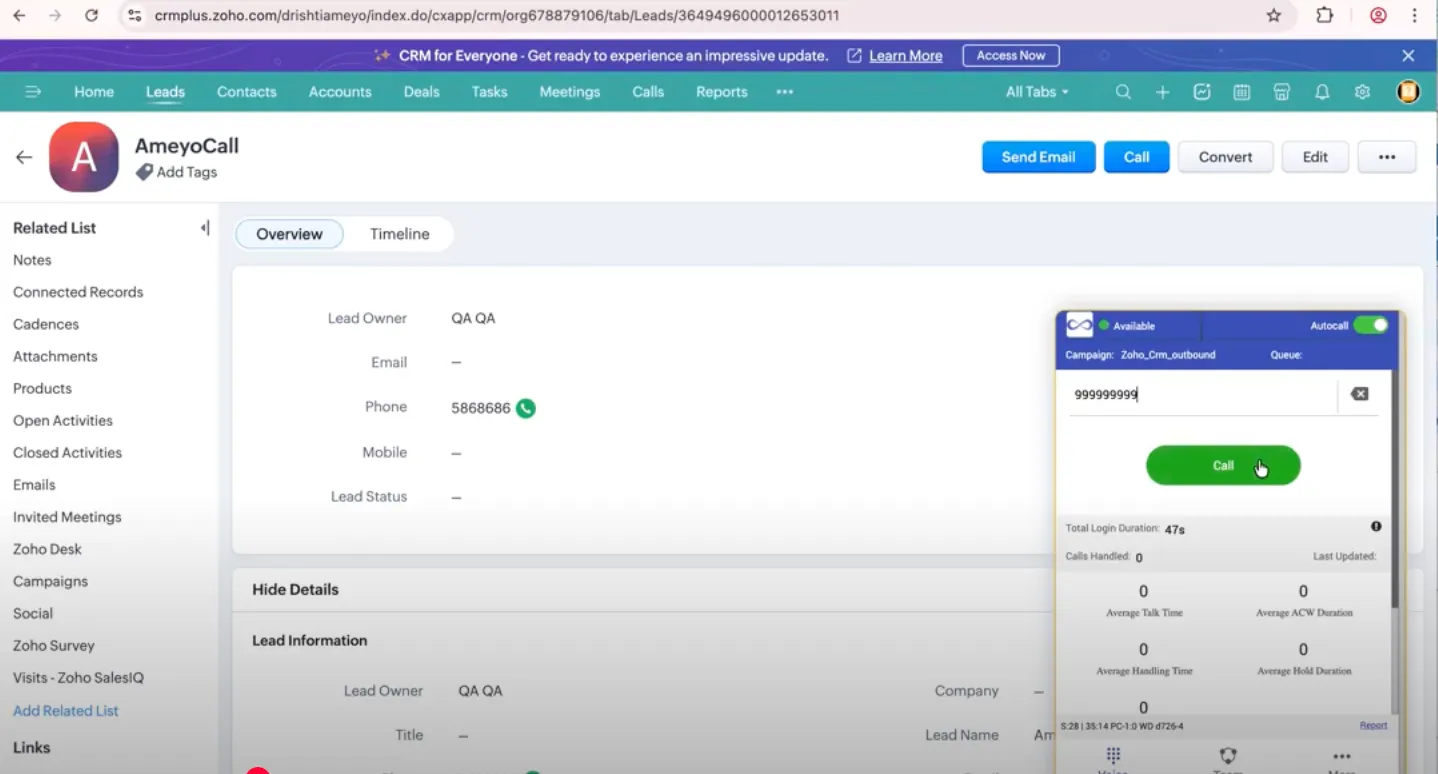
Scenario A: Initiating an Outbound Call
- Enter Number: In the Toolbar input field, type the customer's phone number (e.g., 9999999999).
- Dial: Click the green Call button.
- Connect: Your extension will trigger to connect the audio line.
Scenario B: Receiving an Inbound Call
- Notification: When a call arrives, your extension (webRtc / phone) will get a call.
- Answer: Accept the call via your extension or the answer button on the Toolbar (if configured).
- CRM Pop-up: The CRM will automatically pull up the customer's record if the phone number matches an existing Lead or Contact.
During the Call & Termination
- Active State: While talking, the Toolbar status updates to indicate you are "Busy" or "On Call."
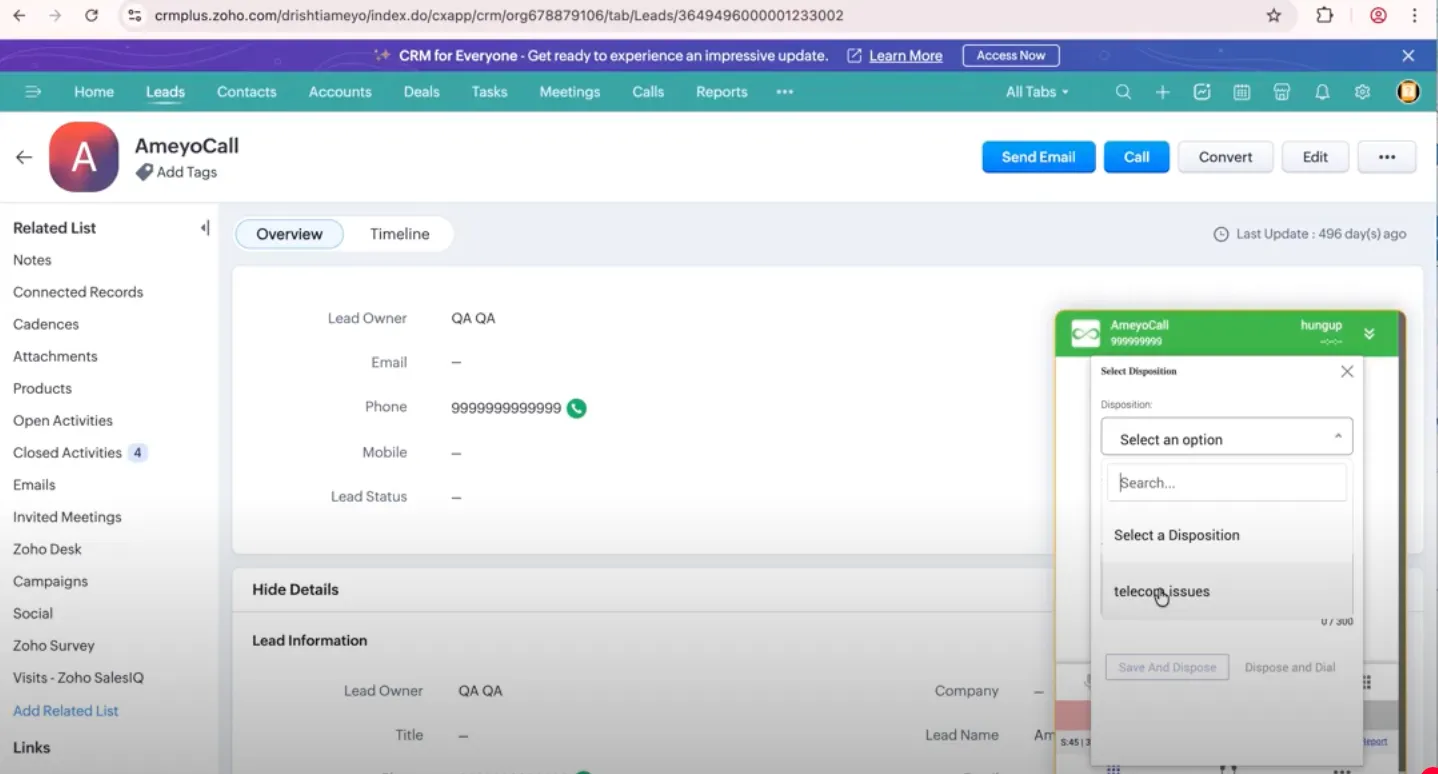
- End Call: To finish the conversation, click the red Hangup button on the Toolbar or the end-call button on your softphone.
- Post-Call: Proceed immediately to the Disposition window to categorize the call
Step 3: Associate Contact Record
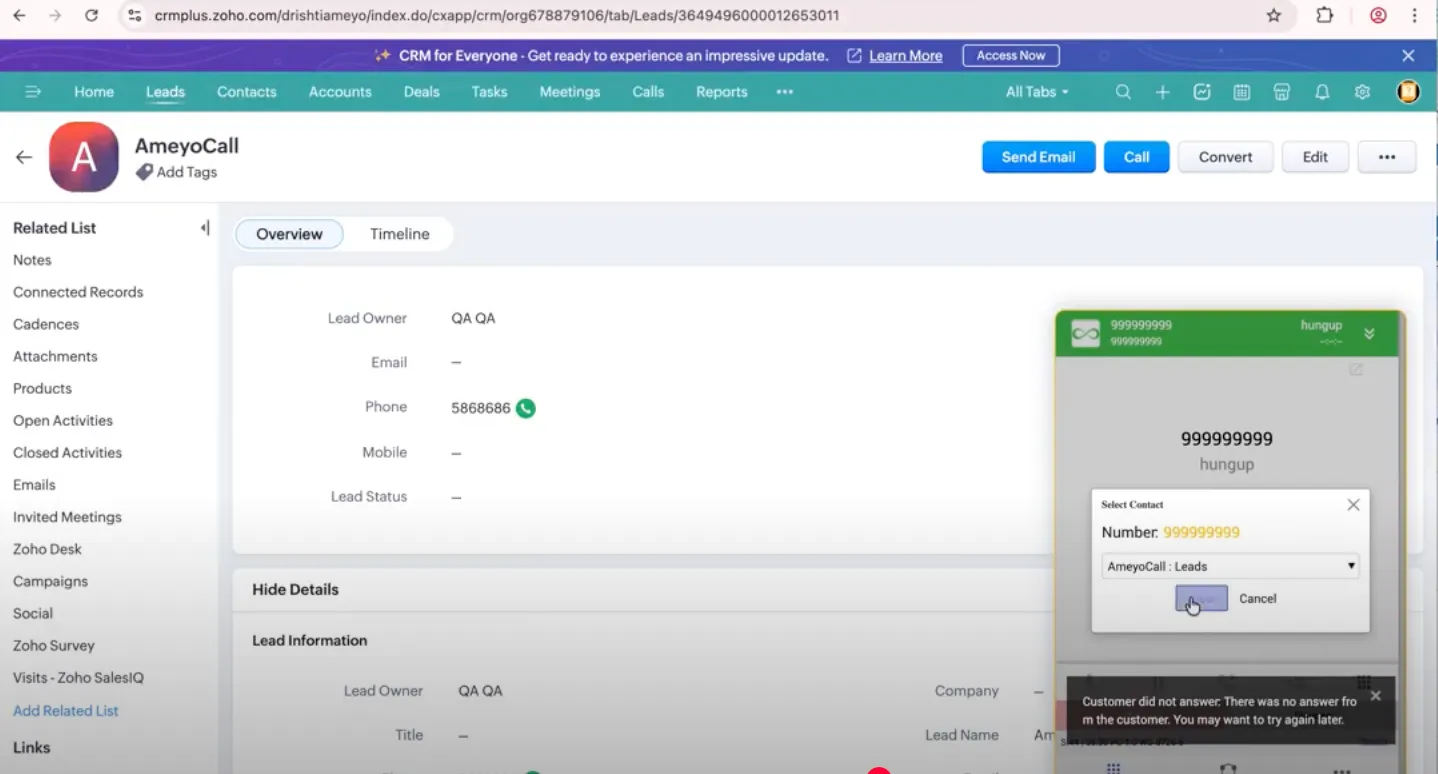
- Immediately after the call ends, a "Select Contact" pop-up may appear if the number matches a record in Zoho CRM.
- Confirm the correct Lead or Contact is selected.
- Click View to open the customer's record details or Cancel to proceed without viewing.
Step 5: Return to Available State
- Once the disposition is saved, the Toolbar automatically resets.
- Your status returns to Available, making you ready for the next call.
- The Calls Handled counter will increment to reflect the completed call.
Have a question?
Our knowledgeable support team and an awesome community will get you an answer in a flash.
To ask a question or participate in discussions, you'll need to authenticate first.