Zoho Desk App Creation and Installation Guide
12 min
Overview
This document serves as a guide to configure (for the 4.7 release and above) the Zoho Widget App at Zoho application's end. Please follow all the steps for the configuration given below.
Usage Instructions
Step 1. Create Zoho Desk Account:
- Go to https://www.zoho.com and select Desk.
- Sign up, fill in the required details, and validate the account via used email Id.
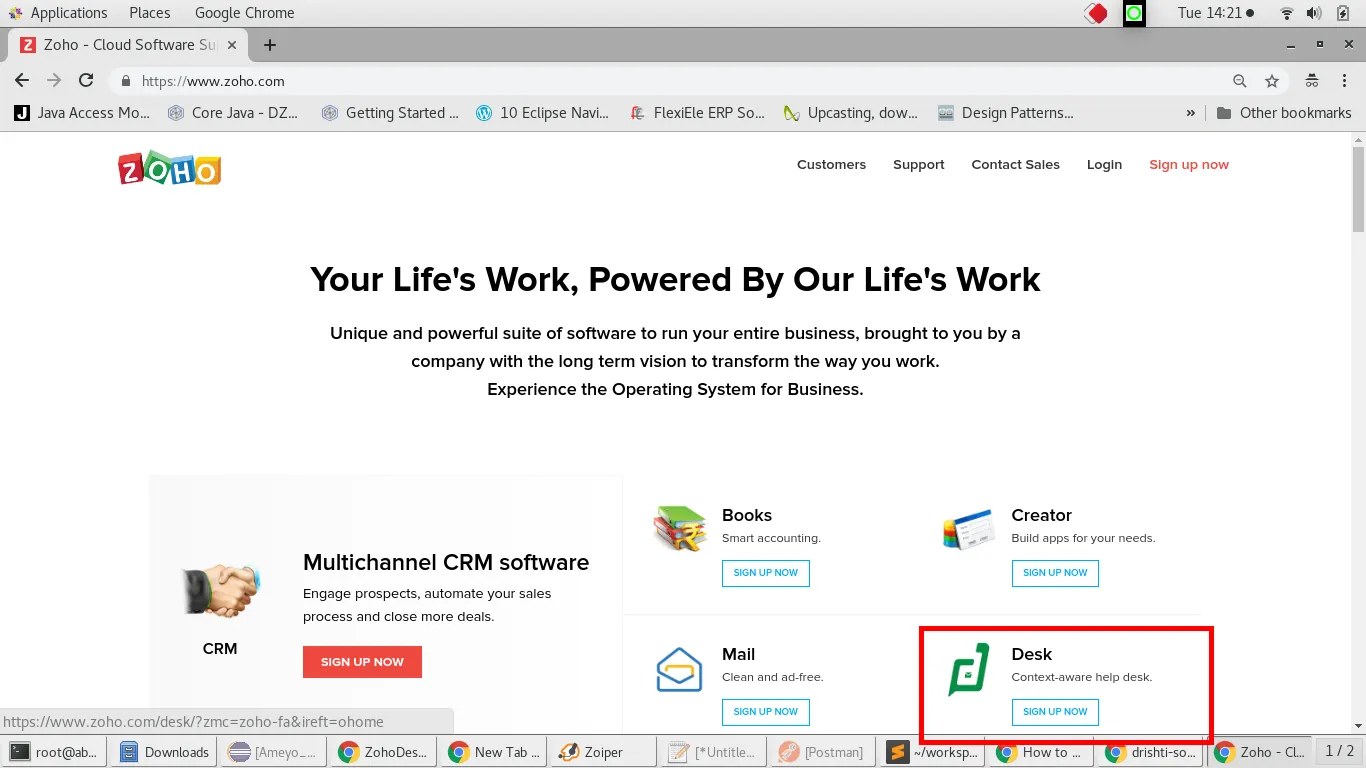
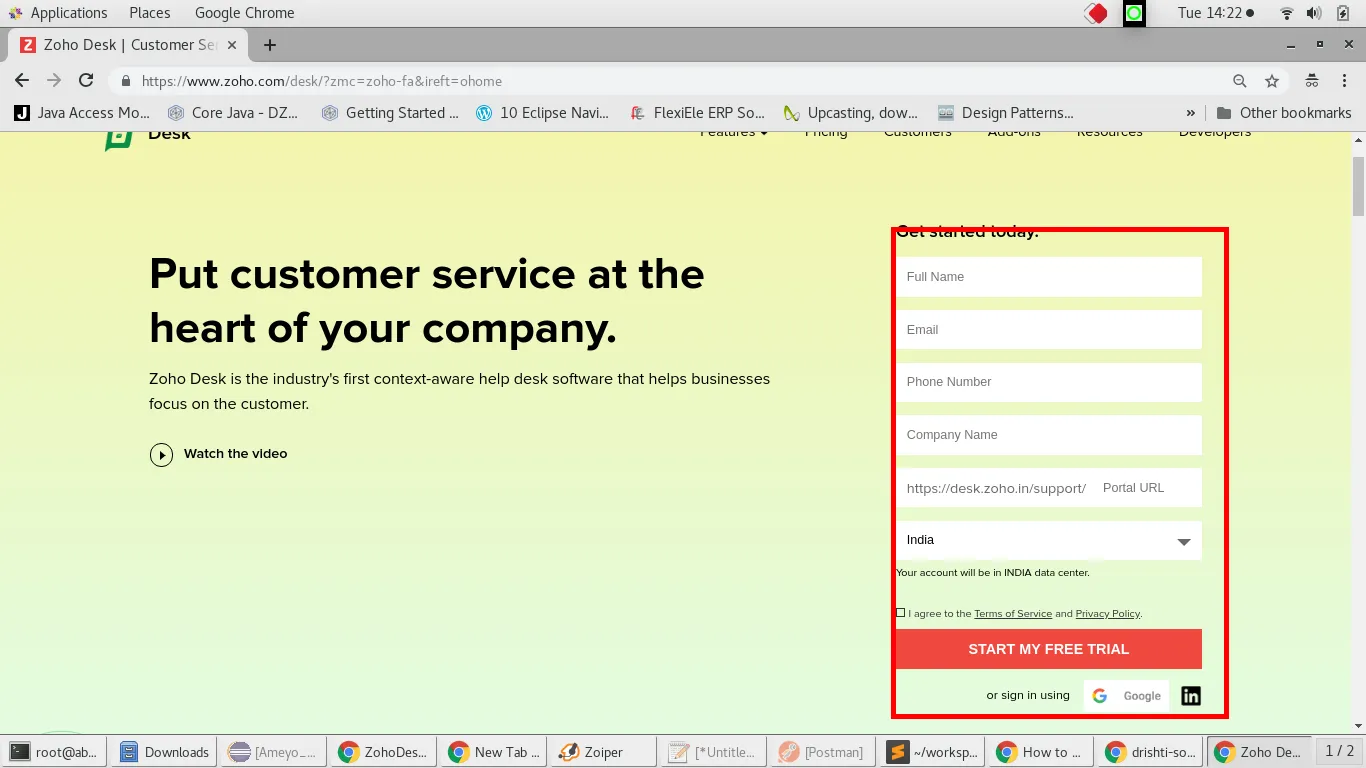
Step 2. Uploading Private App
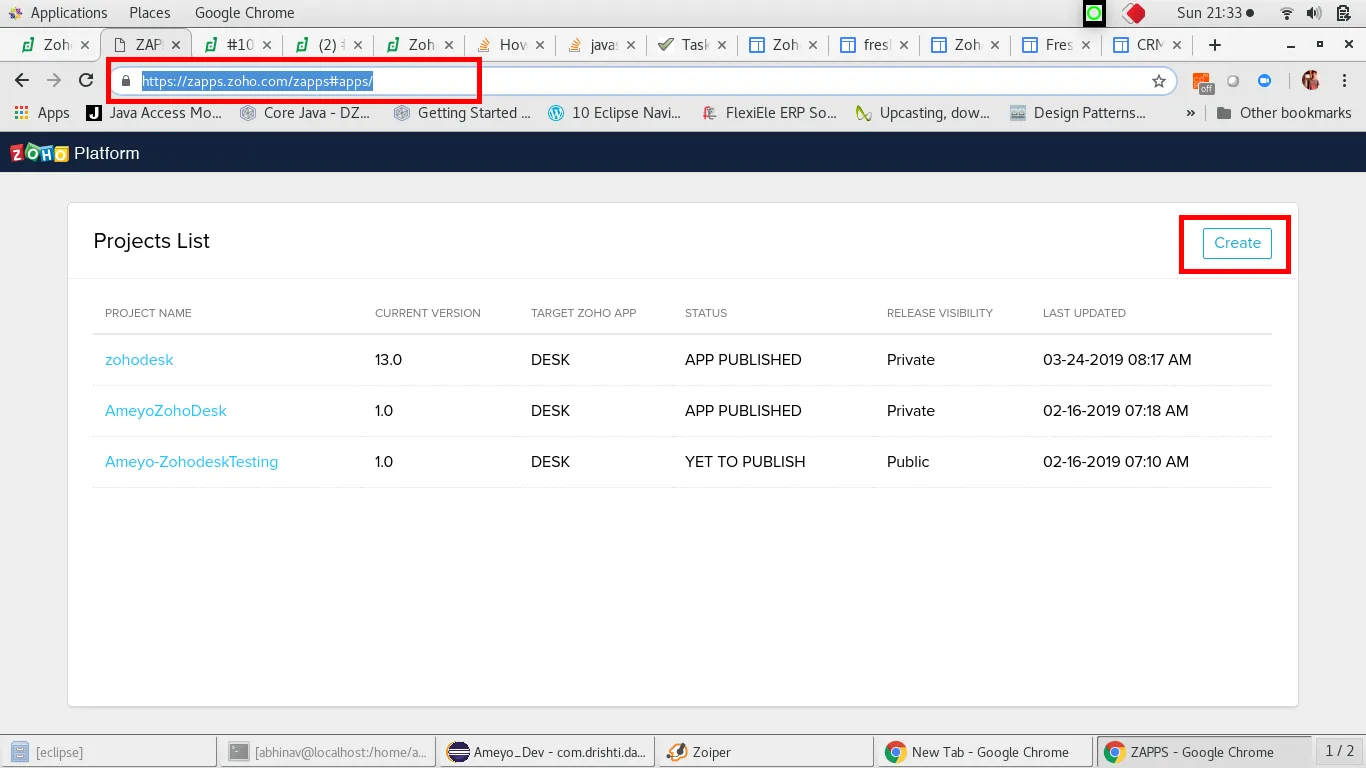
- Goto zohodesk app page https://zapps.zoho.com/zapps#apps
- Click on Create Button
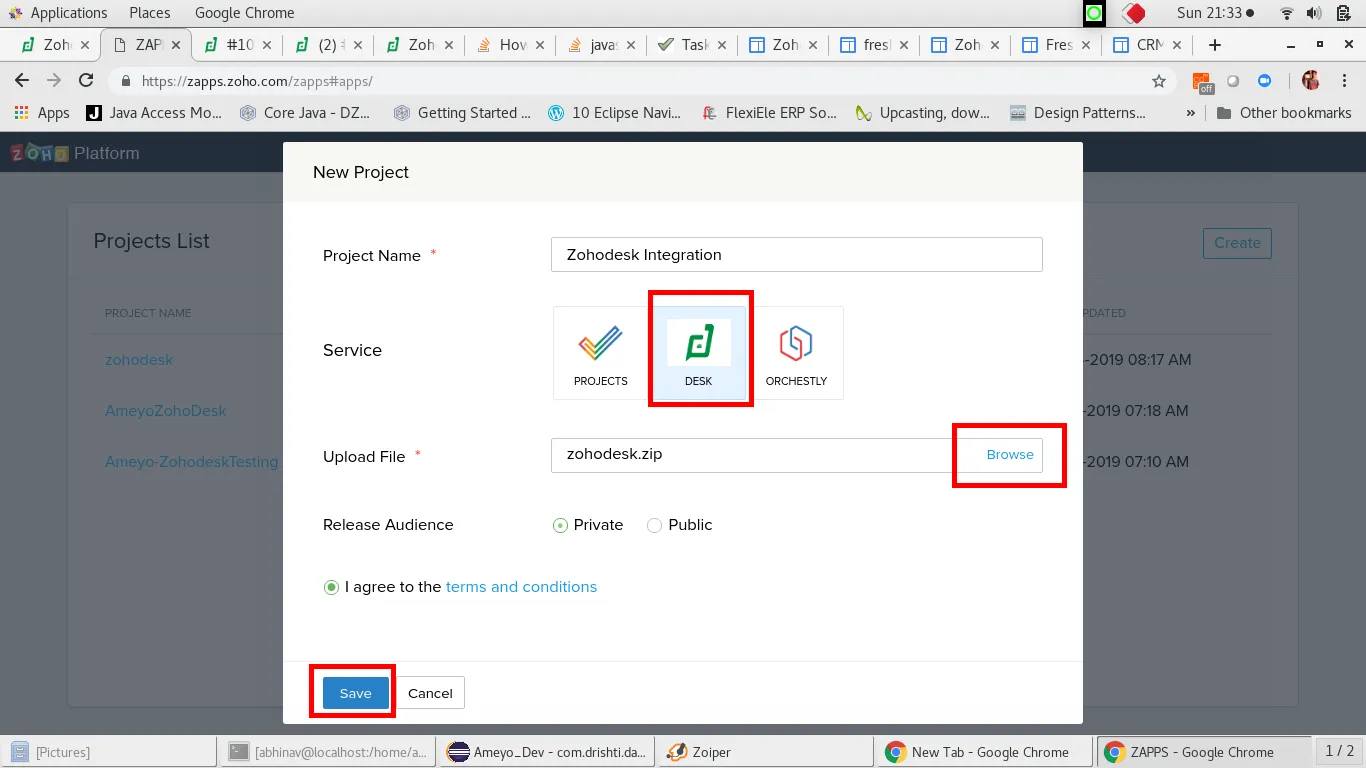
- Upload the Zohodesk App(attached Zip)- ameyo.zip, Select Desk, agree the agreement and click on save button
- Click on the App you uploaded from the list, and than click on Installation link.
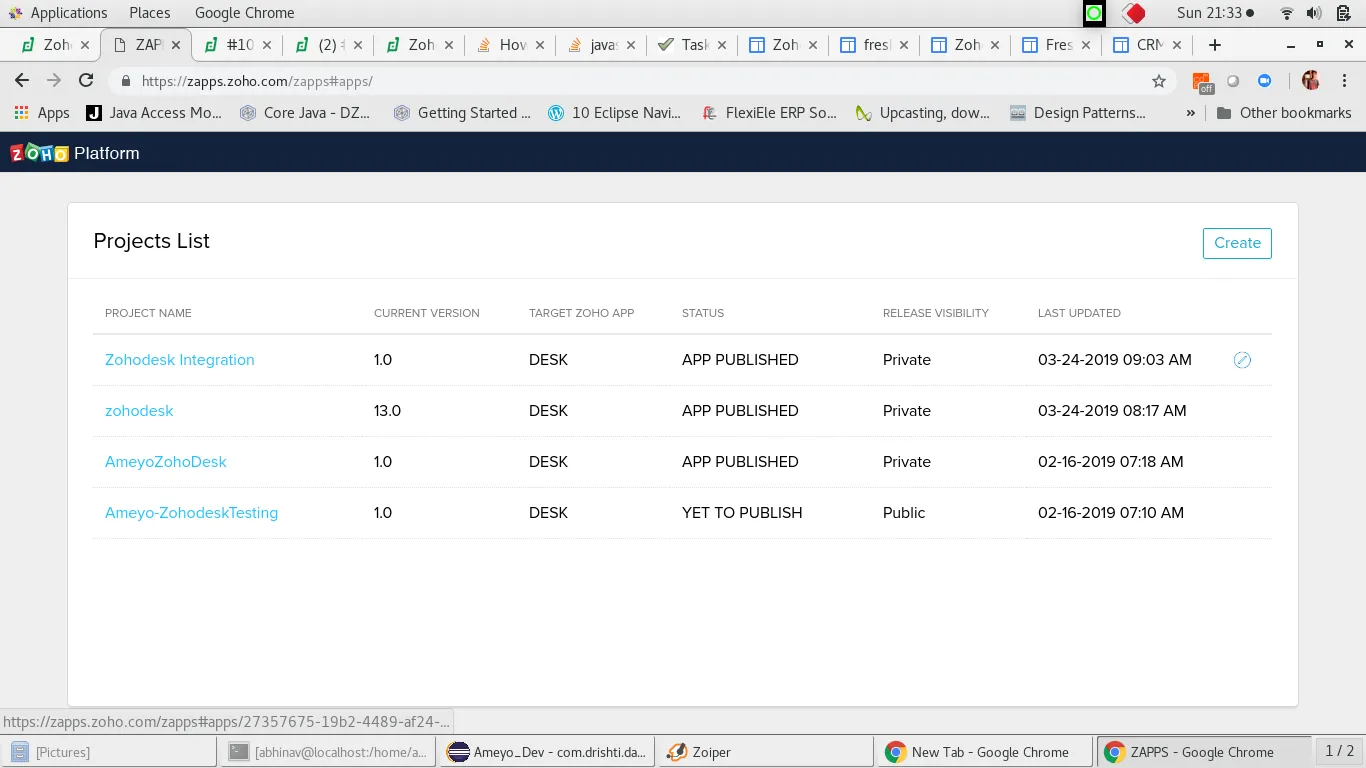
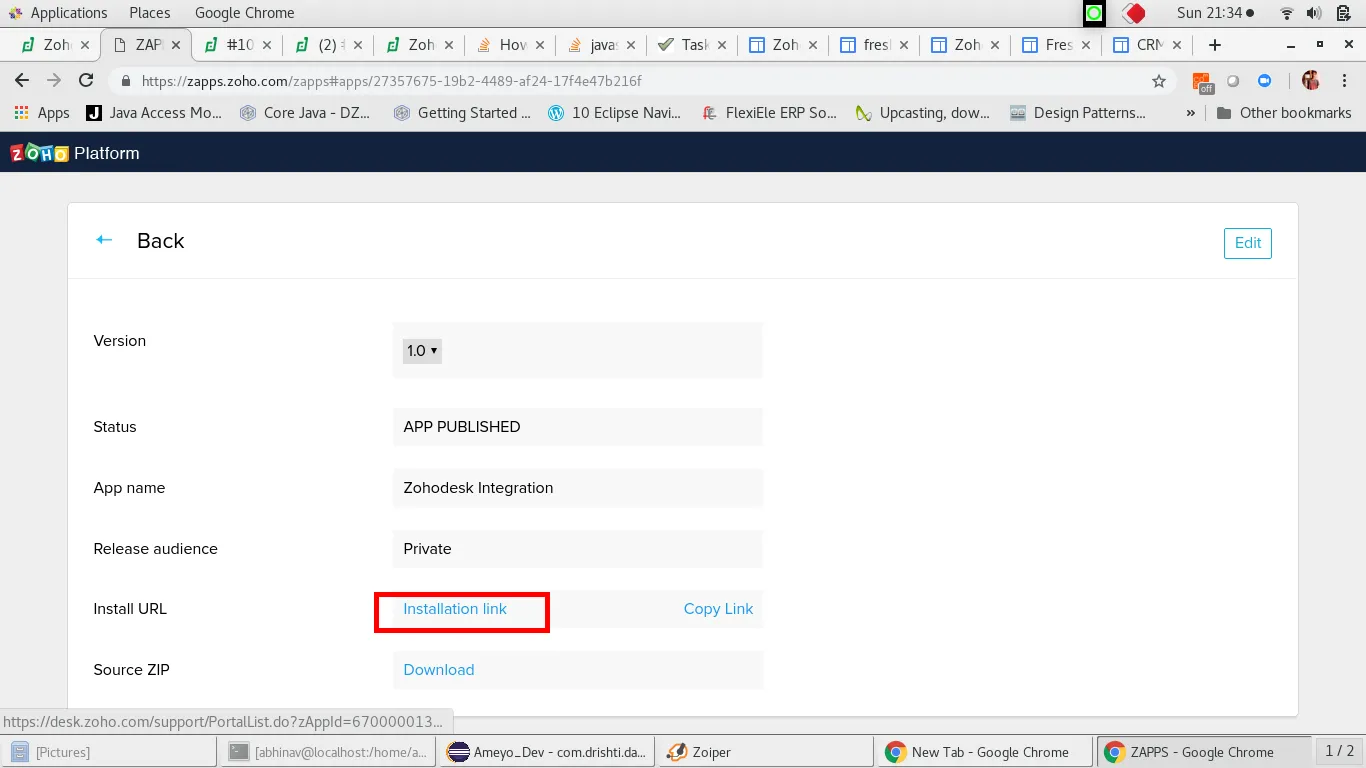
- Select Profile, agree the agreement and Install the app.
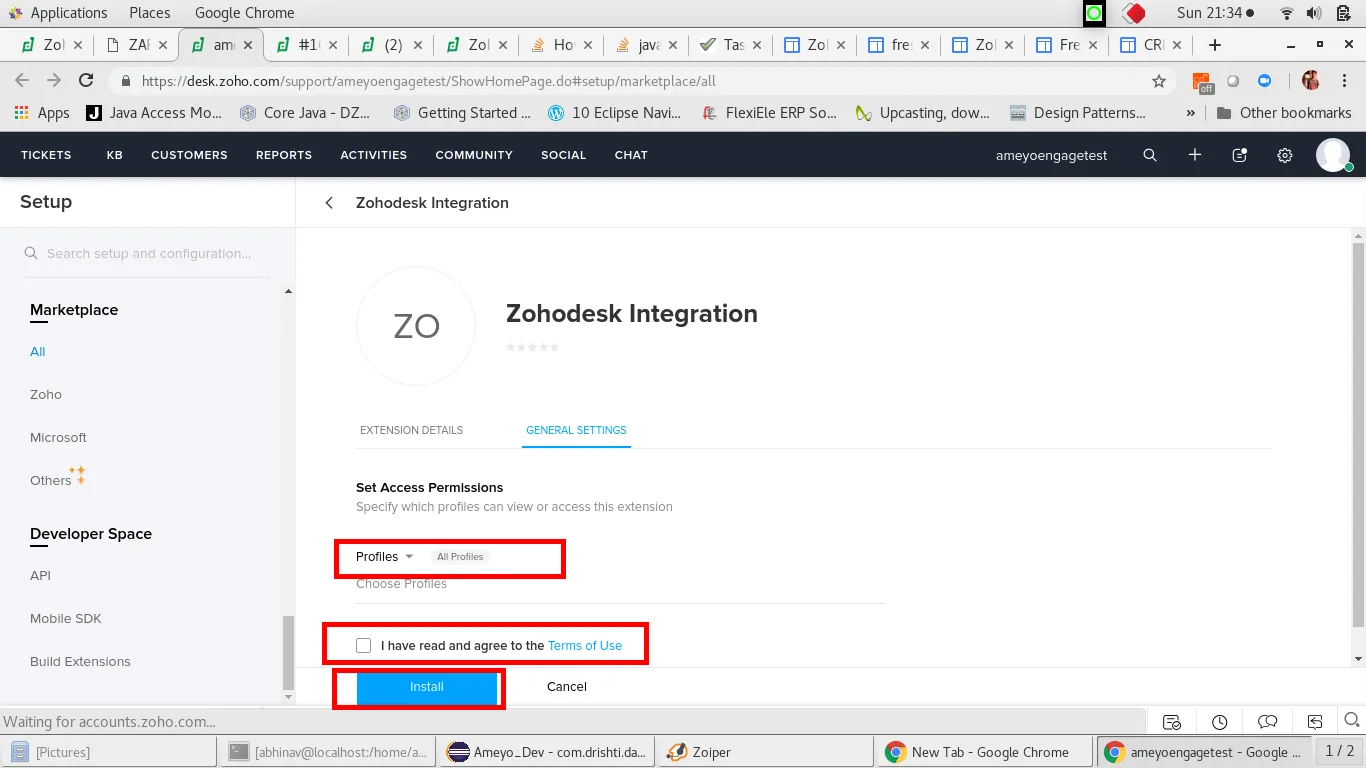
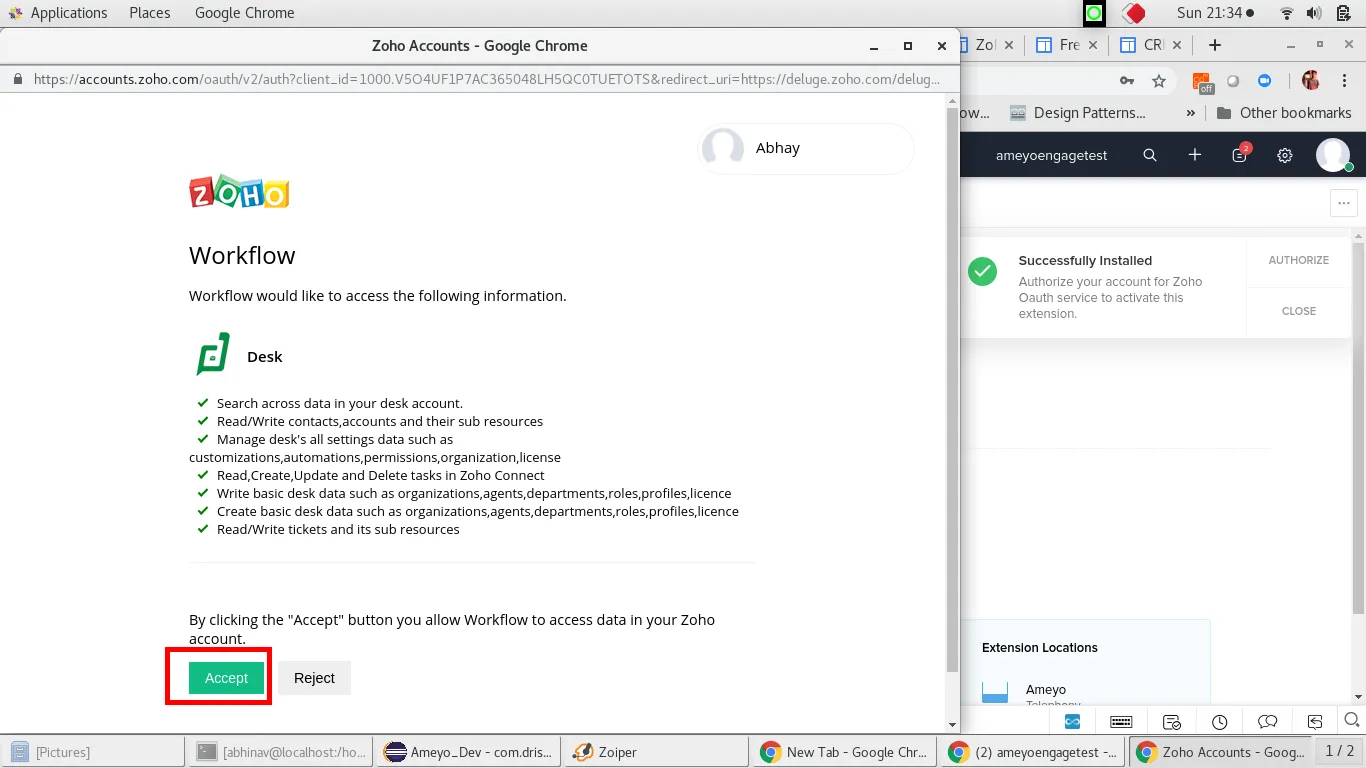
- After Installation you will be asked to authorize the app. Click on Authorize Button.
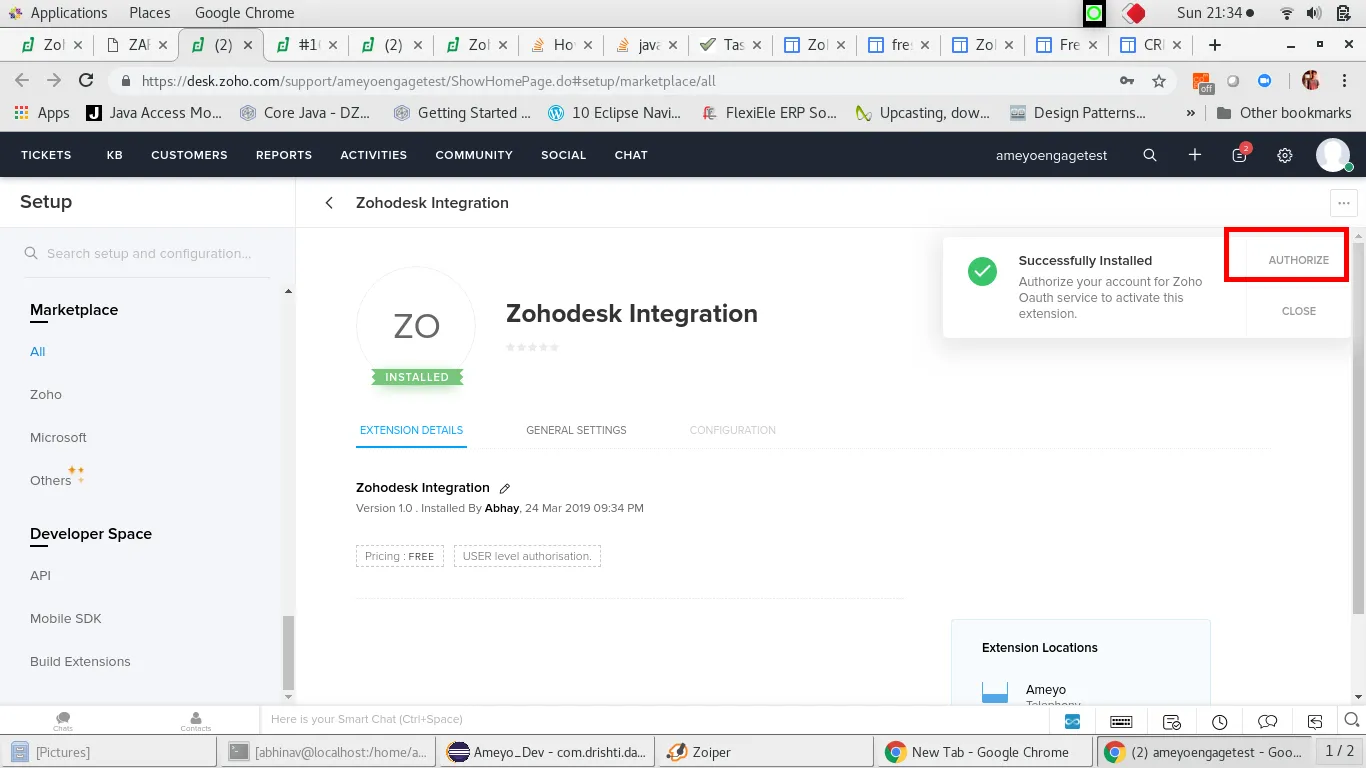
- Click On Accept Button
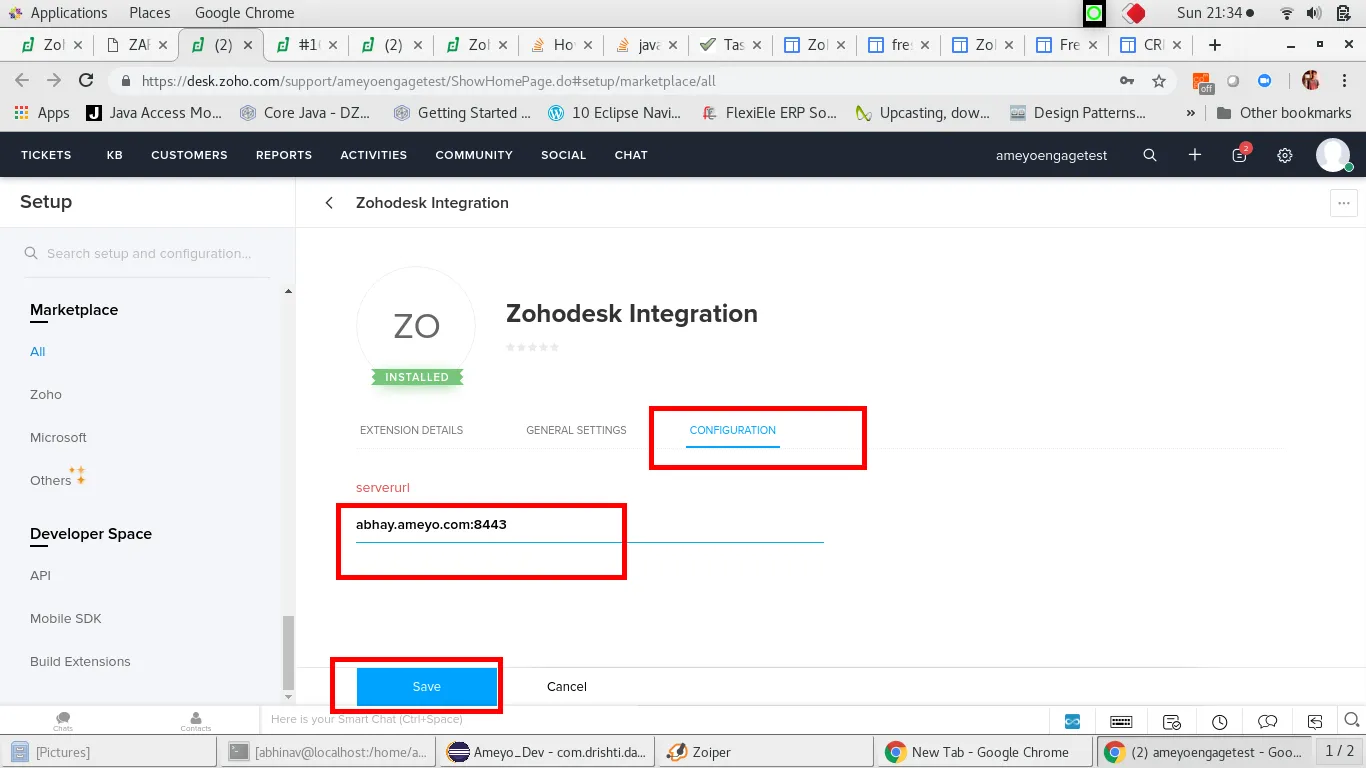
- Click on Configuration tab and enter your Ameyo Server URL. And Save the configuration.
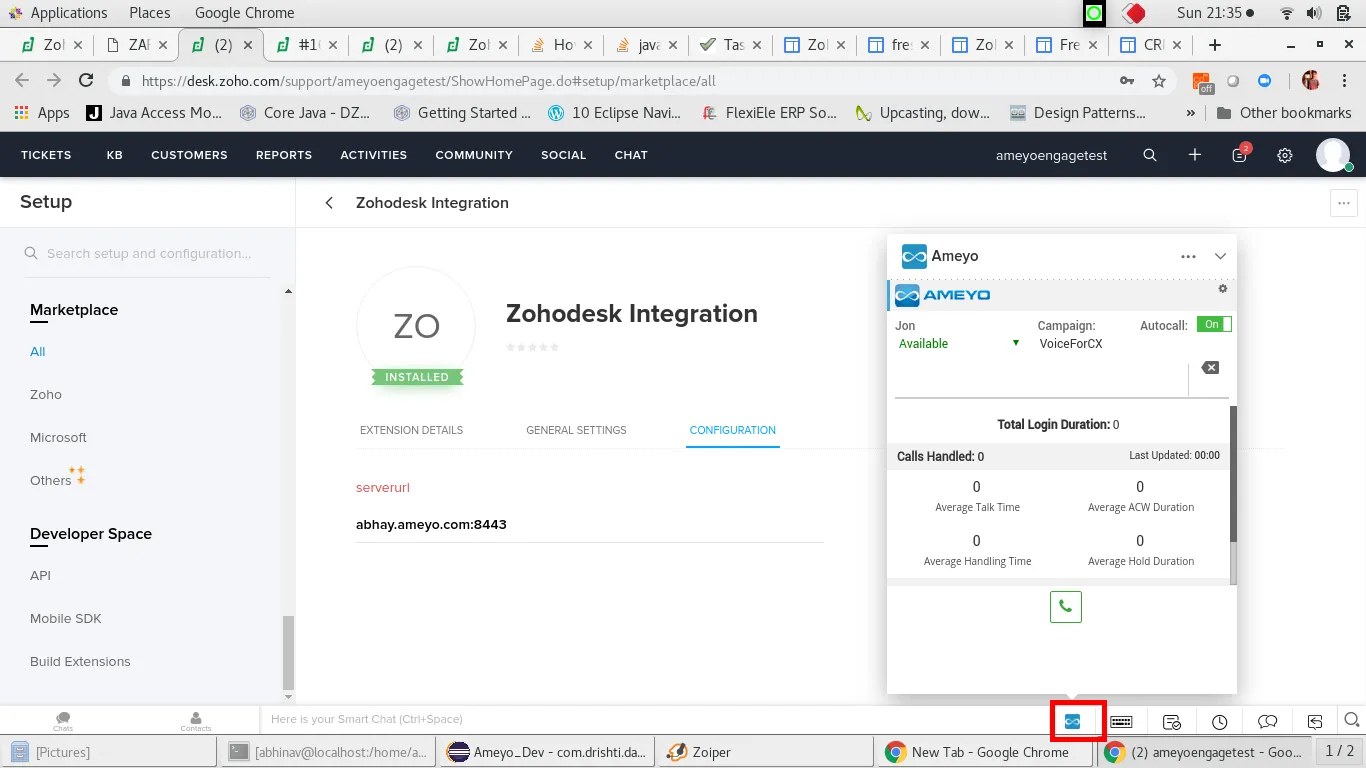
- Hurray!!! You have successfully installed the Zohodesk App. Now you can access ameyo toolbar by clicking on Ameyo Icon at the right bottom.
Step 3. Create Custom Fields in Zoho Desk:
- Log in to Zoho Desk as an administrator.
- Click the Setup (gear) icon.
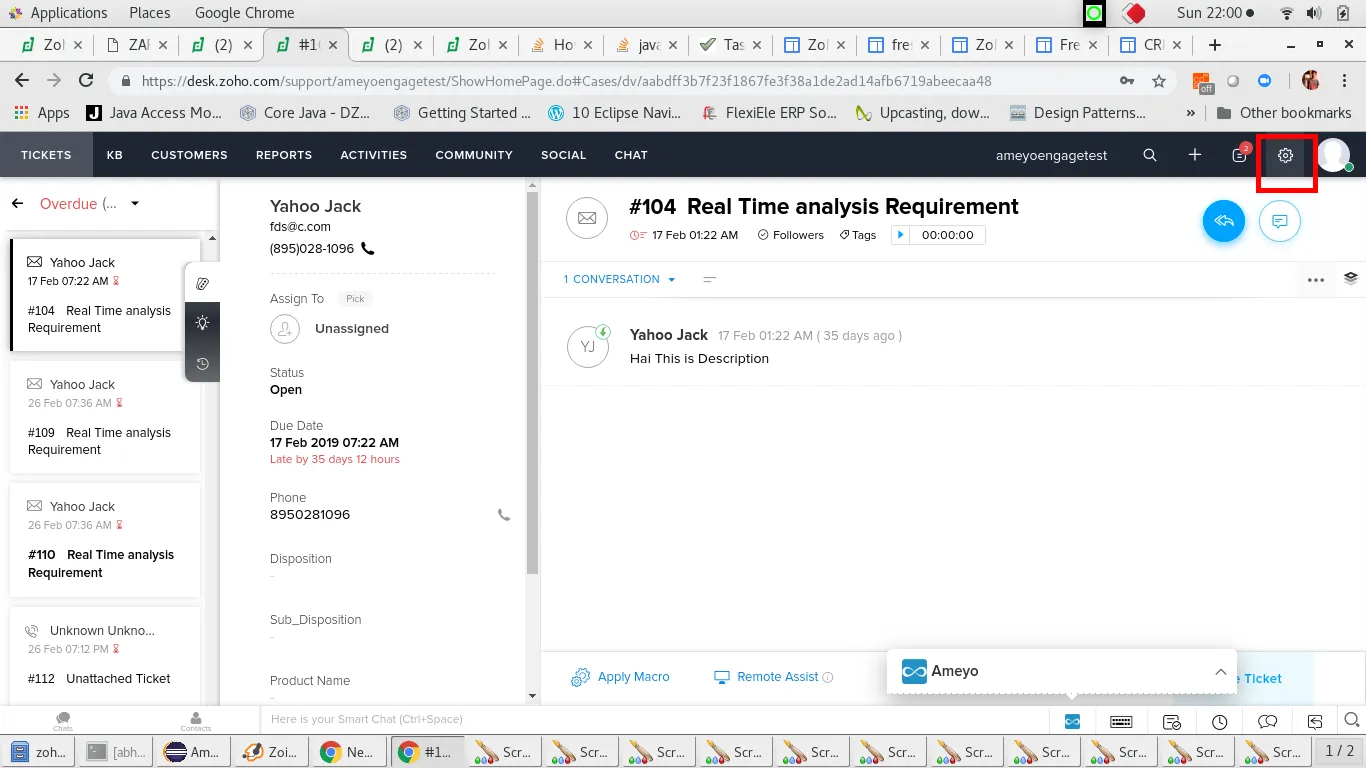
- Navigate to Customization > Layouts and Fields.
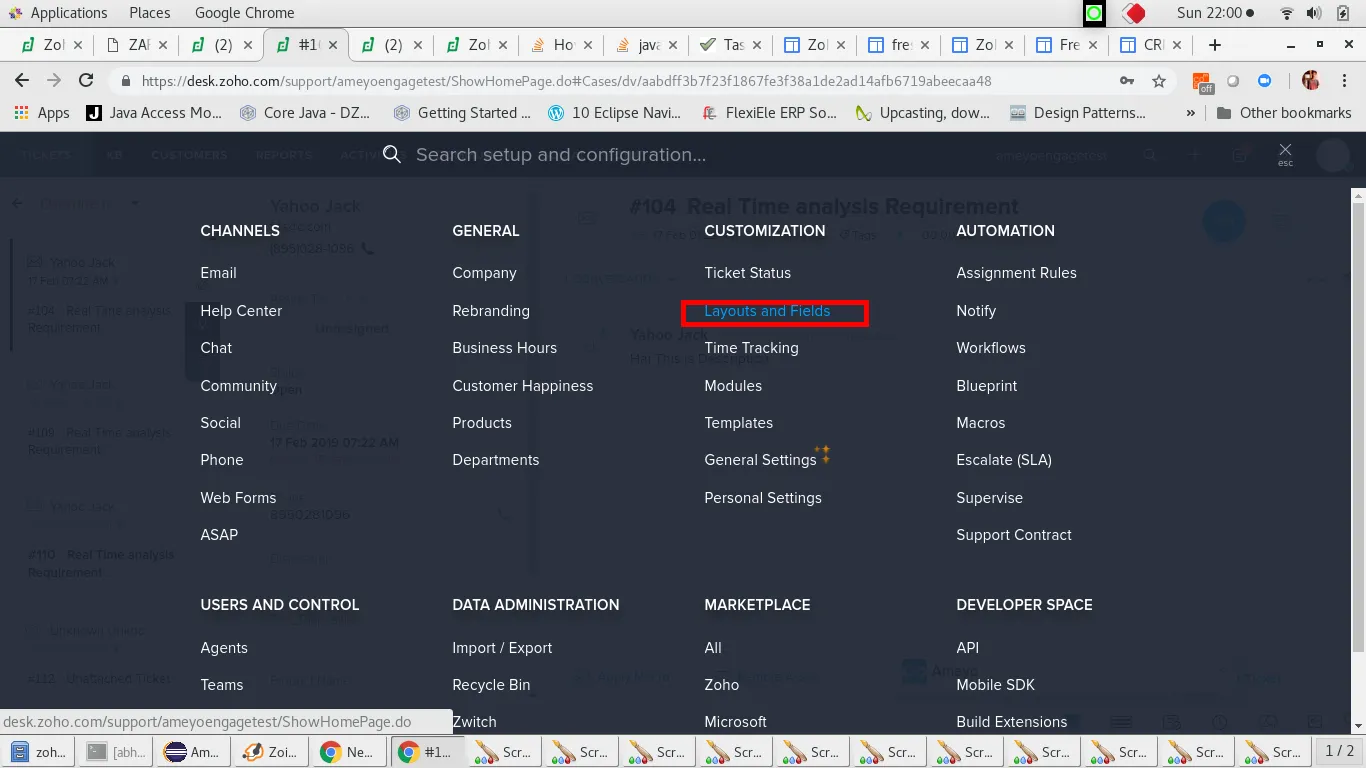
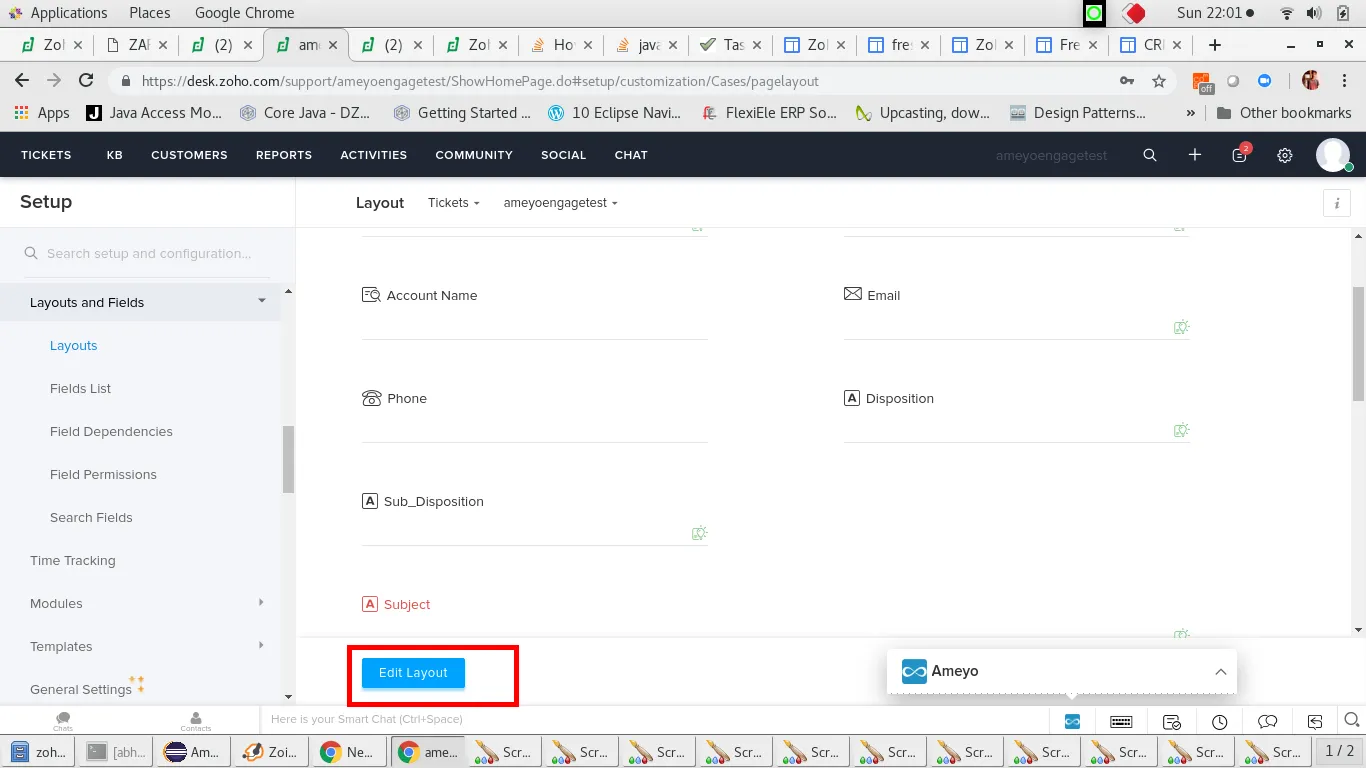
- Select the Calls module layout and click Edit Layout.
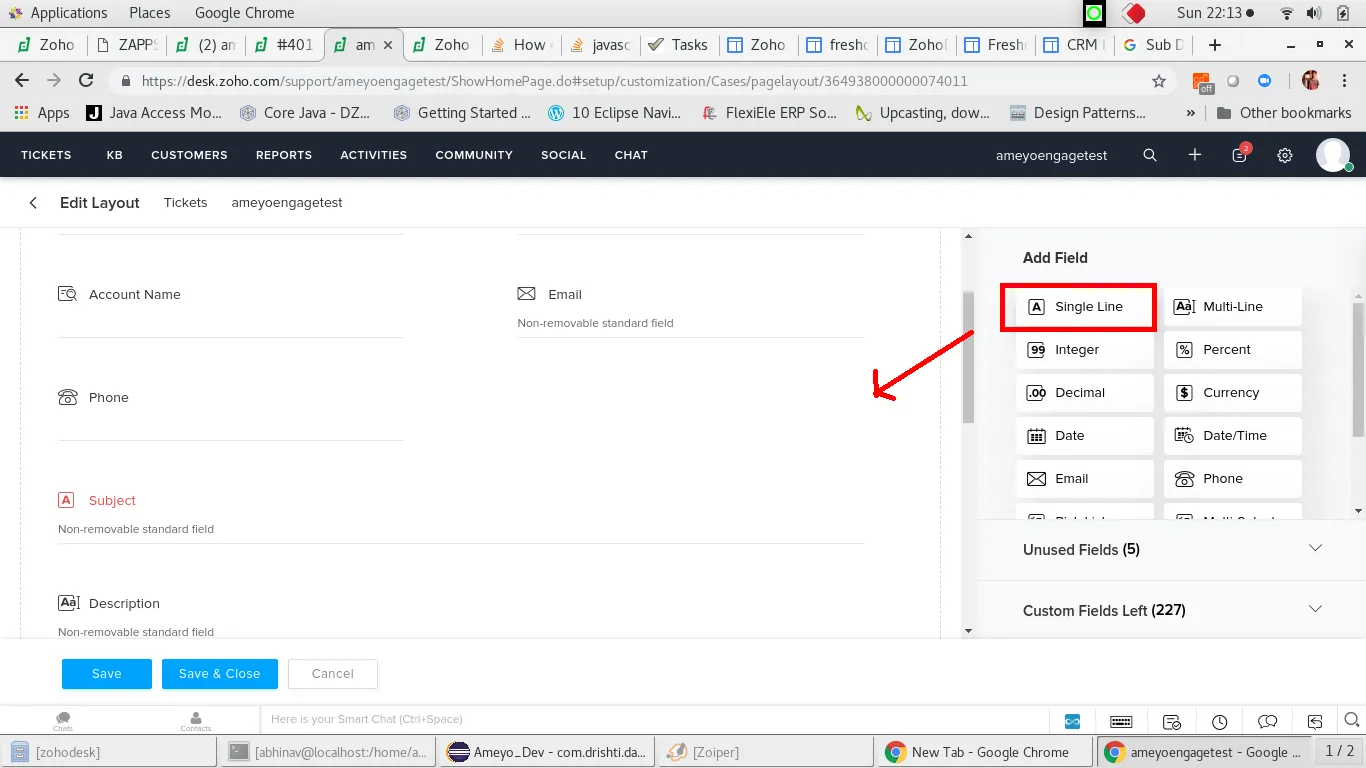
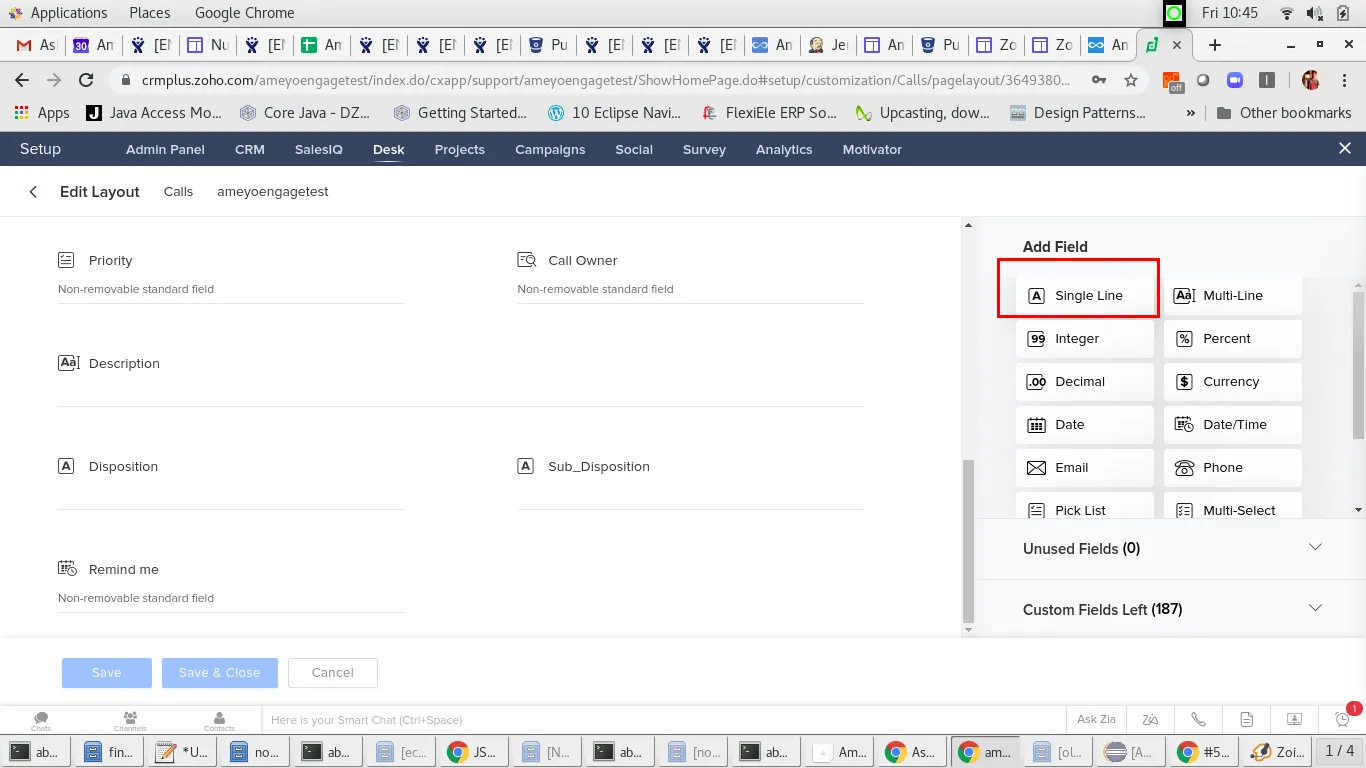
- Drag and drop the Single Line field on the left side. Enter the Details and than click on ADD/UPDATE button.
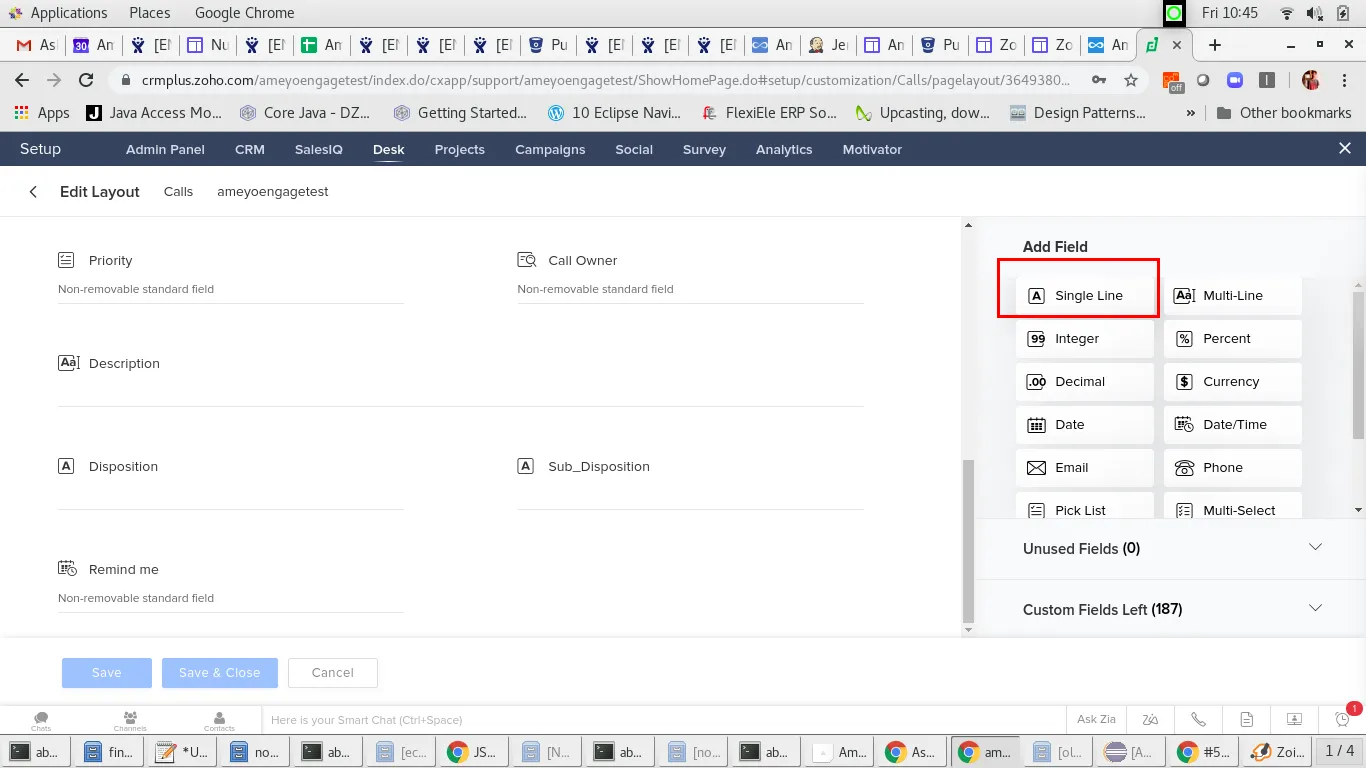
- Create the following two custom fields:
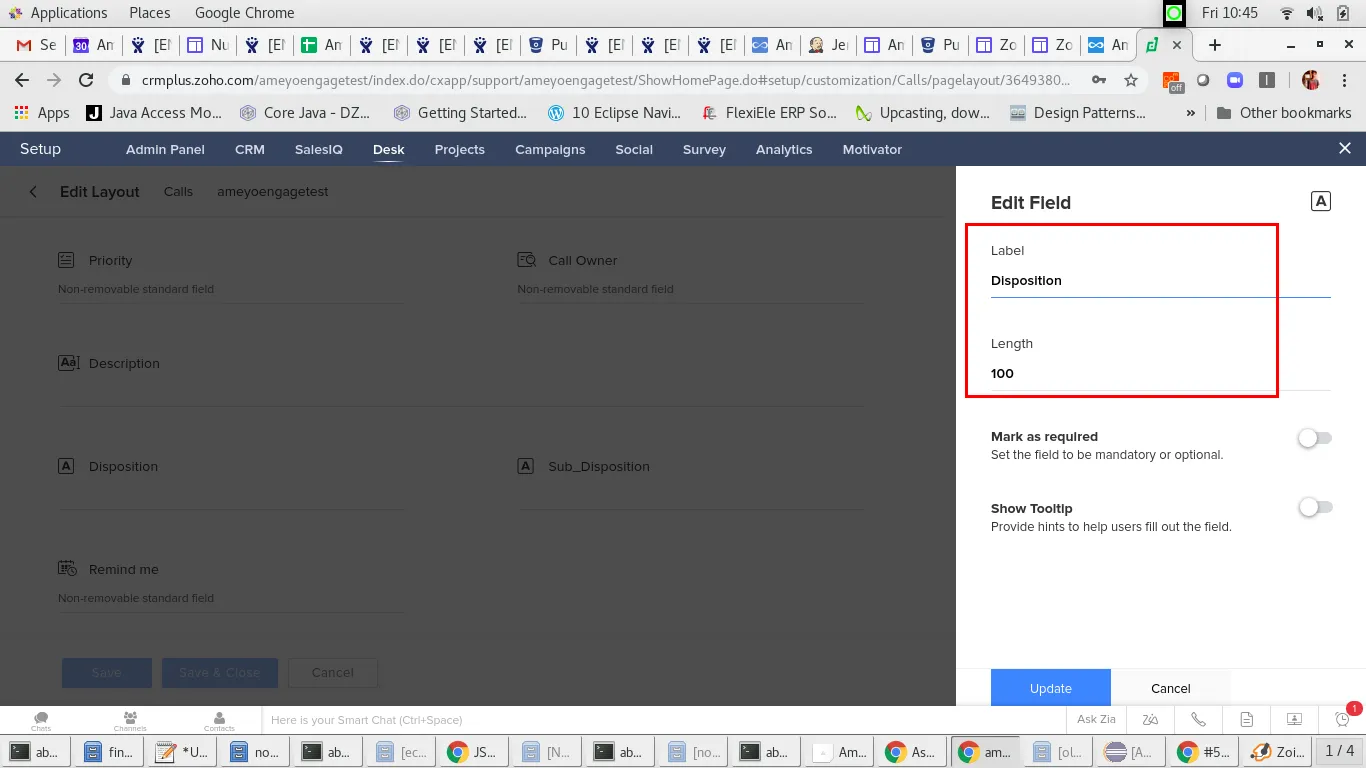
- Field 1: Label: Disposition, Length: 100
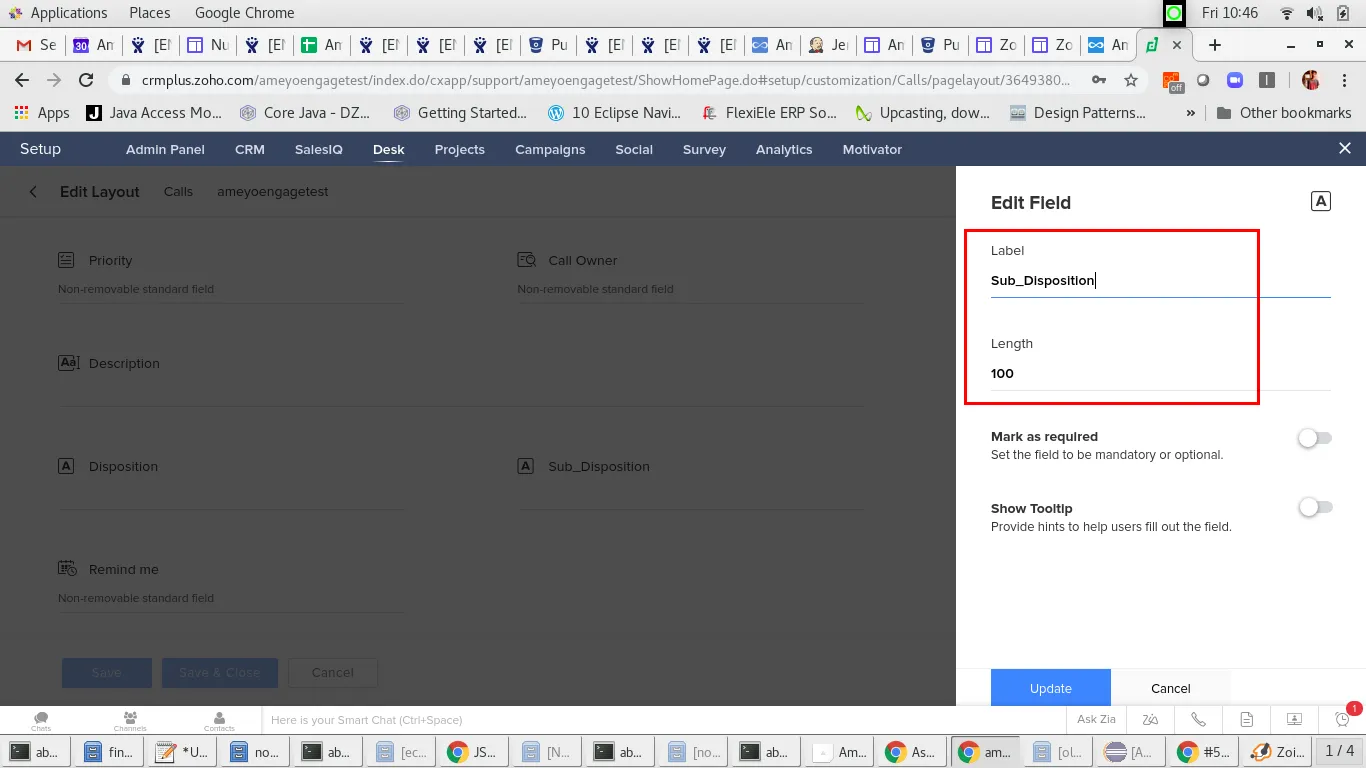
- Field 2: Label: Sub_Disposition, Length: 100
- Click ADD/UPDATE after configuring each field.
- Click Save and Close on the layout editor.
Using these exact labels is crucial for data dumping to work correctly.
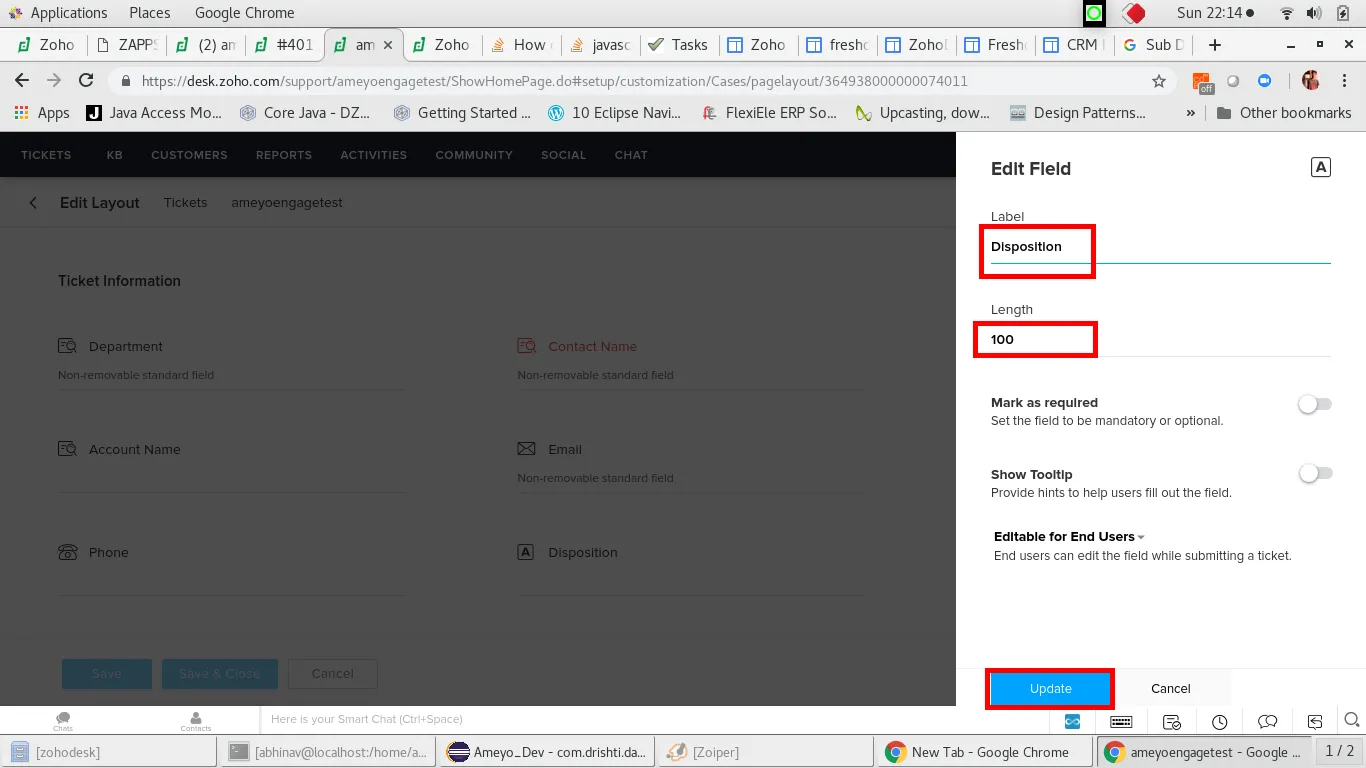
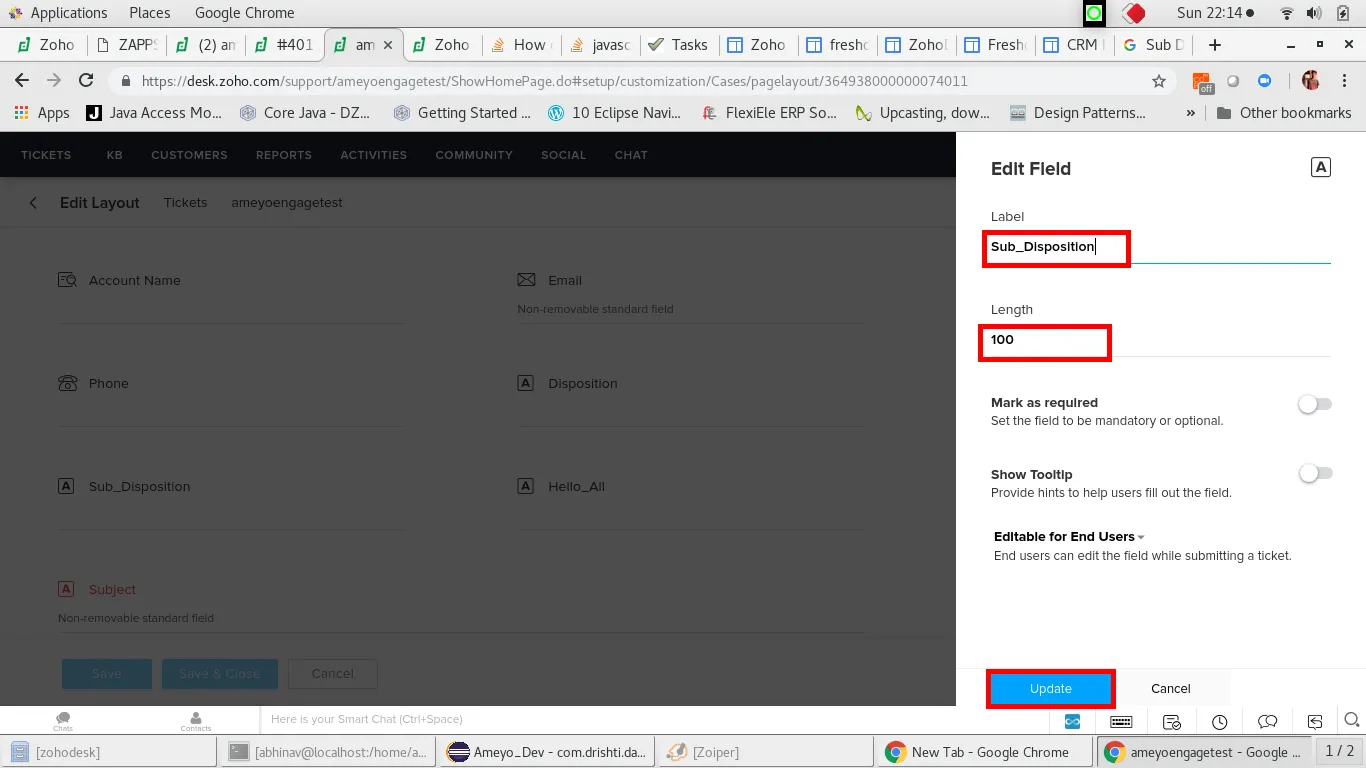
In Release 4.7 and above make these custom fields for Calls Module.
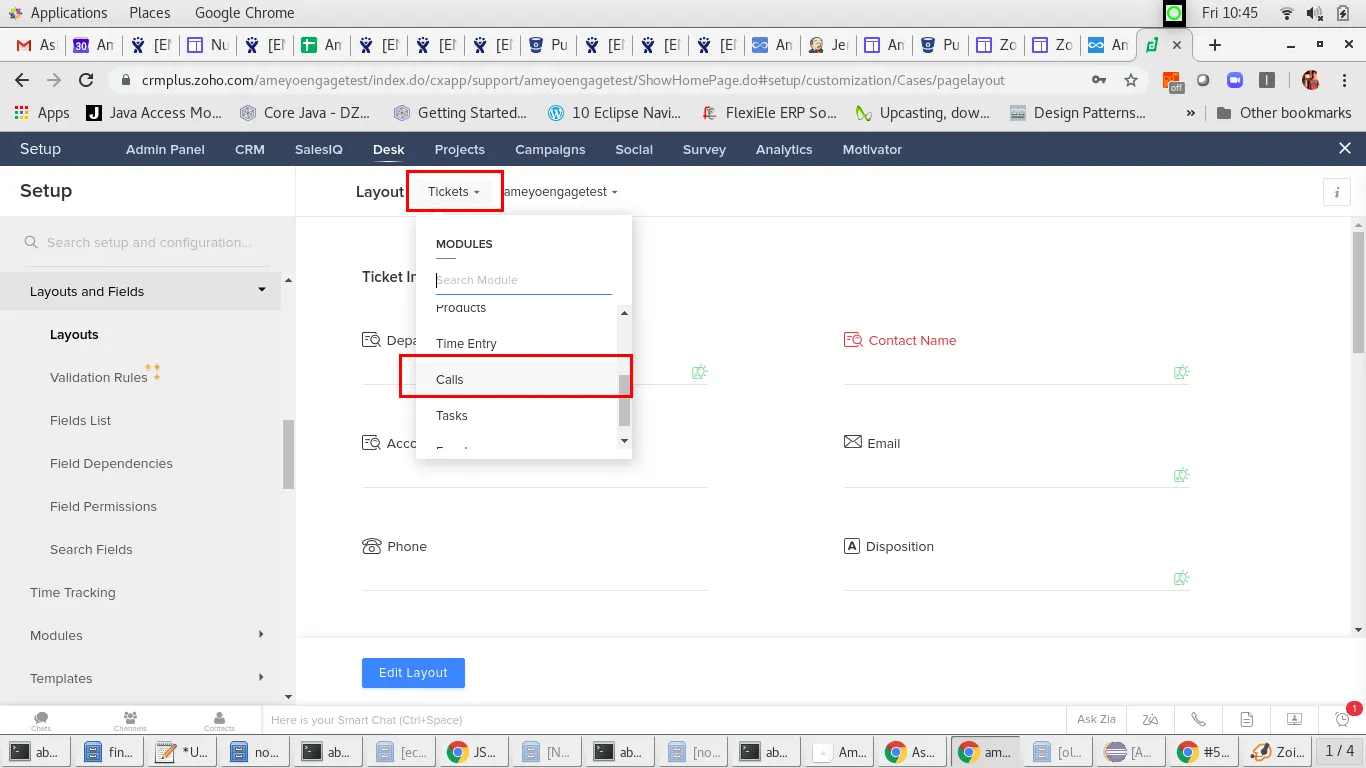
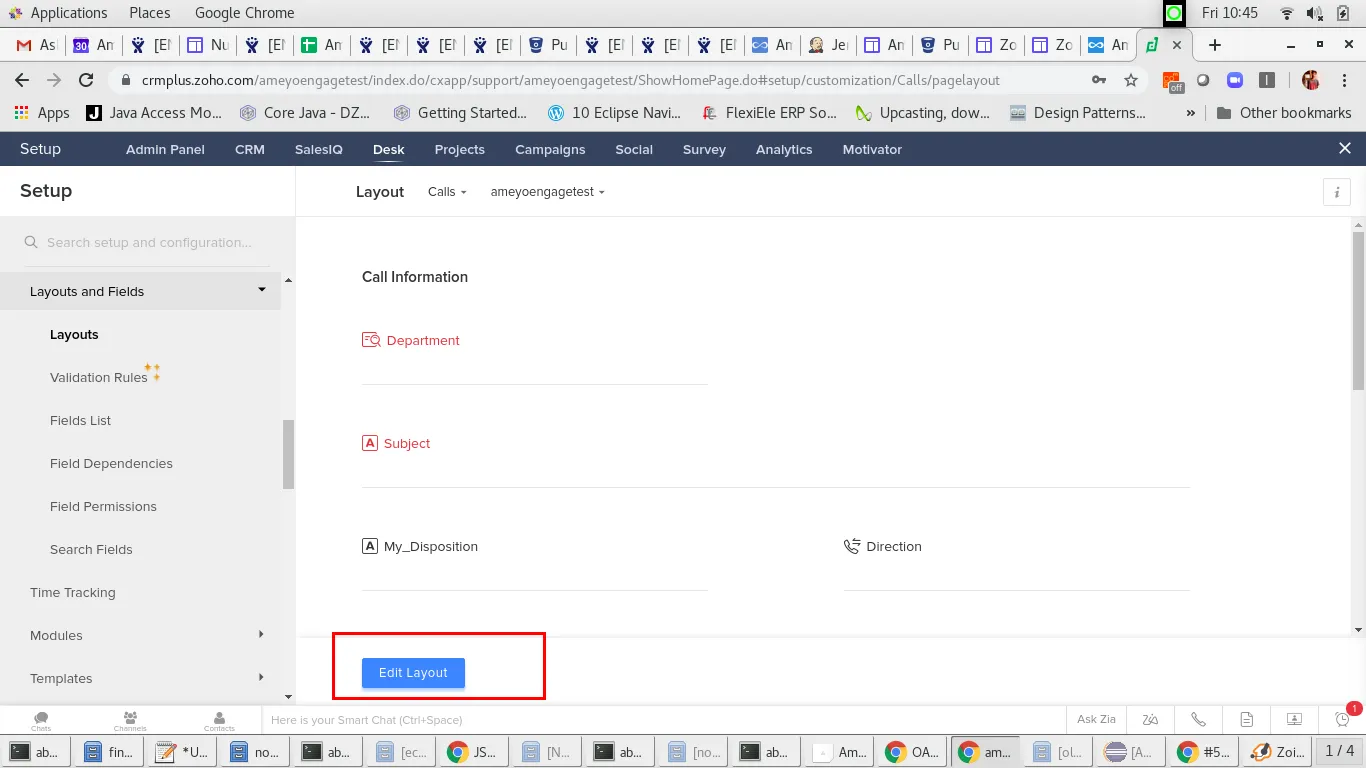
Step 4. Configure Zoho Developer Console for OAuth:
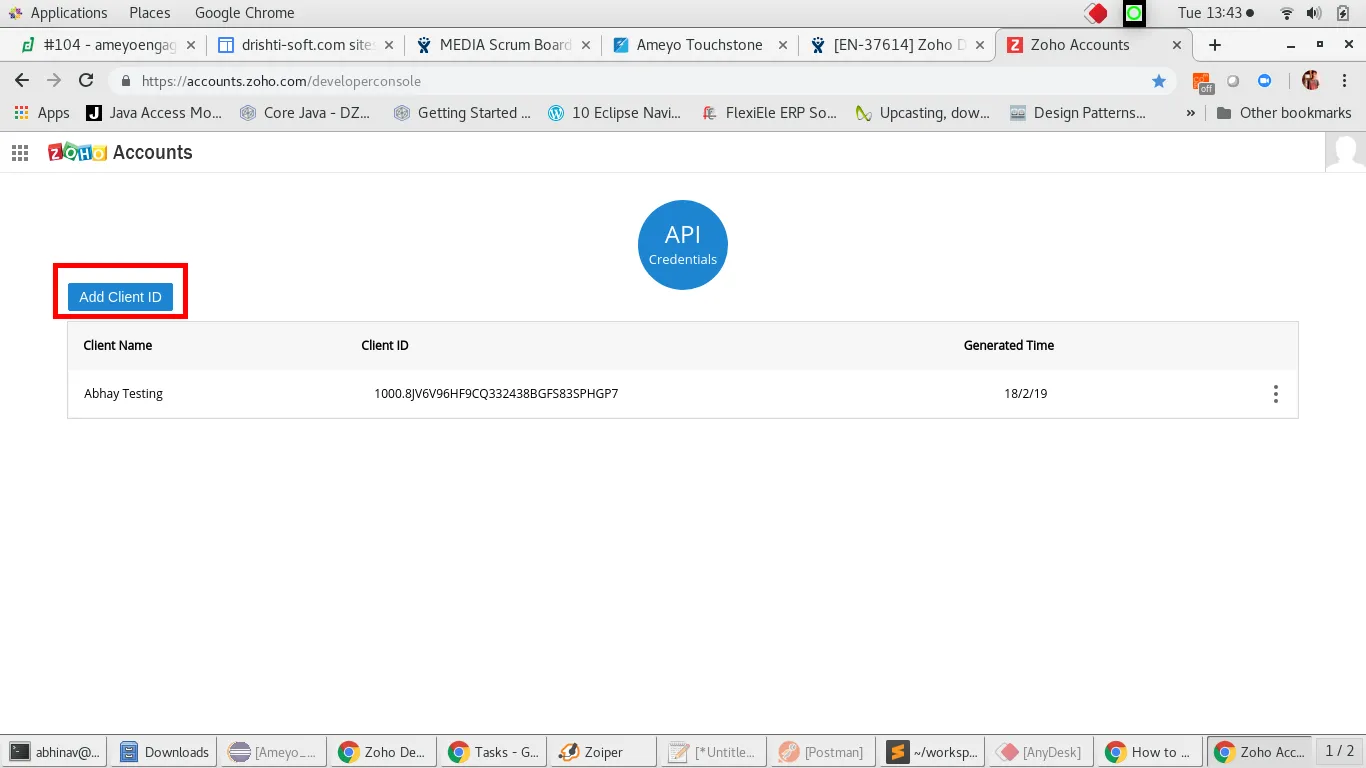
- Go to the Zoho Developer Console (https://accounts.zoho.com/developerconsole).
- Click Add Client. Fill the details: Where in place of domain name put you ameyo server domain.
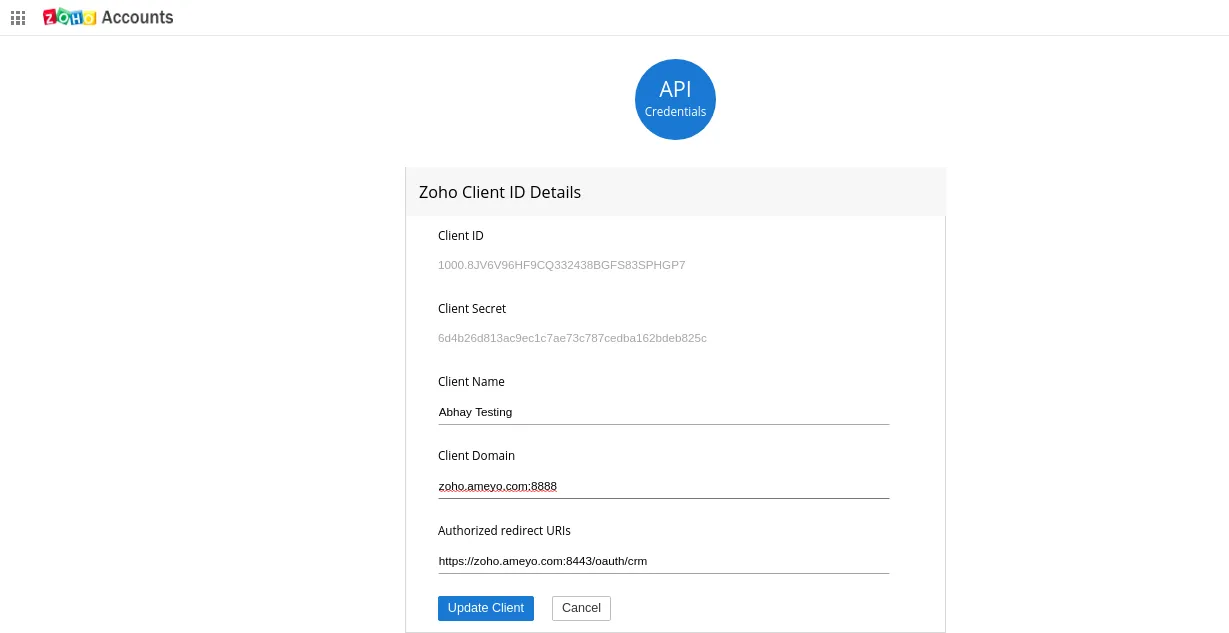
- Fill in the details:
- Client Name: (e.g., Ameyo Integration)
- Homepage URL: Your Ameyo server domain (e.g., https://yourameyodomain.com:8443)
- Authorized Redirect URIs: Your Ameyo server's callback URLs:
- https://<yourameyodomain.com>:8443/ameyowebaccess/_callback
- https://<yourameyodomain.com>:8443/oauth/crm
- Click Create.
- Copy the generated Client ID and Client Secret. Keep these secure.
Note: if the Zoho DC is in India use the same in token url : i.e., use ".in" in token url instead of ".com" - https://accounts.zoho.in/oauth/v2/token
After executing the steps mentioned in this document, there will be few configurations done at the Ameyo DB as well, for which the details will be provided by the designated project manager/engineer
Have a question?
Our knowledgeable support team and an awesome community will get you an answer in a flash.
To ask a question or participate in discussions, you'll need to authenticate first.