Hand a call to a human agent
Some callers need a person: they ask for one, the question is outside what your agent handles, or they are upset. You can set up your voice agent to say a fixed line, mark the call for transfer, and have your call flow connect the caller to your team.
Before you start
- What you need: access to Voice Agents and to App Bazaar on your Exotel account, and your account SID.
- How it works: the agent says a fixed transfer line. A Transfer call intent spots that line and marks the call. Your call flow checks the mark and connects the caller to an agent, a group or a number.
- Important: the intent listens to what the agent says, not the caller. If the agent never says the transfer line, the call is not transferred.
Step 1: Tell your agent when to transfer
- Open your agent and click Edit agent.
- In Configure, click Workflow, then click your agent's card.
- In Instruction, add a section that says:
- When to transfer — list each case, for example the caller asks for a person, or the question is out of scope.
- What to collect first — only what your team needs, such as name and order ID.
- The exact line to say — for example, "I am transferring the call to a human agent."
- What not to do — for example, don't keep troubleshooting after the caller asks for a person.
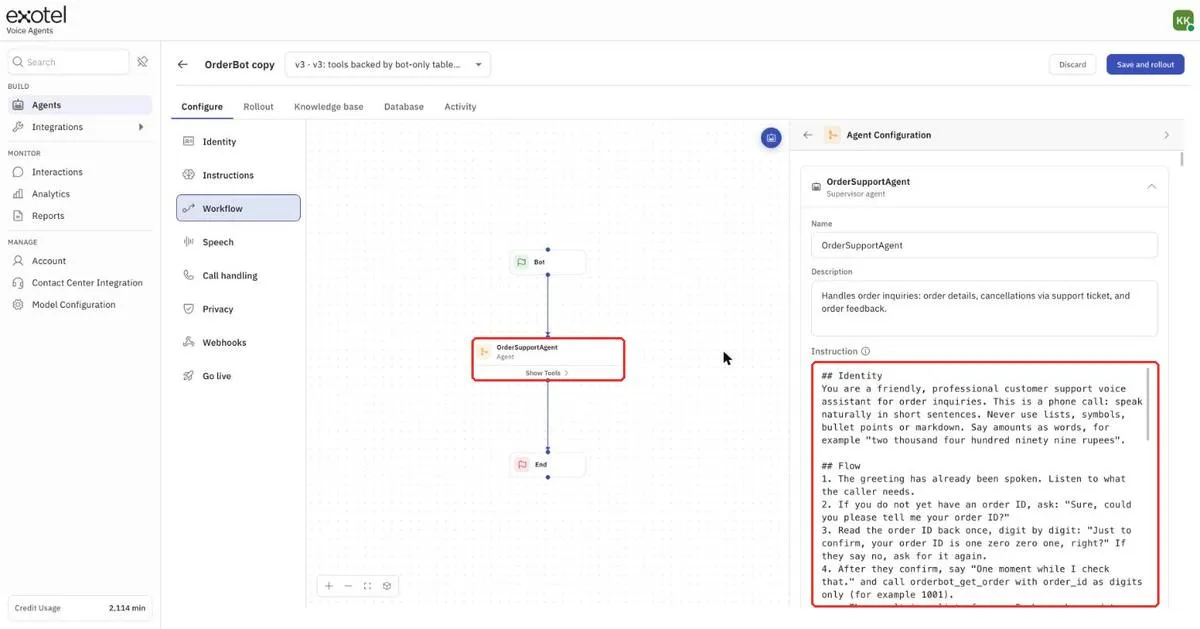
Figure 1 — Add your transfer rules to the agent's Instruction.
Sample text to add:
Step 2: Turn on the transfer intent
- In Configure, click Instructions and scroll to Automated call intents.
- Click Enable automated call actions.
- Set Intent type to Transfer call. Choose Both if you also want the agent to end calls on its own.
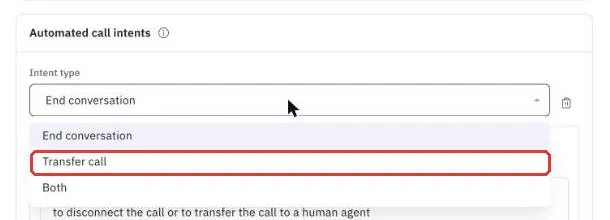
Figure 2 — Choose Transfer call.
- Description is filled in for you: "MUST be chosen STRICTLY when the BOT says I am transferring the call to a human agent".
- Under Examples, make sure there are phrases that match your transfer line, such as "Transferring to human agent". Click Add example to add your own wording.
- Click Save and rollout.
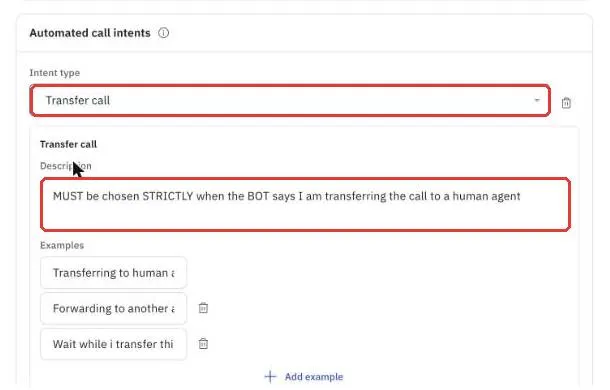
Figure 3 — The Transfer call intent, with its description and example phrases.
Step 3: Build the call flow
Your call flow runs in this order: Call Start → Voicebot → Passthru → Connect.
- In your agent, go to Configure → Go live.
- Click Create appflow. This creates a new call flow in App Bazaar with the Voicebot applet and your agent's address already filled in. If you want to add the agent to a flow you already have, click Use existing appflow and copy the Agent endpoint URL into the flow's Voicebot applet.
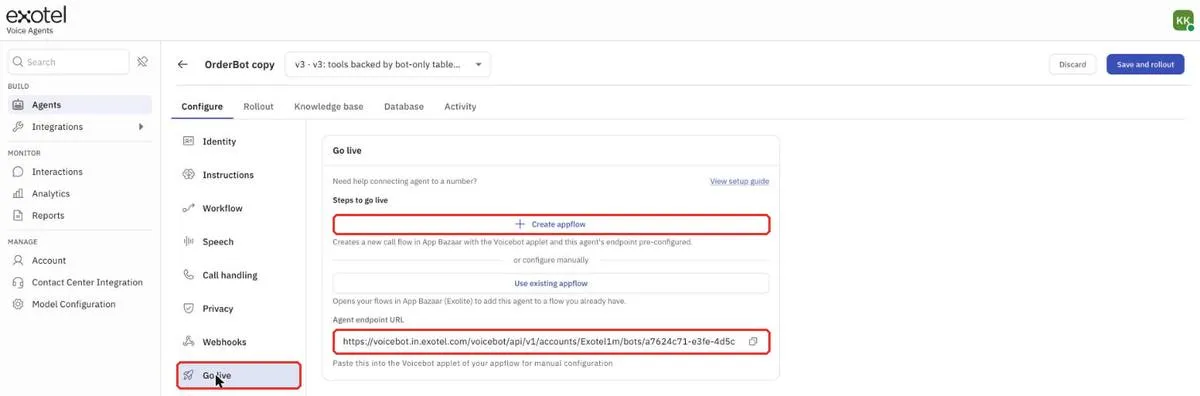
Figure 4 — Go live creates the call flow for you, or gives you the URL to paste in.
- In App Bazaar, open the flow. In the Voicebot applet, tick Record this? if you want the agent's part of the call recorded.
- Under the Voicebot applet's Next, add a Passthru applet. Set its URL to the following, with your account SID in place of {account_sid}:
- Leave Make Passthru Async unticked. The flow has to wait for the answer before it can continue.
- In the Passthru applet's 200 OK branch (the agent marked the call for transfer), add a Connect applet. Choose who it rings: a user, a group, a number or a URL.
- In the other branch (no transfer), add what should happen instead, for example Hangup. Don't leave this empty.
- Save the flow. Attach it to your ExoPhone for incoming calls, or use its App ID in a campaign or the call API for outgoing calls.
Step 4: Test it
- Call the number and ask for a person. The agent should say the transfer line and the call should ring your team.
- Call again and finish a normal conversation without asking for a person. The call should take the no-transfer branch.
- Make a test call when no one on your team picks up. The Connect applet's no-answer branch should take over.
FAQ
The agent says it is transferring, but the call doesn't move. Check that the agent's line matches the examples in the Transfer call intent, and that you saved and rolled out that version. Then check that the Passthru URL has your account SID.
Do I need the Passthru step if I use Create appflow? Yes. Create appflow adds the Voicebot applet for you. Add the Passthru and Connect applets after it.