Complete KYC as the authorised signatory
Overview
Use this guide to help an authorised signatory complete company KYC on a mobile phone. The signatory signs in to DigiLocker, shares documents, and signs the Customer Application Form (CAF). The guide starts at the KYC request email and ends when KYC is complete.
Before you start
The signatory must have:
- The mobile number linked to their Aadhaar. DigiLocker sends an OTP to this number.
- A phone with a working camera.
- Location and camera access allowed in the browser.
- The KYC link, used within 14 days of the email.
Steps
The signatory does all steps on their phone.
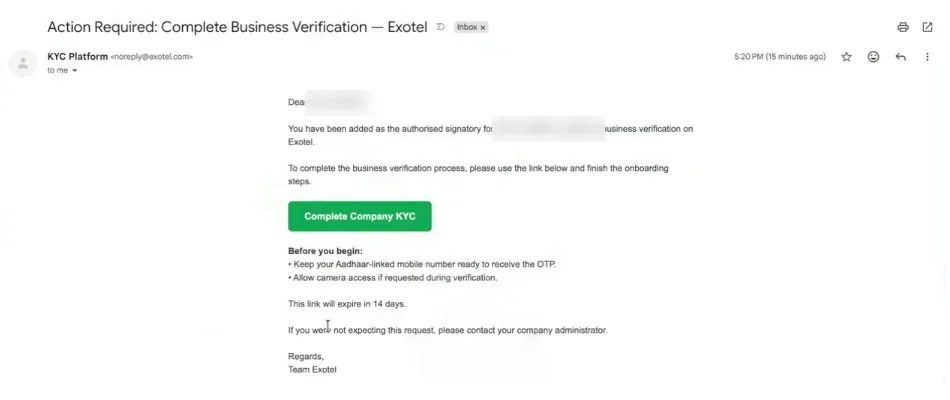
1. Open the KYC email
- Open the email "Action Required: Complete Business Verification — Exotel" from [email protected].
- Tap Complete Company KYC.
If the email is not in the inbox, look in the spam or junk folder.
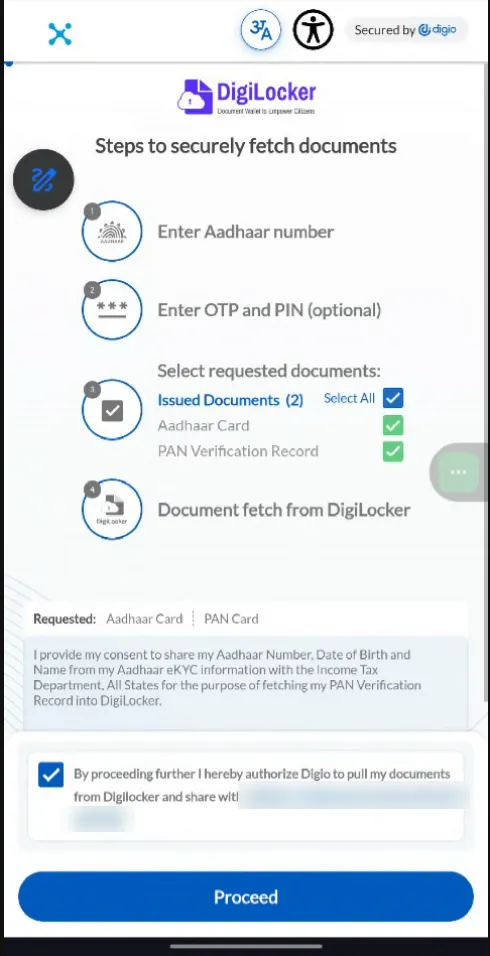
2. Start the DigiLocker fetch
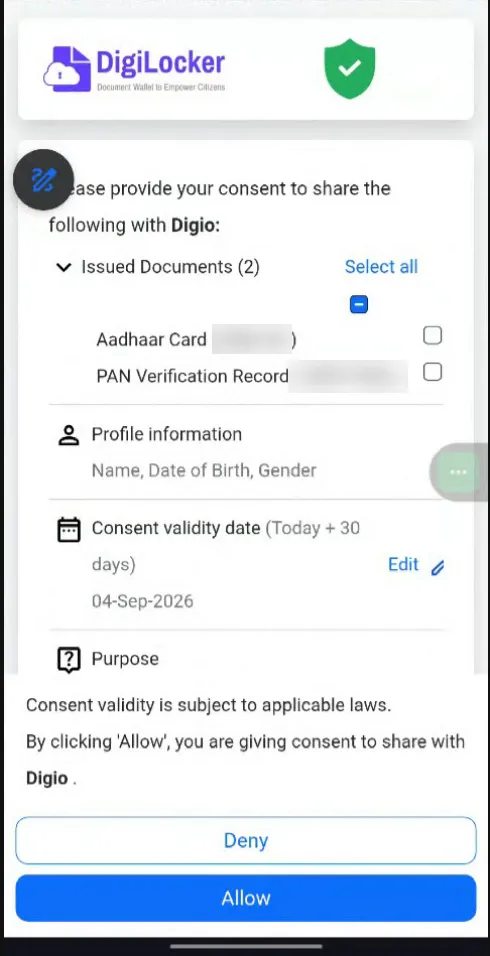
The page lists the documents that Digio gets from DigiLocker: Aadhaar Card and PAN Verification Record.
- Select the authorisation checkbox.
- Tap Proceed.
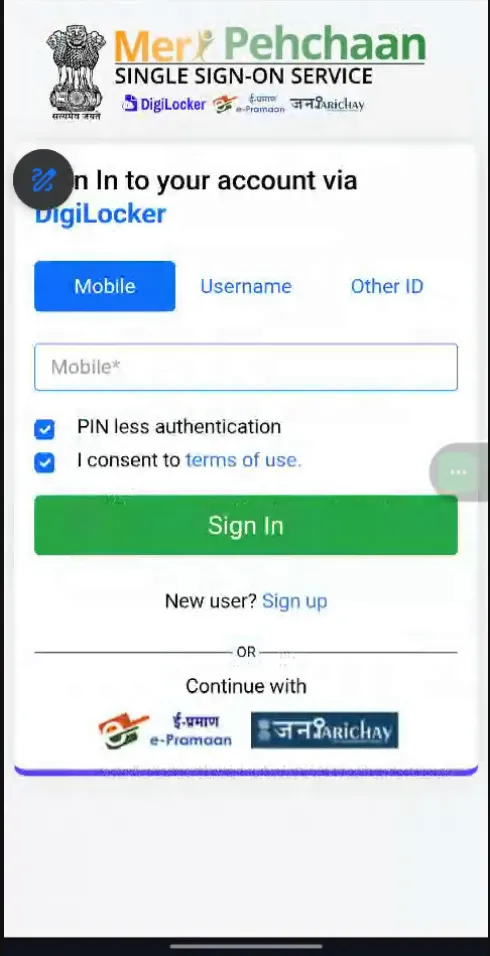
3. Sign in to DigiLocker
- On the Meri Pehchaan page, tap the Mobile tab.
- Enter the 10-digit mobile number.
- Select the terms of use checkbox.
- Tap Sign In.
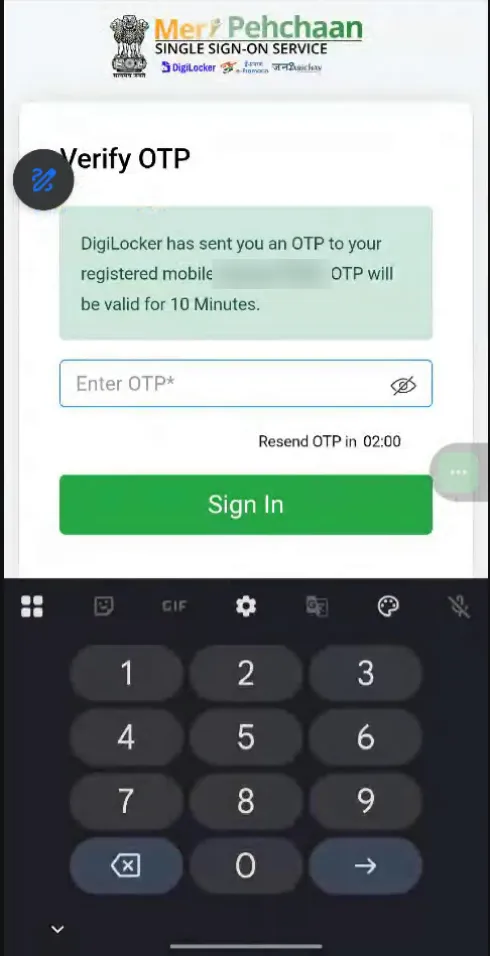
DigiLocker sends an OTP to the registered mobile number. The OTP is valid for 10 minutes.
- Enter the OTP.
- Tap Sign In.
5. Allow document sharing
The consent screen shows the documents and profile data that DigiLocker shares. Consent is valid for 30 days.
- Tap Allow.
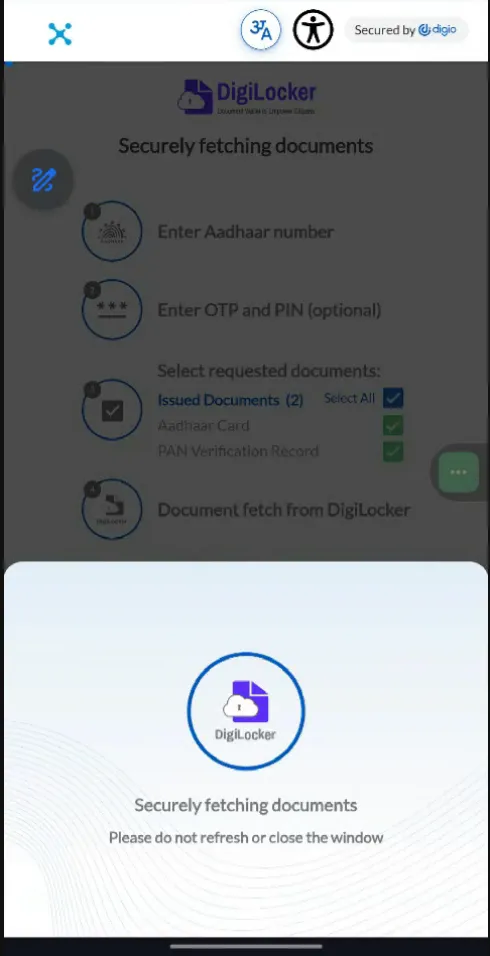
6. Wait for the documents
CAUTION: Do not refresh or close the window. The document fetch stops if you do.
- Wait until the Securely fetching documents screen closes.
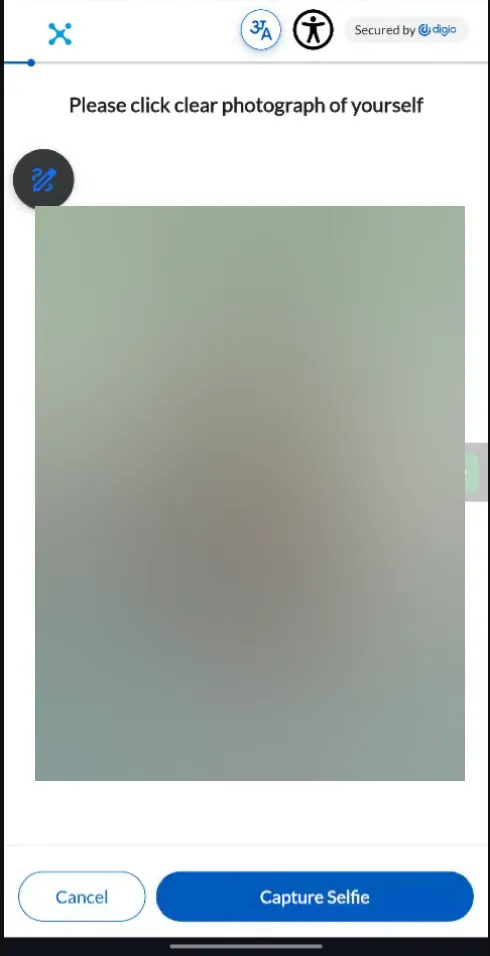
7. Capture a selfie
- If the browser asks for location access, tap Allow.
- Hold the phone in front of your face.
- When the screen shows "Face detected", tap Capture Selfie.
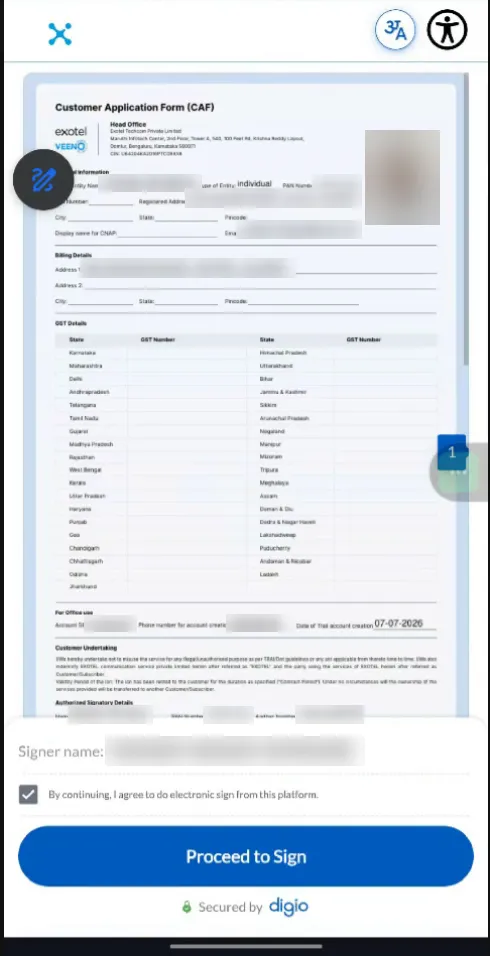
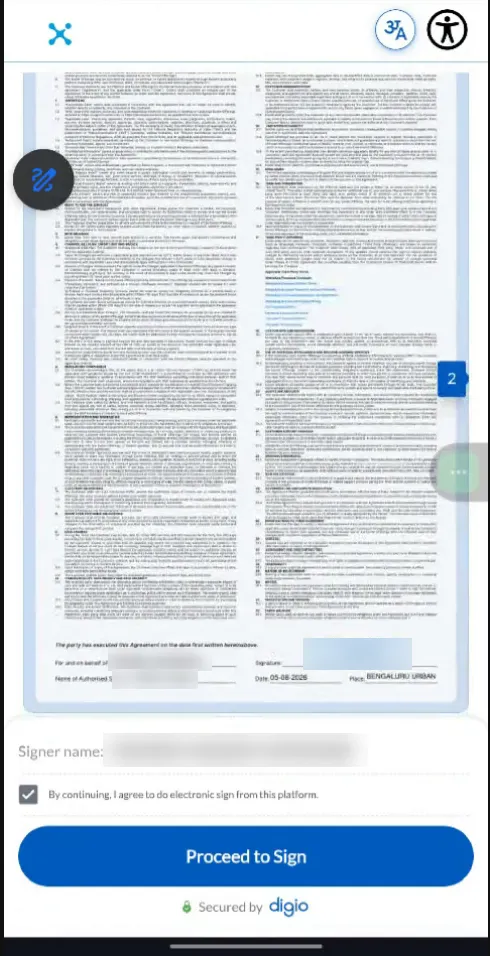
8. Review the CAF
- Read the two pages of the Customer Application Form (CAF).
- Select the checkbox to agree to sign electronically.
- Tap Proceed to Sign.
The CAF has these sections:
Section | Contents |
|---|---|
Basic Information | Entity name, type of entity, PAN, registered address, city, state, pincode, CNAP display name, email, photo |
Billing Details | Billing address, city, state, pincode |
GST Details | GST number for each state |
For Office Use | Account SID, phone number for account creation, trial account creation date |
Customer Undertaking | Usage terms that the customer agrees to |
Authorised Signatory Details | Name, PAN, masked Aadhaar number |
Terms and Conditions (page 2) | Terms, then the signing block: company name, authorised signatory, signature, date, place |
Page 1:
Page 2:
9. Add a signature
- Tap Draw, Type or Upload.
- If you tap Type, enter your full name.
- Select a signature font.
- Tap Submit Signature.
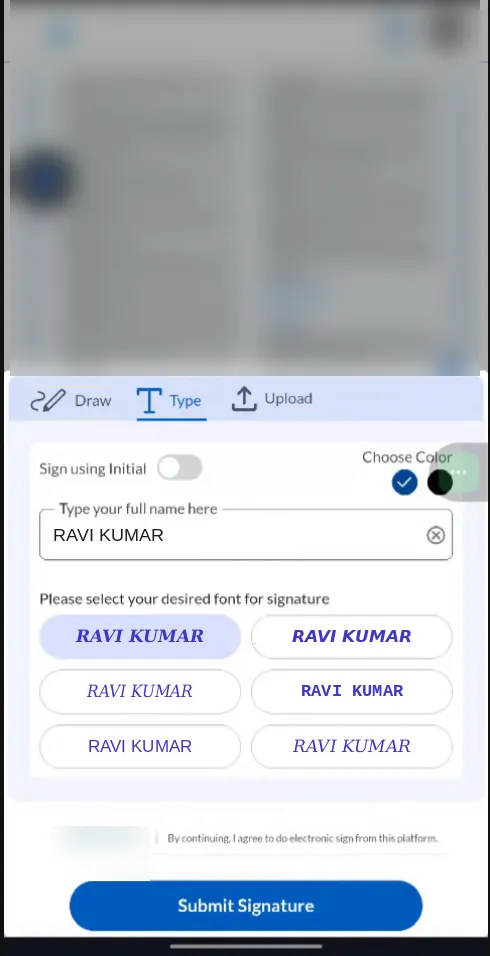
Sample data: the name RAVI KUMAR is illustrative.
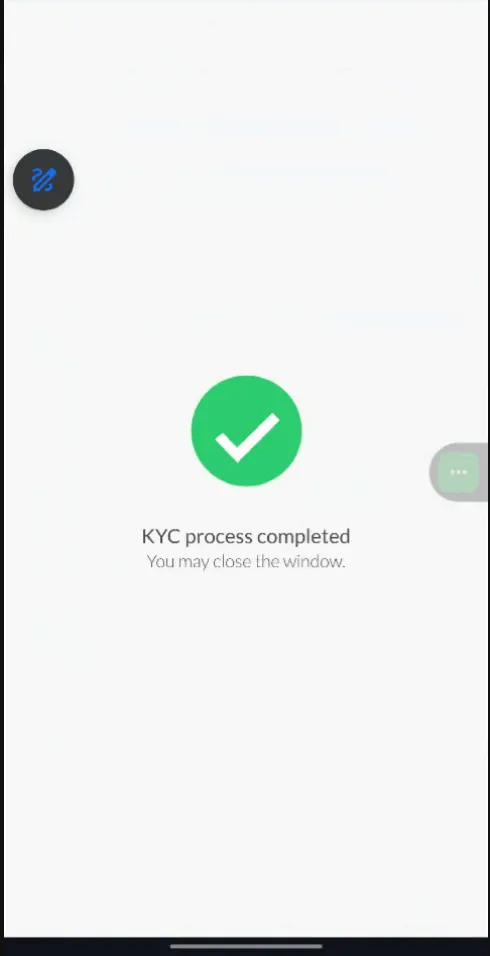
10. Confirm KYC is complete
The screen shows KYC process completed. You can close the window.
Camera and location permissions
The selfie step (step 7) needs camera and location access. If the browser blocks either one, the KYC link shows an error.
CAUTION: Do not tap Deny or Block when the browser asks for access. A denied request stops the selfie step.
- Make sure location is on in the phone settings.
- When the browser asks for location access, tap Allow.
- When the browser asks for camera access, tap Allow.
- If no request appears, look in the address bar and tap Allow.
If you denied access before:
- Open the browser settings.
- Go to the Permissions section.
- Find Location and Camera, and allow both for the KYC website.
For steps for each device and browser, see the KYC error-fix article.KYC error-fix article.